Create Dramatic Light Effect
4In this tutorial, we will learn about creating dramatic light effect on photographs, digital art or design. The importance of this tutorials that is is an important step to turn a dull light of an image to an interesting unit in the image and dramatic effect in your design or image. The basic concept behind this tutorial is to understand the light and dark parts on the photo and try to give more focus to the high lighted and dark areas. In this tutorial I used a nature image that does not have any special light effect and start by enhancing its effect to create a more dramatic light on the image.
Before you start reading this tutorial, do not forget to join our tutorials and free resources updates to be the first to know about this tutorials updates by subscribing here.
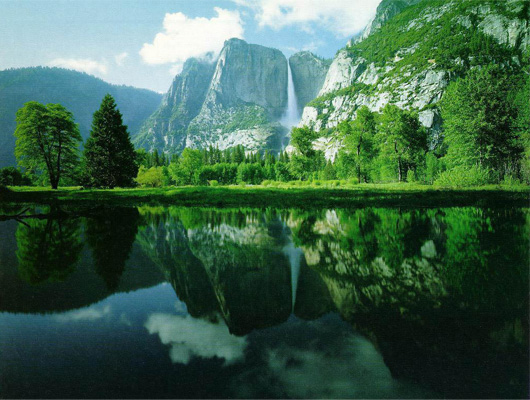
Figure01. A natural image of a landscape scene
1- Duplicate the nature layer by dragging it to the New Layer icon in the Layers panel.
2- Edit the new duplicated layer Brightness and Contrast from Image > Adjustments to give the image more dark edges by making the image darker.
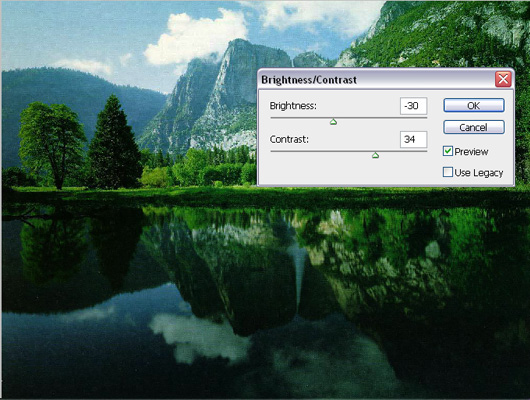
Figure02. Edit the duplicated layer Brightness and Contrast from top menu Image > Adjustment
3- While we are on the same duplicated layer, we will add more light and contrast using the Lighten Effects from the Filter menu > Render.
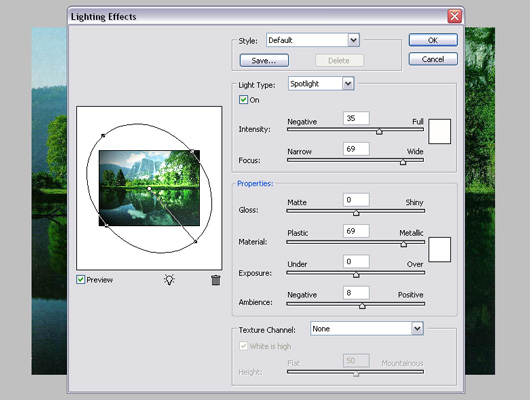
4- Now, we will start adding more focus on light and dark areas by giving it more contrast.
5- Duplicate the current layer and make it more bright using the Brightness and Contrast dialog from the Image menu > Adjustments. This will be the highlight layer.
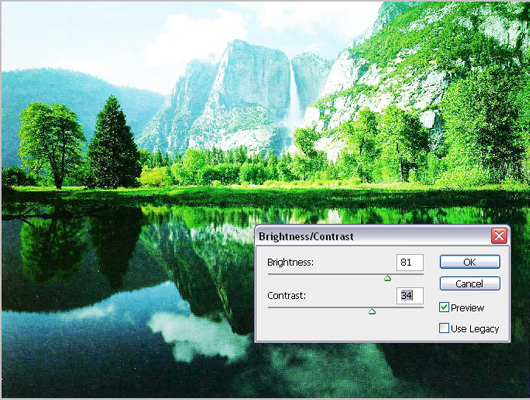
Fgure04. Duplicate the nature layer ans make it extreme bright
6- Since not all the image is highlighted, we will need to show the highlights in specific areas. So, we will add a mask to this layer to hide it by pressing the Mask icon in the Layers panel. And fill the mask with the black color, the result is the highlight layer is hidden totally.
7- In this step we will reveal the highlight layer over the areas that needs a highlight focus. You can do this by selecting the brush tool, set the foreground color to white and paint over the mask layer to reveals the highlight areas (make sure to select the mask while painting over the mask). The result will be as below.

Figure05. Focus on the highlighted areas using the highlight layer
8- Now, repeat the previous step but with making the duplicated layer dark to focus on the dark areas and image shadows. The results should be as below.
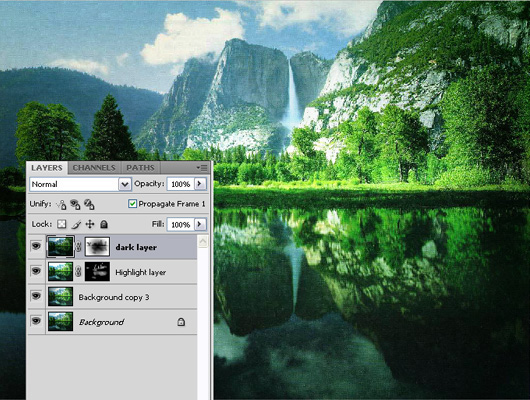
Figure06. Adding focus on the drak areas on the image
9- Now, we will add some light flare to the total scene.
10- Create a new layer and fill it with the black color.
11- From the Filter menu, choose Render > Lens Flare, and set it as below.
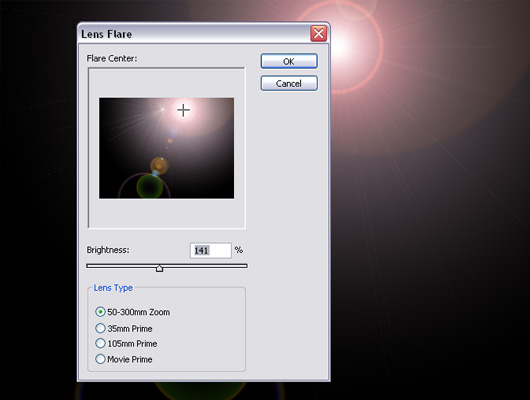
Figure07. Apply the Lens Flare filter
12- Select the lens flare layer and from the layer modes drop down list in the layer panel, choose Screen option
13- Create a new lens flare effect like above to create the reflection of the sun light on the lake, and the final result will be as following
Conclusion
Playing with the light and shadow can change your image effect completely and moves with your image or design to a more attractive and eye catching effects. This tutorials is just a start, and you should start trying this trick with more images and create more effect through it. In the next tutorials, we will dig more on working with light and shadows since it is one of the most important factors to create an amazing design.


every thing else is good…
Good one! Just tweeted it.
nice effect
Cool effects, great tutorial. Thanks buddy.