Creative Image Coloring Photoshop Tutorial
10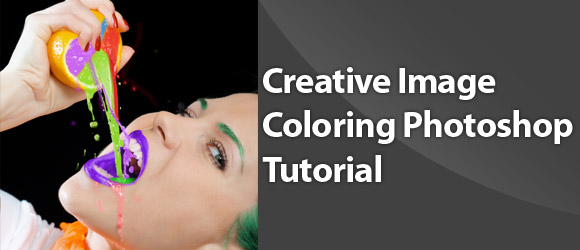
It is the time for a new how-to tutorial. Today’s Photoshop tutorial is about coloring an image using the Hue and Saturation and mask features in Photoshop. There are many methods that you can use to change the color image in Photoshop, but the Hue and Saturation are two of the methods that allow you to do the coloring easily and fast.
When you use the Hue and Saturation feature through the Adjustment layers in the Layers panel, you can give each part of the image different color. On another meaning, you can use the Adjustment layers in Photoshop to change the color of each element in the image separately.
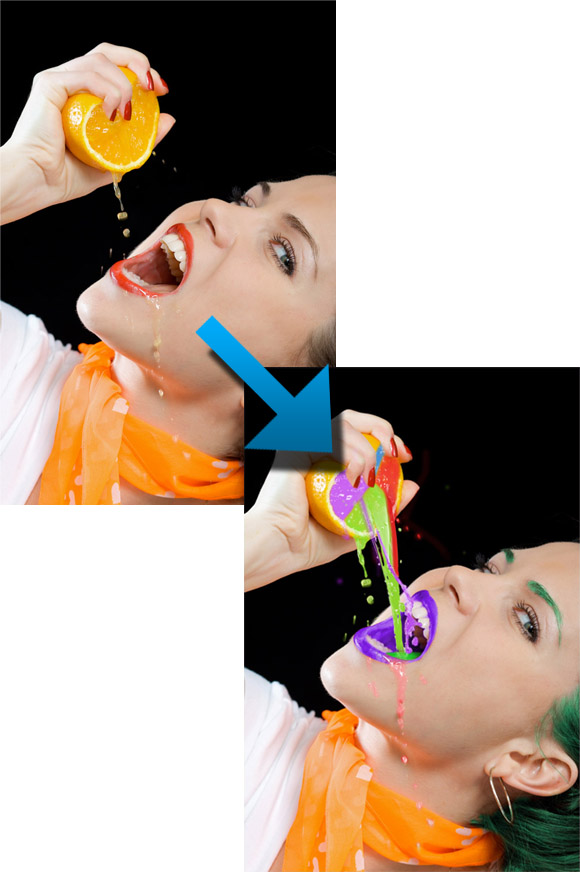
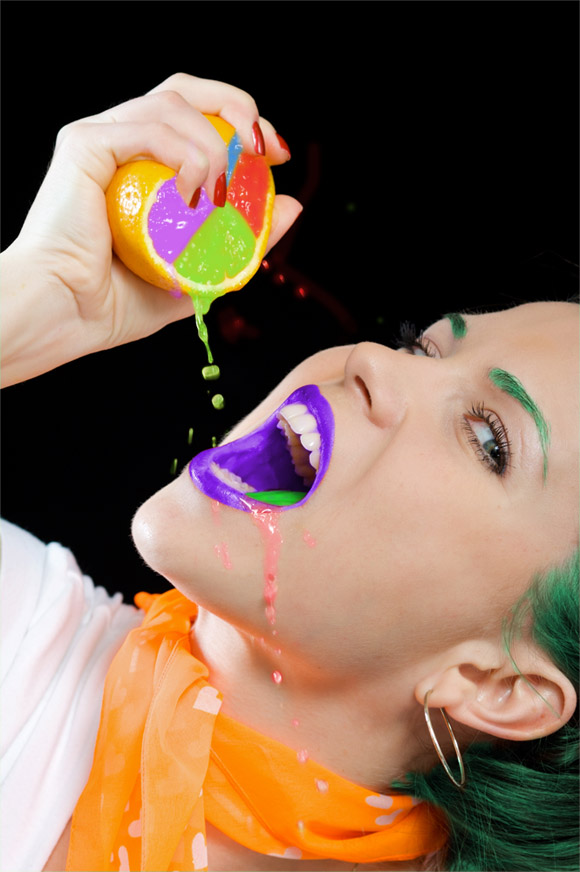
However, in this tutorial, I have an image of a girl squeezing an orange. I will change the orange color to have multiple colors and change the girl mouth color to reflect the hue of the orange juice spilled colors in her mouth. Let us start by seeing how the images look before the effect and after the effect below.
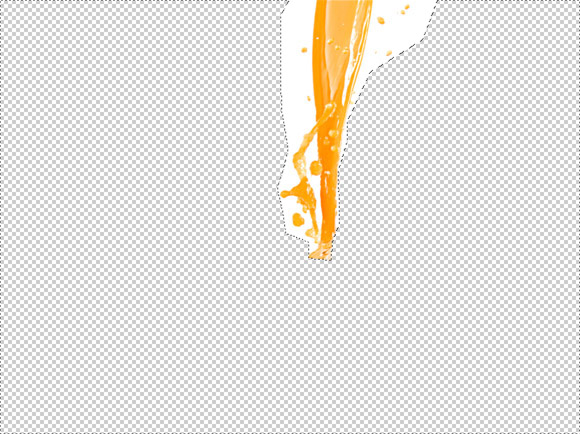
In this tutorial, I used images from Shutter stock photos for the girl holding an orange and an image for an orange juice splash. Below are the images that are used in this tutorial.
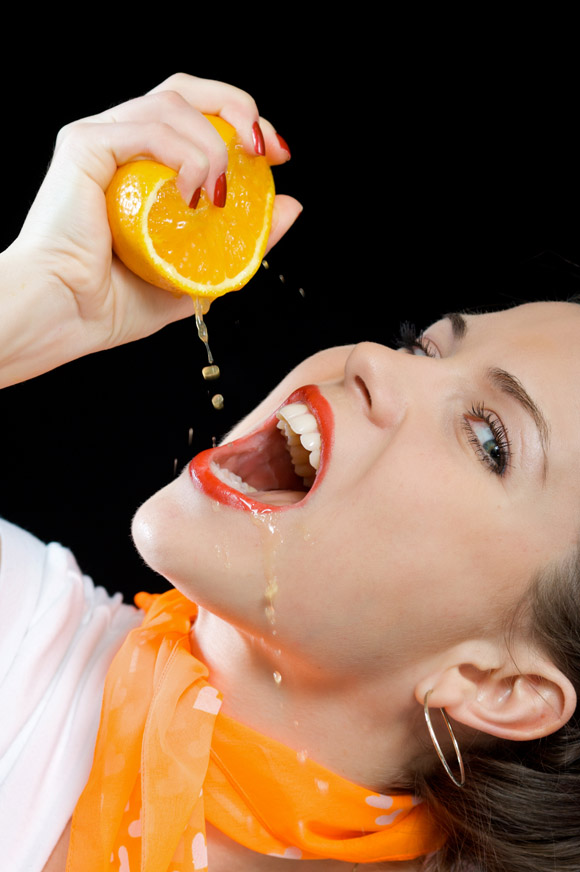
Image by shutterstock
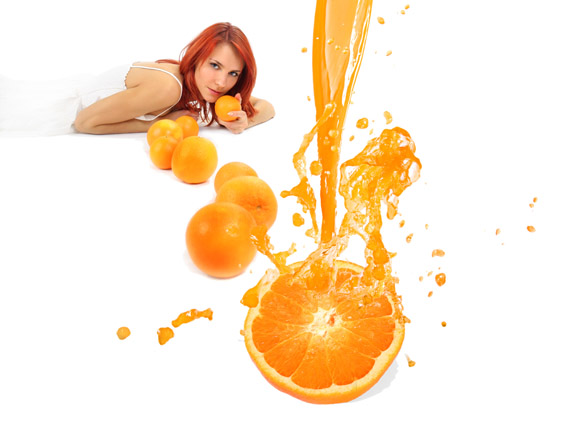
Image by shutterstock
Now, let us start by coloring the orange in the girl’s hand with different colors using the Adjustment layer with Hue and Saturation option.
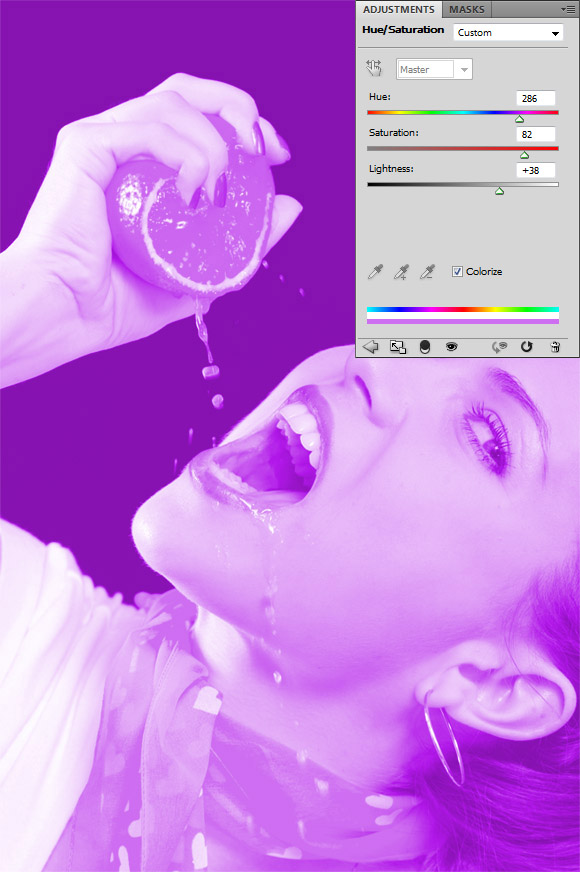
Step1
In this step, we will color the left side of the orange with a violet color by following the steps below:
- Open the girl image
- In the Layers panel, click on the Adjustment layer icon in the bottom of the Layers panel and choose Hue/Saturation
- In the Adjustment panel click on the Colorize icon to give the whole image one hue color scheme
- Change the Hue value to 286, Saturation to 82 and Lightness to +38.
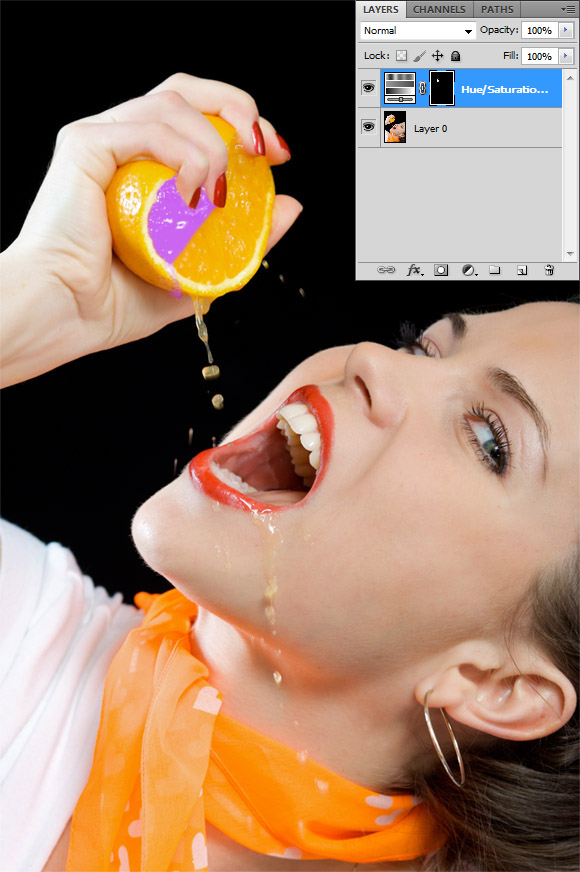
Step 2
The above step will change the whole image color to violet. However, we need only to change a part of the orange. So, we will create a mask over the image to hide the violet color on the whole image. Then, we will reveal only the part that we would like
to show using the brush tool as following:
- Select the mask thumbnail in the Adjustment layer
- Fill it will a black color to hide the adjustment effect from the whole image.
- Select the Brush tool and change the color to white
- Start painting using the Brush tool over the part that you would like to reveal in the orange. The result should be as below:
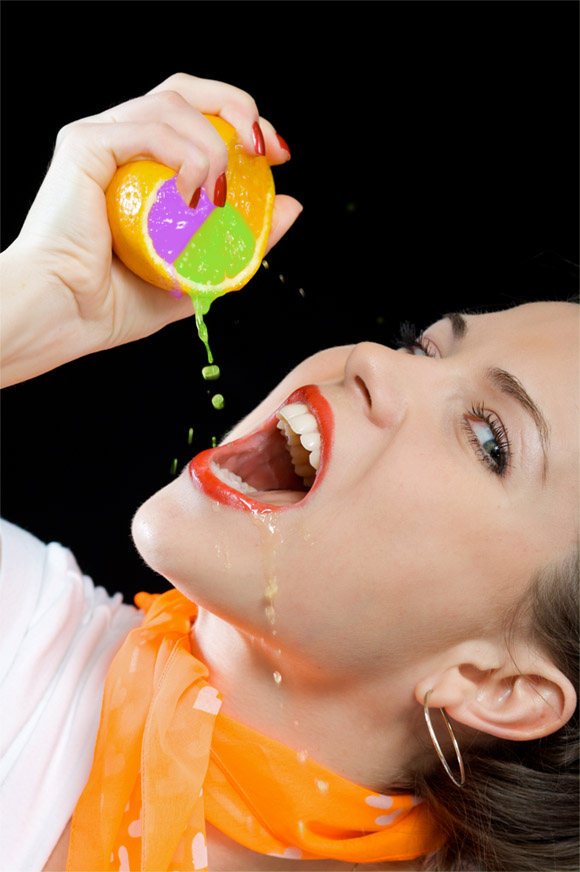
Step 3
Repeat the above step to create a green part in the orange by using different Hue/Saturation values. Set the Hue to 89, Saturation to 73 and Lightness to +13. You can extend the green hue to color the orange juice drops from the orange to give it more realistic effect. The result should be as following:
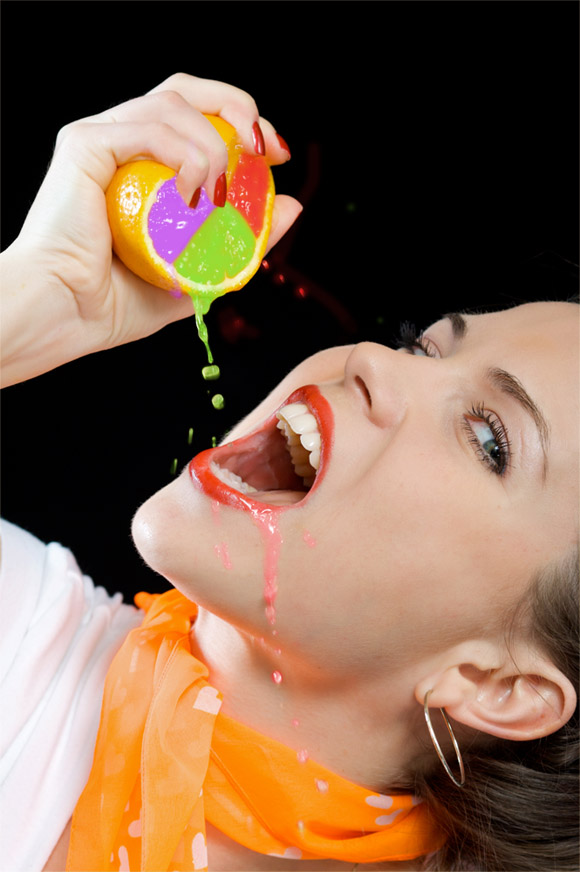
Step4
Create another part with red color using the above steps and set the Hue to zero, Saturation to 84 and Lightness to +19. You can also display some red hue on some spills and over the girl face to give the impression, as if she were having some of the red juice on her face.
Step5
Add another blue part with the values Hue 211, Saturation 90 and Lightness +25, so the result is as below:
Step6
Now, we will change the mouse color to have one of the colors in the orange, for example, the violet color. You can do this as below:
- While the girl layer is selected, create a new Adjustment layer using the Adjustment layer icon in the Layers panel and set it to Hue/Saturation
- Change the Hue to 271 and Saturation to 78
- Using the same idea that we applied above, create a mask on the adjustment layer and fill it with black color. And use the Brush tool to paint over the areas that you want to color. In this example, we will color the mouse except the tongue as we will color it with the green color as seen below.

Step7
Repeat the above example to give the hair a green color as you can see below.
Step8
Now, we will add some more of the colored juice flow by using part of the second stock image. In this image select the flowing juice part and copy it our example document.
Step9
Select the white areas around it and remove juice flow and delete it. Also, make the juice flow match the area between the orange and the image below. You can also flip it horizontally to fit more with the area and edit it as below:
Step10
Select the orange flow layer and Choose Adjustment> Hue/Saturation from the image menu to change its hue to meet with the green color in the orange.
Step11
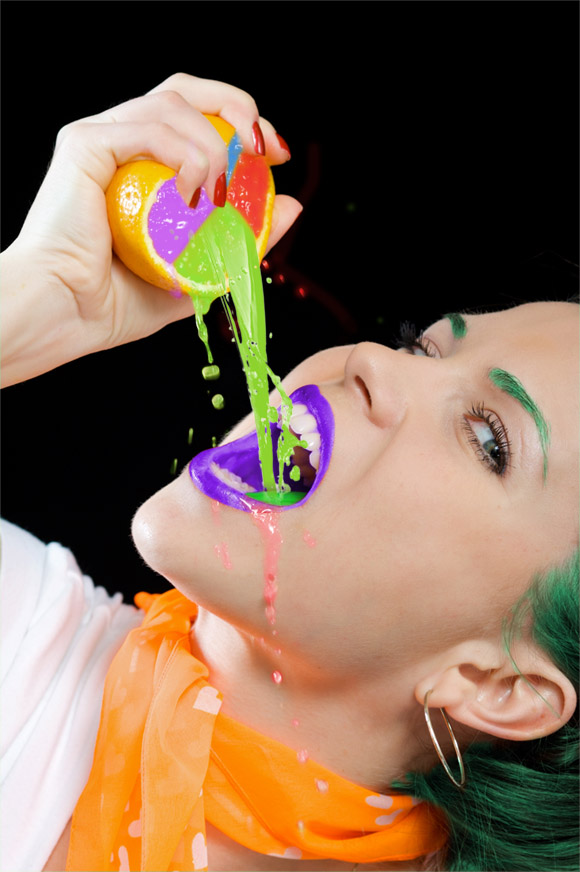
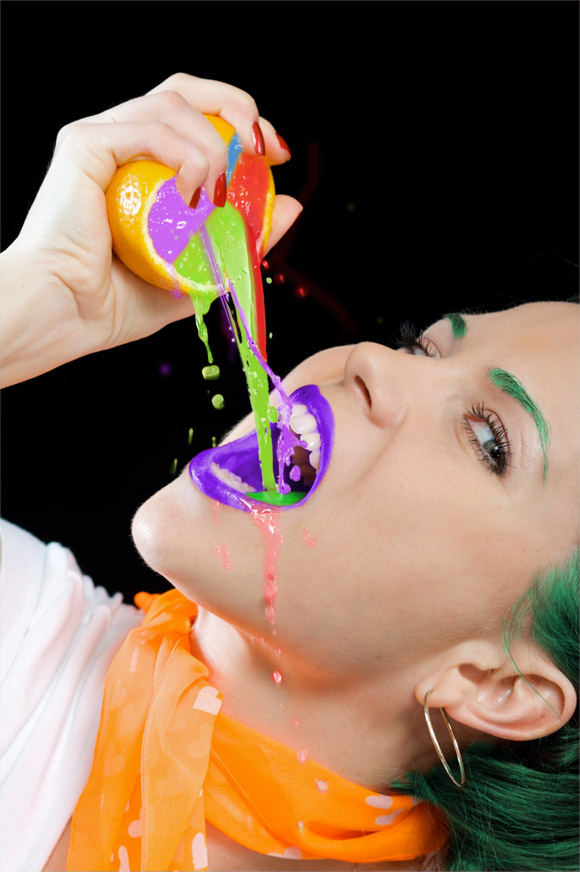
Applying the above concept to color the image elements, add different colors to the flowing juice to have more than one flowing colors as below.
Now, we reached the end of the tutorial steps and you can download the Photoshop source file for this tutorials with the layers by clicking the button below.
Photoshop is a real powerful tool to edit images and add effects on it. However, the Hue and Saturation feature enables you create many effects on the whole image or part of it. In this tutorial, I want to show one of the image editing tips in Photoshop that we can do it using the Hue and Saturation color adjustment.
Finally, I hope you like this tutorial and would love to hear your comments and ideas about it.
[amember_protect guests_only]If you are already a Premium Member then just sign in and you can download the source files of this tutorial.
Not a member? Sign up today or read more about our Premium Member area.


[/amember_protect]


very beautiful the choice of colours is very pleasant, nice tutorial
Wow really great tutorial. I enjoy it. Thanks for sharing.
Nice lesson!!!
i like the composition. thanks for sharing this!
really good work. Thanks for sharing.
enjoyable tutorials . thanks for sharing
great and outstanding posting.
thanks
Hi,
I really liked your post, what a post guys so nice, keep your work continue.
Thanks
Excellent tut, hue and saturation have always been the hardest Photoshop tools for me to use.
Wow really great tutorial. I enjoy it. Thanks for sharing.