Eye Photo Manipulation Photoshop Tutorial
13
In this tutorial we will learn how to create realistic eye manipulations in an aqua and fire theme.
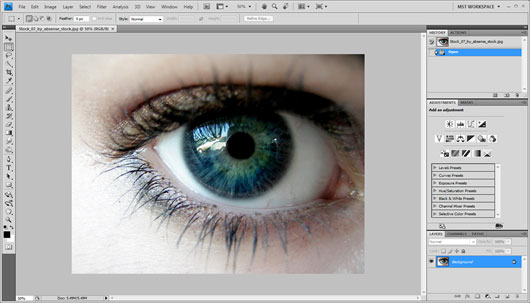
We will make the first image an aqua eye that seems to be underwater
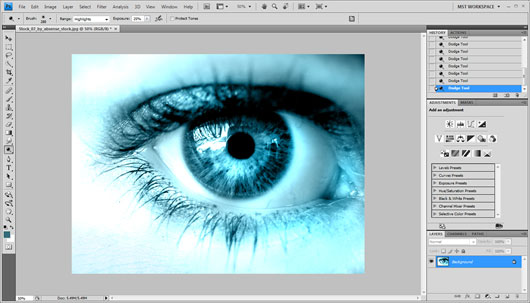
To do this we will first use the color [picker tool to get a dark gray blue coloring, I used #366b79 but you can use any similar.
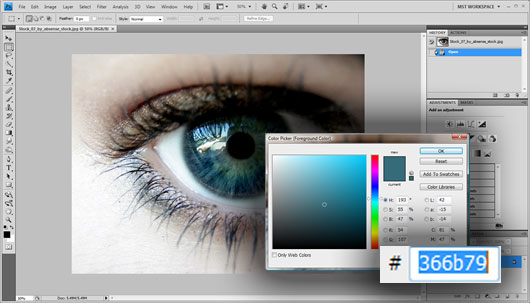
Then with the brush set to color and 100% opacity we will apply the coloring to all our image.
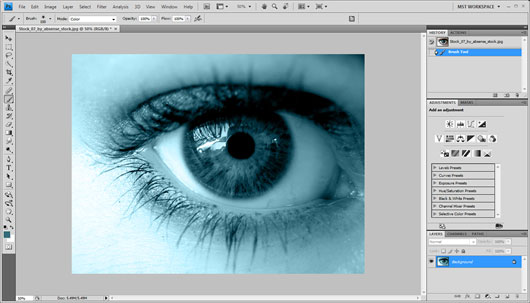
Then using the dodge tool in highlight mode (exposure set to 25% and protect tones unchecked) we will apply the lighting in the iris and the radius outside of it as well on the endpoints of the eye and the background.
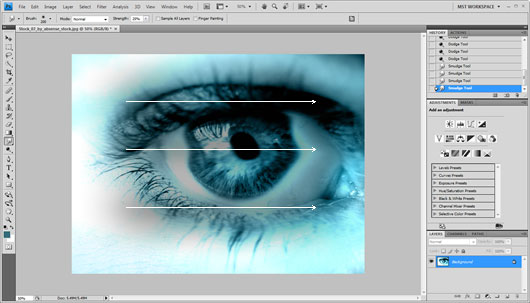
With the smudge tool set to normal and strength set to 25% we will apply three directional lines horizontally to the eye as shown :
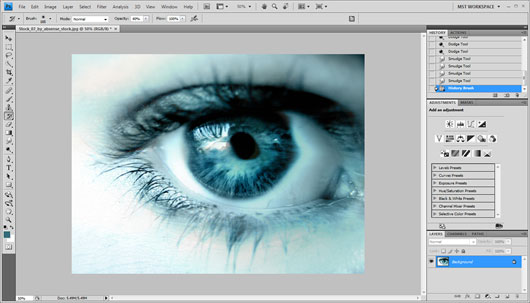
Then we will use the history brush with opacity set to 40% and we will apply it to the whole the document
We can now go ahead to texturing. It is really important that our texture is pointed like we are looking down to the water, otherwise we may need to correct the perspectives.
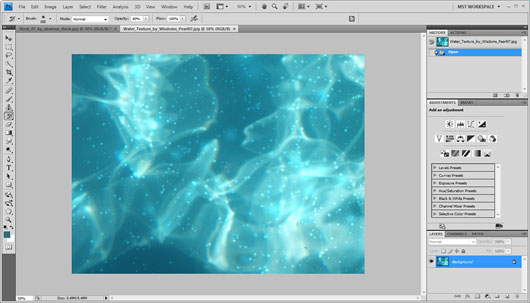
Then we will copy paste the texture to our document and set the blending to normal and 40% transparency

Let’s go ahead and add some extra light lighting, to do this we will use the curves tool (Layer -> New Adjustment Layer -> Curves) and we will make the curve into an S bend shape as shown :
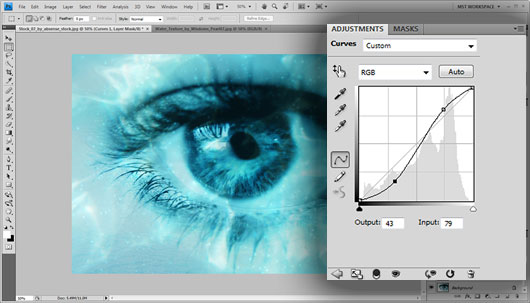
Finally we will dodge in the same settings the part of the textures that covers the outside of the eye
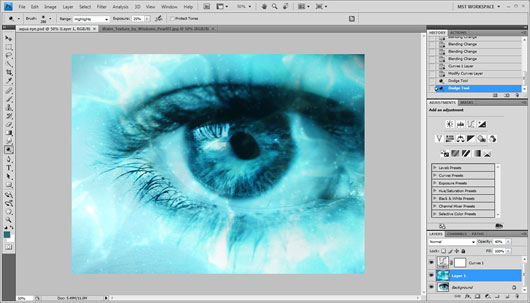
The result should look like this :
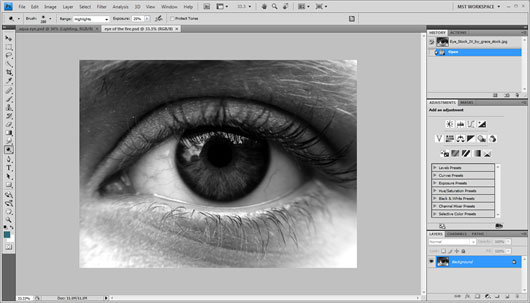
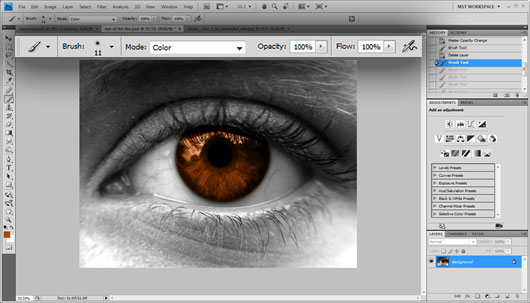
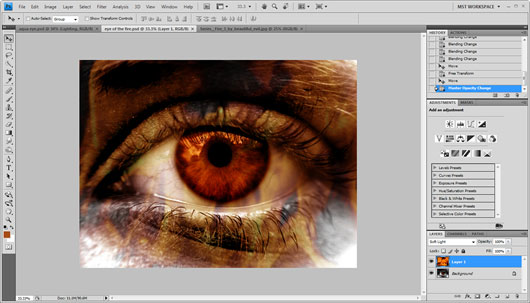
We will make our second eye looking like an eye of fire.
First off using the color picker tool we will select a midtone orange coloring, I used #a64e18 but you can use any similar.
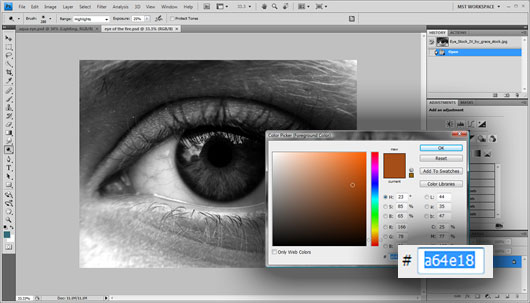
Then with the brush set to color and opacity set to 100% we will apply the coloring in the iris of the eye and the shaded outline of it.
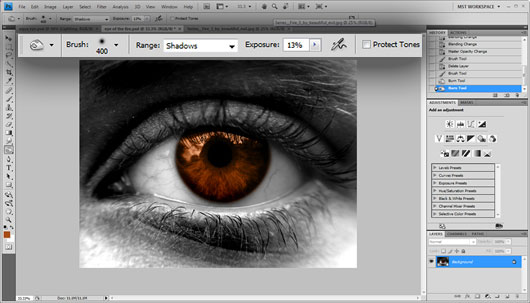
We will also apply some darkening before texturing takes place, to do this we will use the burn tool in shadows, exposure set to 13% and protect tones unchecked e will apply the darkening to the whole document apart from the inside eye.
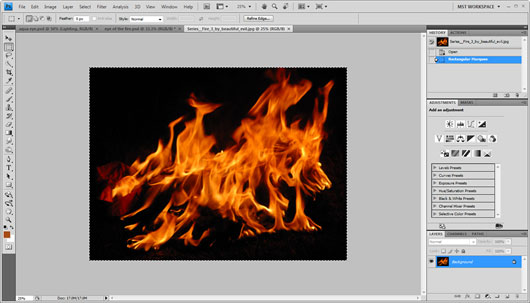
We are going to use a flame texture like this one :
After we copy paste the layer to our document we will change the blending into soft light.
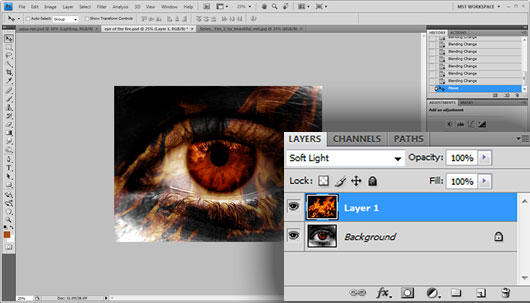
Then using Edit -> Transform -> Scale we will upscale the texture so as the fire covers as much of the document as possible.
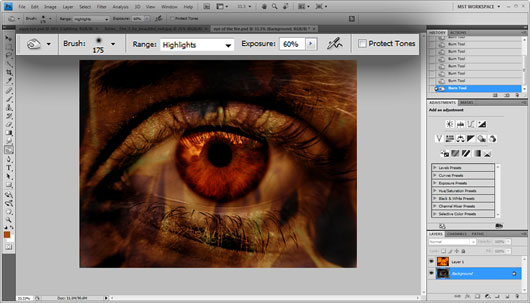
Finally we will burn over the white parts of the image using the burn tool set to highlights and 60% opacity.
Resources : Eye 1 Eye 2 Water Texture Fire Texture


[…] This post was mentioned on Twitter by Adobe Software and PhotogZone. Adobe Software said: Eye Photo Manipulation Photoshop Tutorial http://bit.ly/XAT7i […]
Eye Photo Manipulation Photoshop Tutorial…
In this tutorial we will learn how to create realistic eye manipulations in an aqua and fire theme.
…
hi
your works are excellent.i like to have that tutorals.
thank you.
[…] Eye Photo Manipulation […]
[…] a creare manipolazioni degli occhi realistiche con effetto acqua e fuoco. Link al tutorial: http://www.graphicmania.net/eye-photo-manipulation-photoshop-tutorial/ […]
[…] Link al tutorial: http://www.graphicmania.net/eye-photo-manipulation-photoshop-tutorial/ […]
[…] 40.Eye Photo Manipulation Photoshop Tutorial […]
Great post to remember….
Thanks…
Nice tutorial, the result is wonderful.. thanks
Thanks for the nice posting.
Awesome tutorial.Thank you very much this impressive post. Great work and good job.
This post helps me well to learn it. Thanks for a clear presentation.
I am again here to thanks you as I am very happy today learning the photoshop work from you.