How to Create an Alarm Clock in Adobe Illustrator
7Today we will be learning how to create a cute alarm clock in perspective in Adobe Illustrator. Some people tend to have problems with perspective, so if you are one of them, feel free to use a reference image if you need to.

We will create few ellipses, arrange them and with some nice gradients we will make a nice looking alarm clock. There is just one thing about perspective we should keep on mind. The most important aspects of perspective are size and distance. If you increase the distance between you and the object you are observing, you need to decrease the size of that object. That way you can achieve a nice depth effect in you illustrations.
The final result should look like below:

So, let’s get down to business.
First we have to create few ellipses and arrange them in order to create nice perspective.
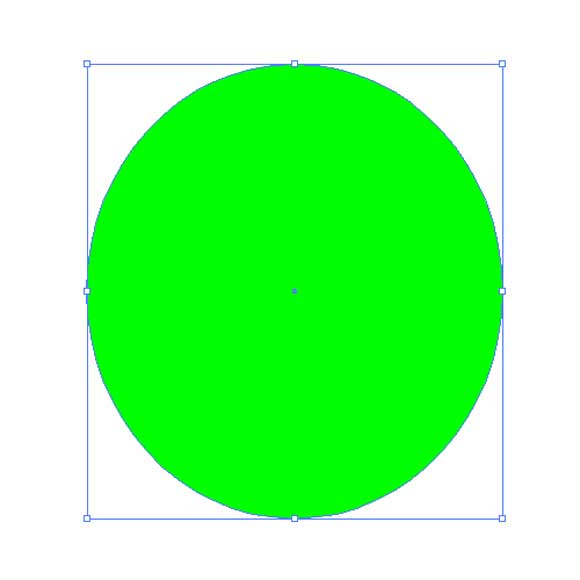
Step1
Grab the Ellipse Tool (L) from the Tool Panel and create an ellipse as shown in the picture below.
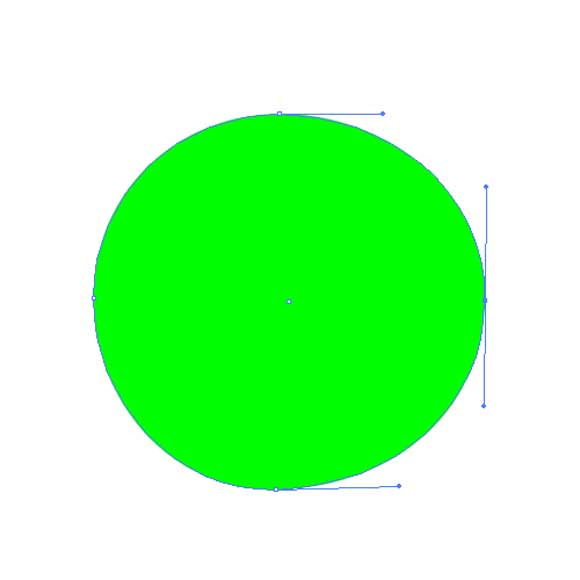
Step2
We will have to distort the ellipse a little bit. With the Direct Selection Tool (A) adjust the position of the anchor points and the angle of theirs handles. If you are unsure how to distort the ellipse, feel free to do this step later, after we have created some more elements for our Alarm clock. Basically, you should end up with something like this.
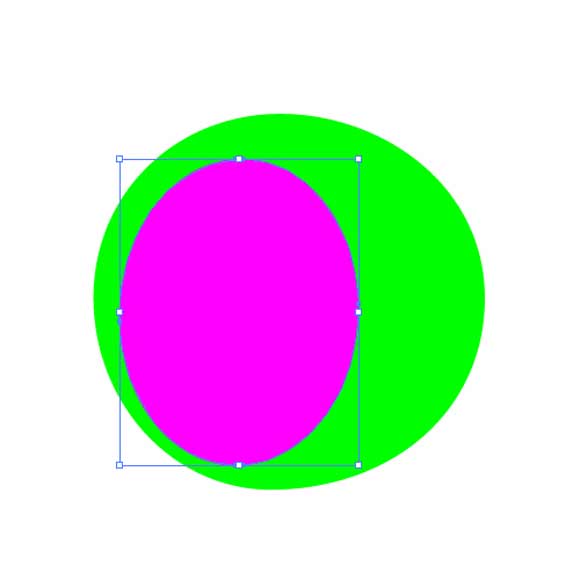
Step3
Grab the Ellipse Tool (L) from the Tool Panel and create the ellipse as shown in the picture below.
Step4
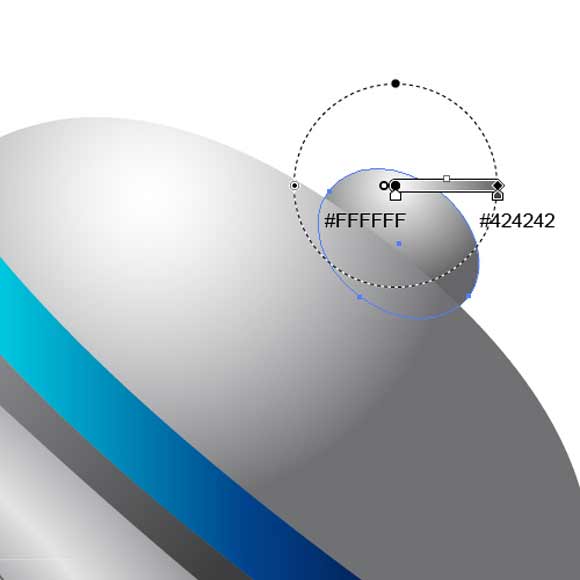
We are going to apply gradient immediately. This way we’ll be able to see if there’s something that needs to be fixed.
We are going to apply a radial gradient to the larger shape.
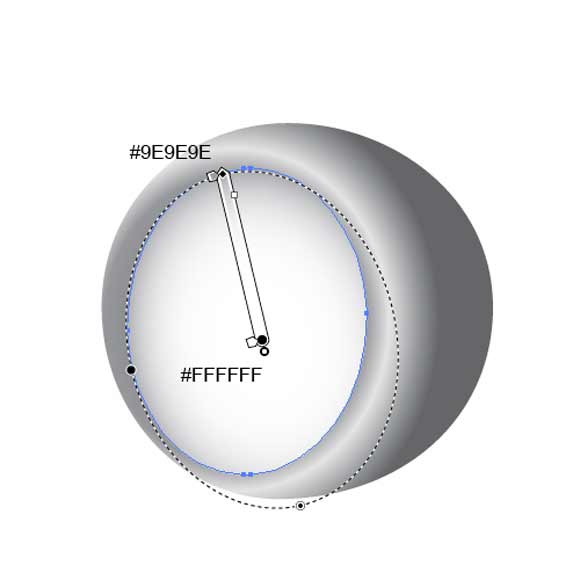
Step5
Apply a radial gradient to the smaller ellipse as well.
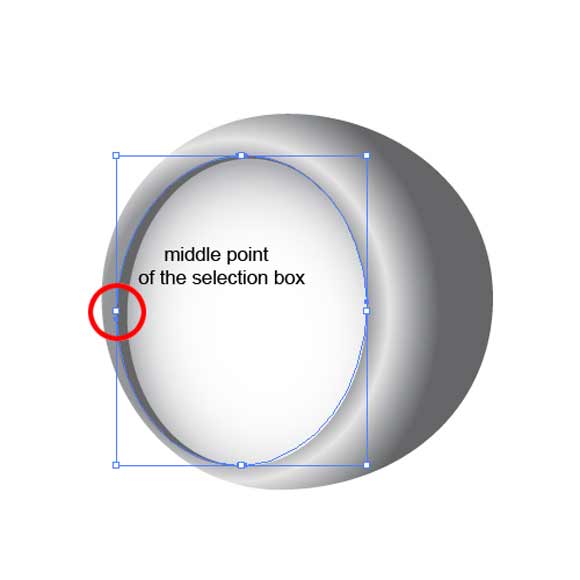
Step6
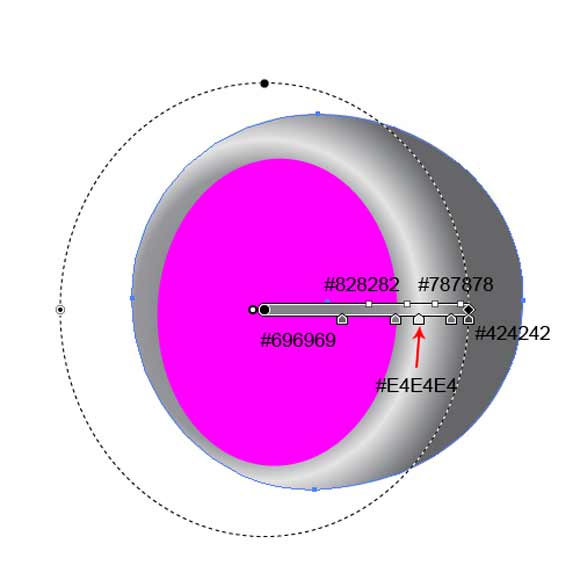
Duplicate (Ctrl / Cmd + C, Ctrl / Cmd + F) the smaller ellipse and place the copy underneath the original ellipse. Set the Fill color to #666666 and using a non-uniform scale grab the middle part of the selection box on the left side and drag it to the left, just like in the picture below.
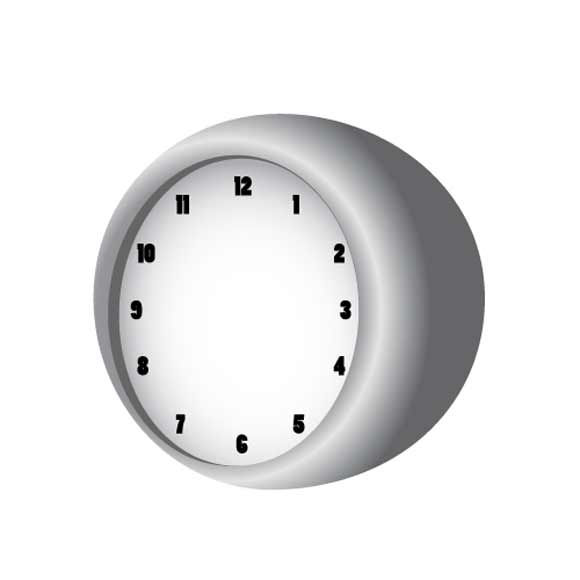
Step7
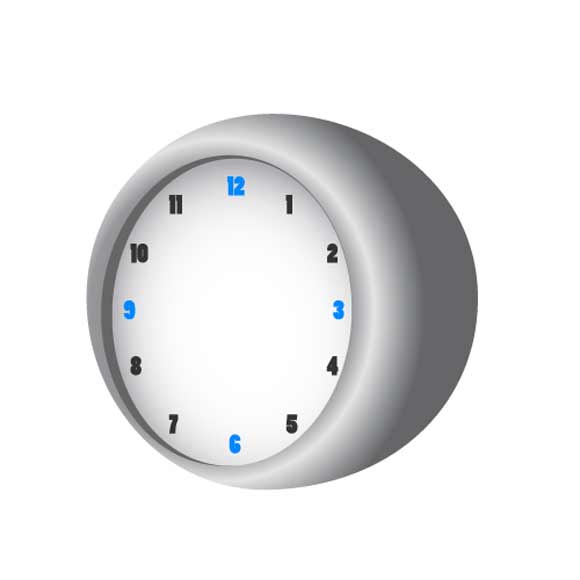
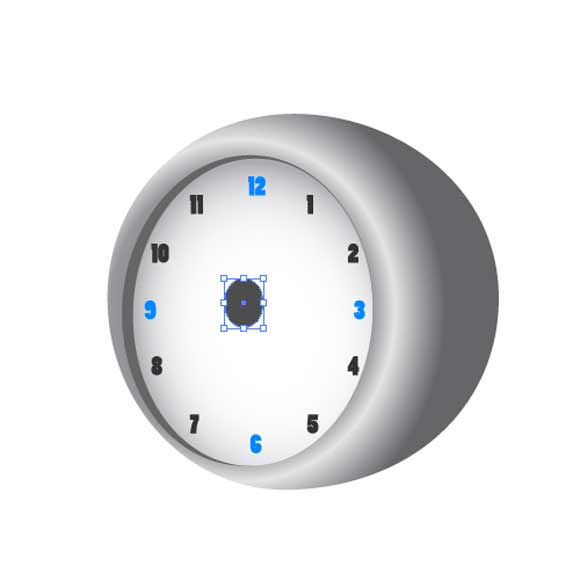
Grab the Type Tool (T) from the Tool Panel and type the numbers from 1 to 12. Place them on the circle. In order to make our Alarm clock more interesting we will change the Fill color for some numbers.
Step8
Grab the Ellipse Tool (L) again and create a small ellipse and place it in the middle.
Step9
Duplicate (Ctrl / Cmd + C, Ctrl / Cmd + F) the ellipse from the previous step, change its Fill color to #4D4D4D, send it behind the original ellipse (Ctrl / Cmd +[) and nudge it to the right by 2-3 pixels.
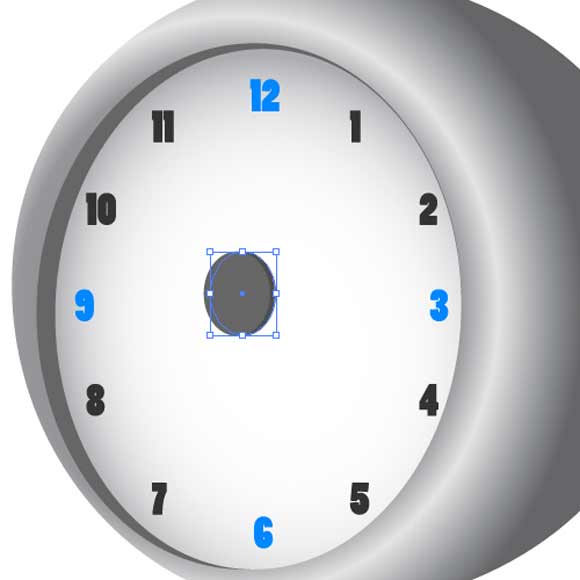
Step10
Select the ellipse in the front and under the Object select Path > Offset Path. Set the Offset to -7 and hit the OK button. Set the Fill color of the smaller ellipse to #00CCFF. You can also nudge this ellipse to the left side by a pixel or two.

Step11
Grab the Pen Tool (P) from the Tool Panel and draw the shape of the arrow. Since we are creating our alarm clock in perspective make sure not to draw a symmetrical arrow. Set the Fill color to #4D4D4D.

Step12
Duplicate (Ctrl / Cmd + C, Ctrl / Cmd + F) the arrow, set the Fill color to #666666 and nudge it to the left exactly like we did in the previous step with the ellipse.

Step13
There is one thing that needs to be fixed.
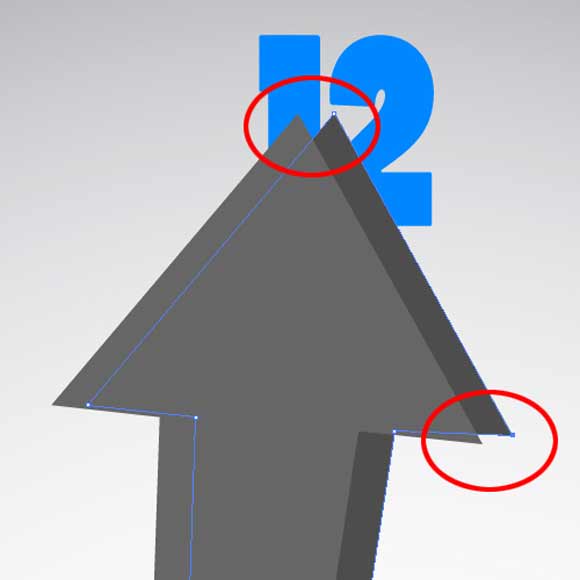
Grab the Add Anchor Point Tool (+) from the Tool Panel and add two anchor points near the corners. Grab the Direct Selection Tool (A) from the Tool Panel and move them and place them as shown in the picture below.

Step14
Repeat the last two steps in order to create a smaller pointer.
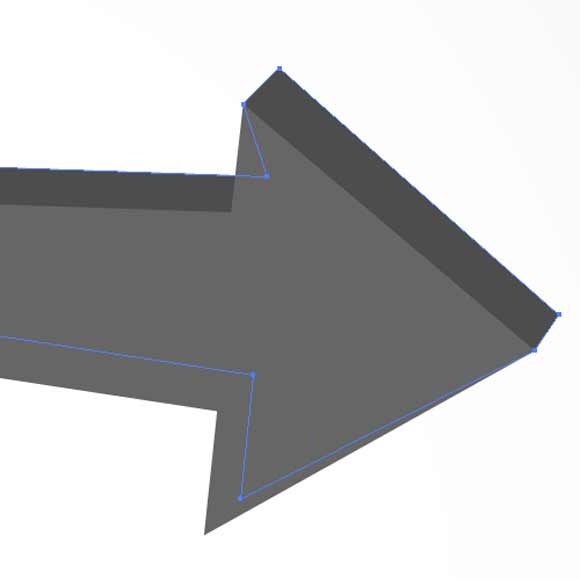
You should end up with something like this.

Step15
The next thing we are going to create is the“leg” for our alarm clock. To complete it we will need the Ellipse Tool (L), the Rectangle Tool (M) and the Direct Selection Tool (A). All we have to do is to create three objects, adjust some anchor points and bring them all together.
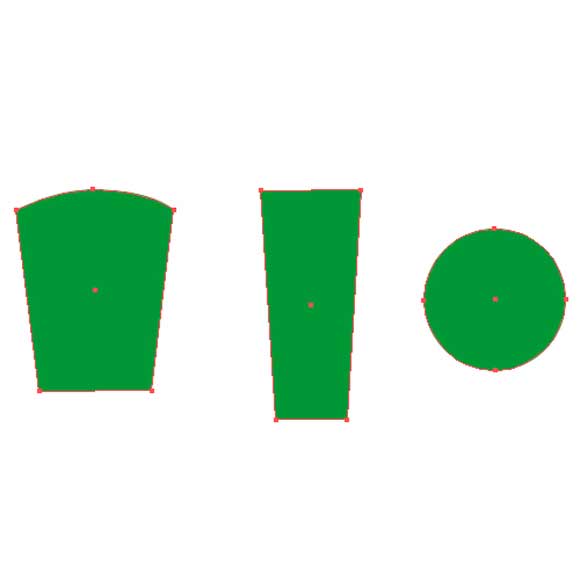
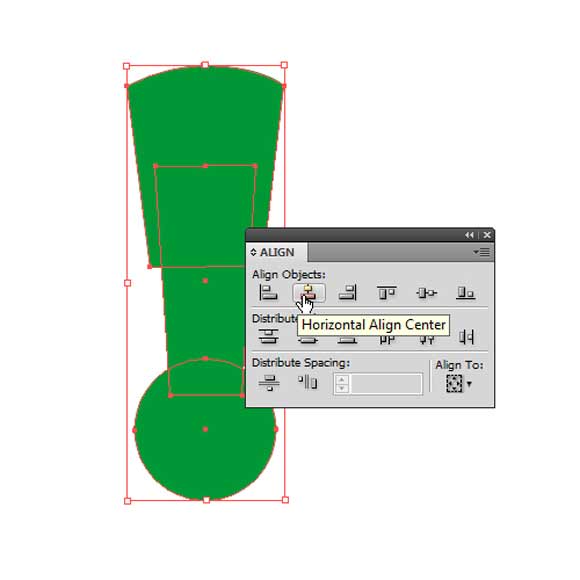
Step16
Don’t forget to use the Horizontal Align Center under the Align Panel in order to align all three elements properly.
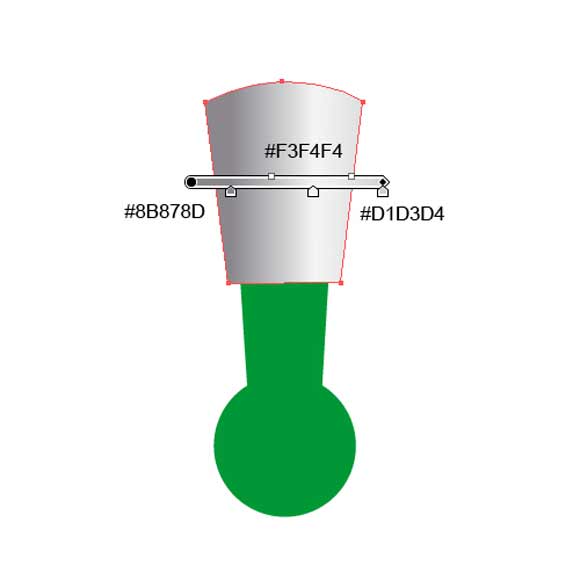
Step17
We are going to apply a nice linear gradient.
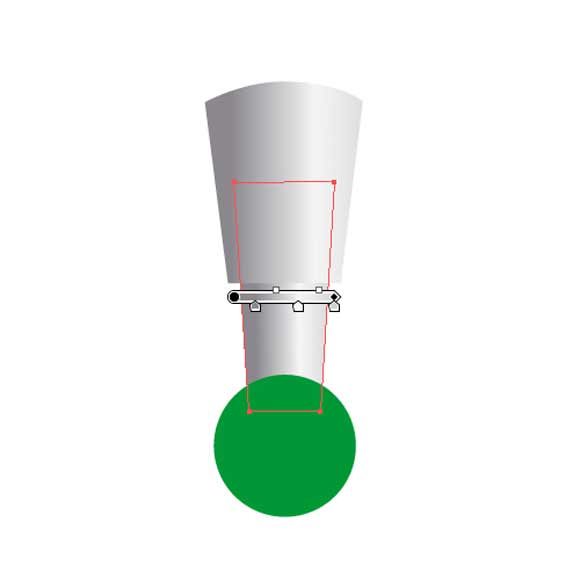
Step18
For the middle part of the leg we will use the same linear gradient. Just make sure to move the gradient slider to the left a little bit.
Step19
And for the circle we will use radial gradient.

Step20
Select all the elements and Group them (Ctrl / Cmd + G). Rotate the selection and place it as shown in the picture below.

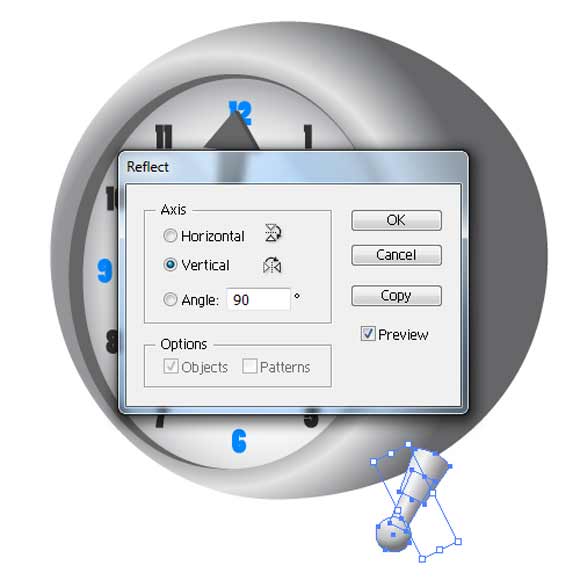
Step21
Under the Object select Transform > Reflect. Set the Axis to Vertical and hit the Copy button. Place the second leg as shown in the picture below.
Step22
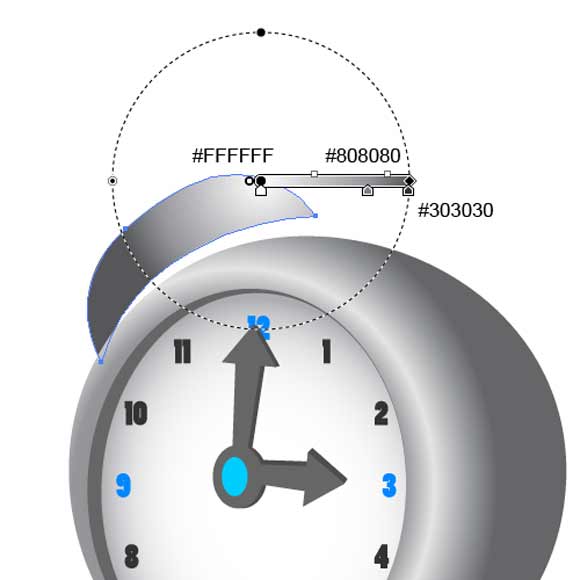
Grab the Pen Tool (P) from the Tool Panel and create the shape as shown in the picture below.

Step23
Apply a radial gradient.
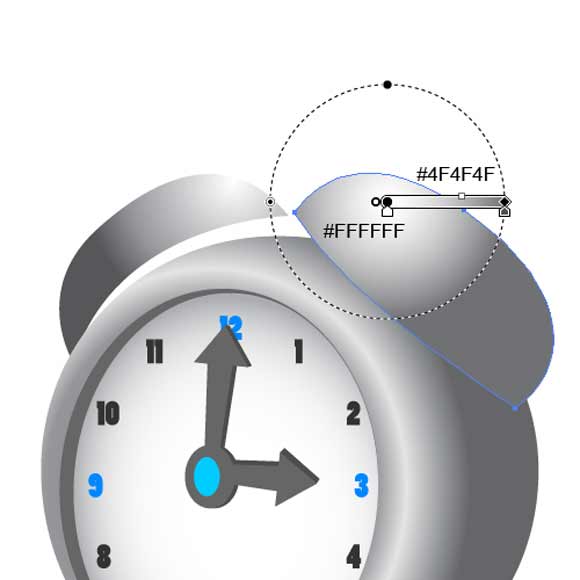
Step24
With the Pen Tool (P) selected, draw a similar shape and apply a radial gradient.
Step25
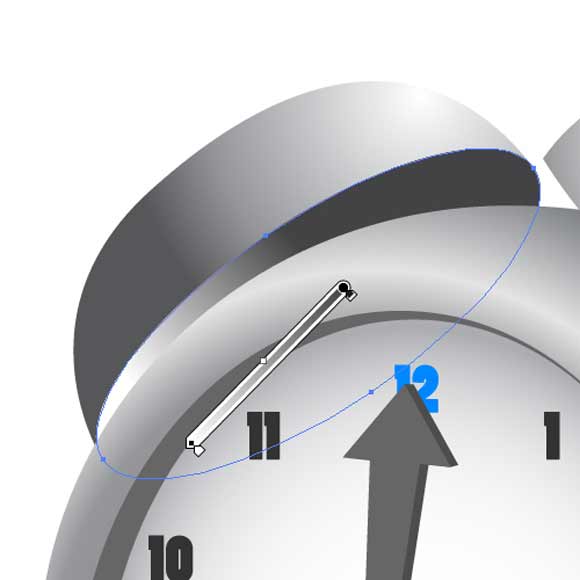
Grab the Ellipse Tool (L) from the Tool Panel and create an ellipse. Rotate it and adjust the anchor points until the endpoints match.
Step26
Apply a nice gray linear gradient.
Step27
Grab the Pen Tool (P) from the Tool Panel and create the shape as shown on the picture below.
Step28
We will also apply a linear gradient. This way we’ve created a nice shadow.
Step29
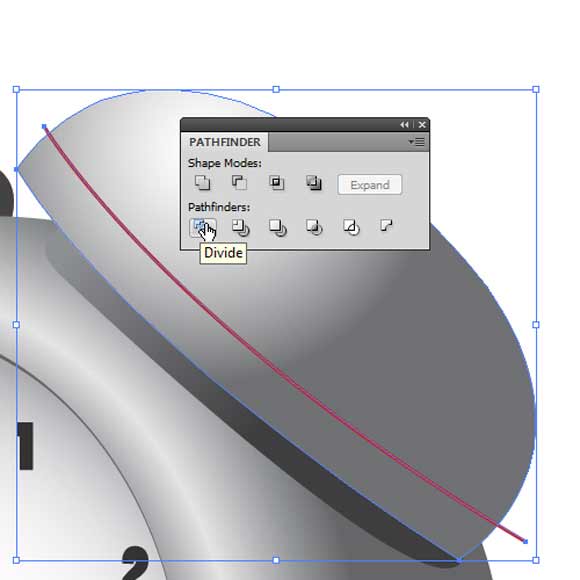
Duplicate (Ctrl / Cmd + C, Ctrl / Cmd + F) the upper part (the “bell)”. Grab the Pen Tool (P) from the Tool Panel and create a path as shown in the picture below. Select the copy we have just created and the path, and under the Pathfinder Panel hit the Divide button.
Step30
Ungroup (Shift + Ctrl / Cmd + G) the new shape, delete the upper part and apply a linear gradient to the lower part.
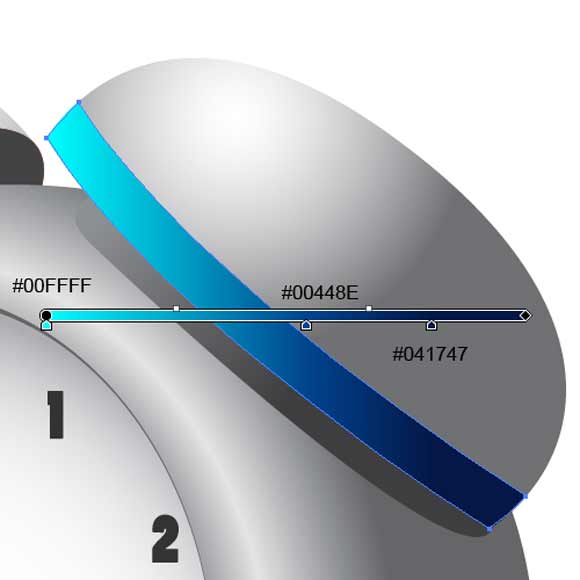
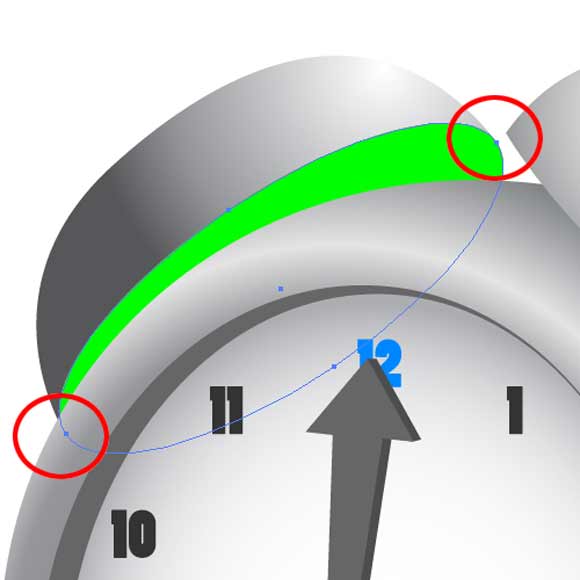
Step31
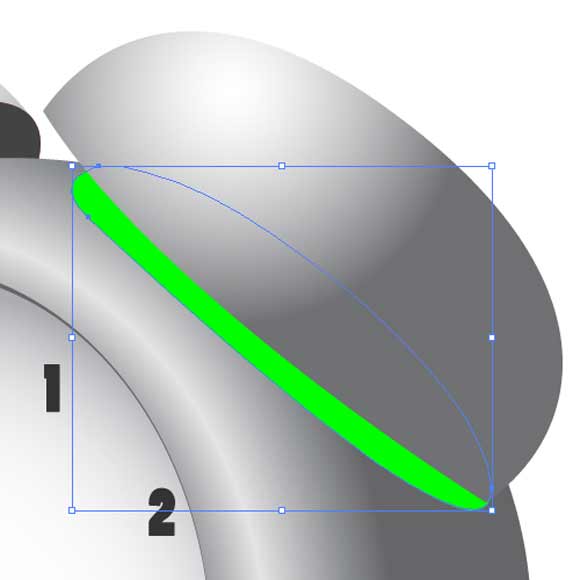
Repeat the previous step and create a nice blue stripe for the left part of the “bell” as well.

Step32
Select the Ellipse Tool (L) again from the Tool Panel and create a small ellipse. Place it as shown in the picture below. Don’t forget to apply a nice radial gradient.
Step33
Repeat the previous step for the left “bell” of the alarm clock. You should end up with something like this.

Step34
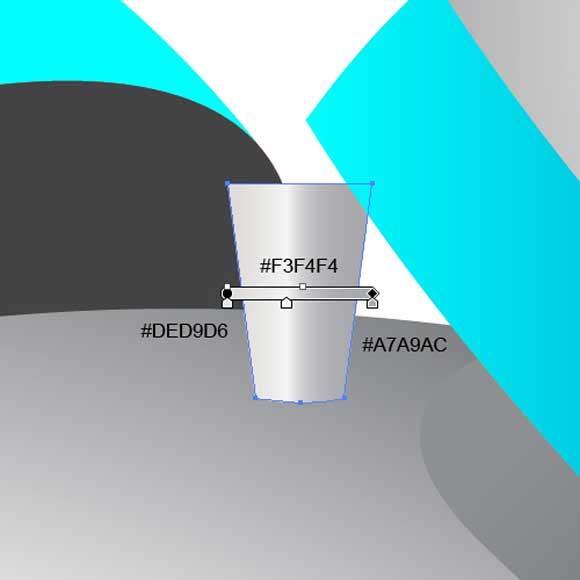
Now we have to create a middle part, the one that actually is making a noise when you would rather sleep. This part contains a small rectangle and a circle.
Grab the Rectangle Tool (M) from the Tool Panel and create a rectangle. Make sure to nudge the lower endpoints to the inner side and make the lower side slightly curved. The Direct Selection Tool (A) will help you to do that. When you are satisfied with the shape apply a nice linear gradient.
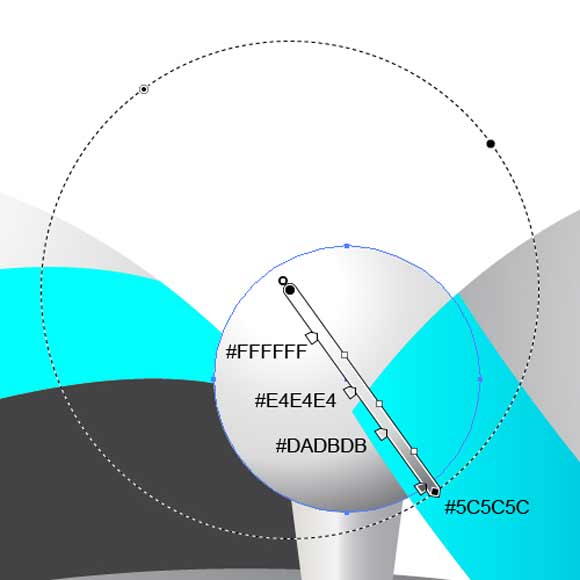
Step35
Grab the Ellipse Tool (L) from the Tool Panel and create a nice circle. Apply a gray radial gradient.
Step36
For the lower part create a small ellipse. Set the Fill color to #666666.
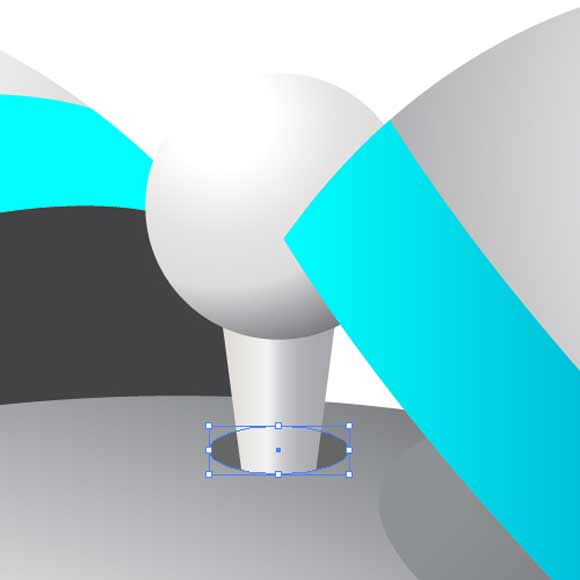
Step37
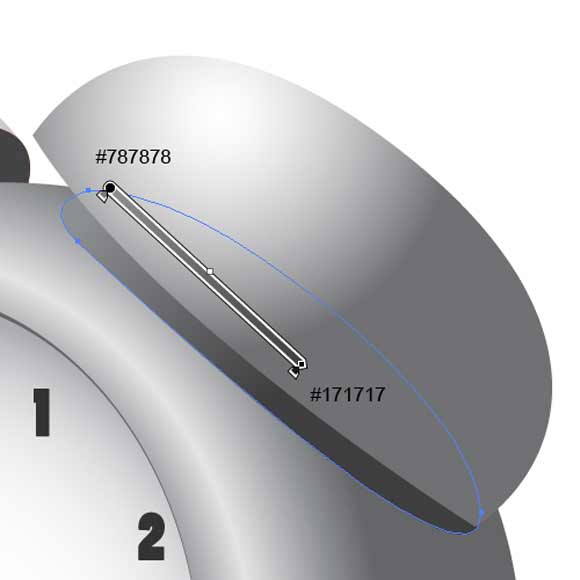
Grab the Pen Tool (P) from the Tool Panel and create the path as shown in the picture below.


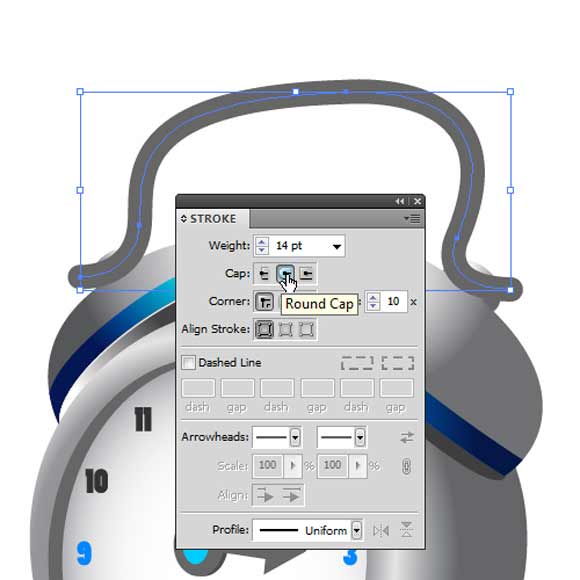
Step38
Set the Stroke to 14 and under the Stroke Panel hit the Round Cap.
Step39
Duplicate (Ctrl / Cmd + C, Ctrl / Cmd + F) the path and set the Stroke to 2pt for the copy. Select both paths and under Object hit Expand.
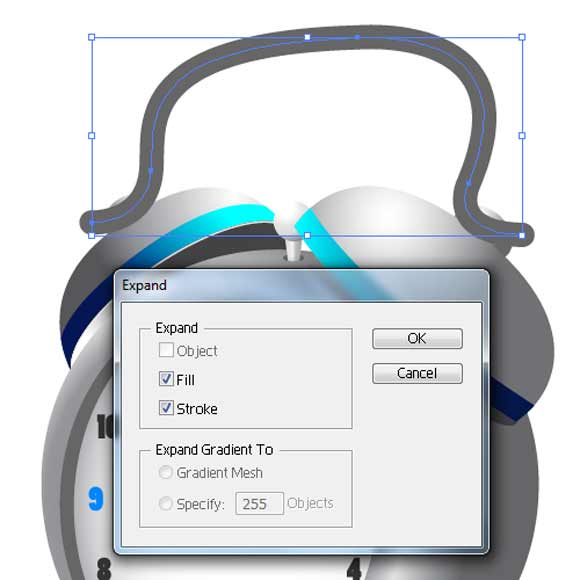
Step40
Now we need to change colors. Set the Fill color for the thicker shape to #B2B2B2 and for the thinner shape to #F2F2F2. You should end up with something like this.

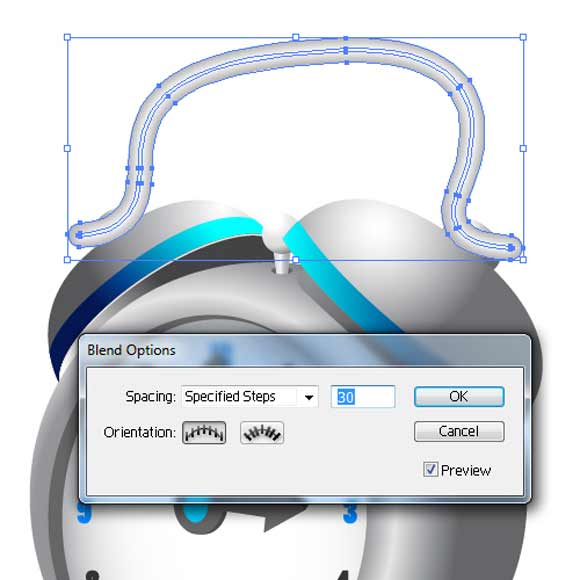
Step41
Select both shapes and under Object select Blend > Make. Then, under Object select Blend > Blend Options. Set the Spacing to Specified Steps and for the value enter 30.
Step42
Duplicate (Ctrl / Cmd + C, Ctrl / Cmd + F) the handle and send one of them to back (Shift + Ctrl / Cmd + [). Grab the Ellipse Tool (L) from the Tool Panel and create a small ellipse. With the Direct Selection Tool (A) adjust the position of some anchor points as shown in the picture below.
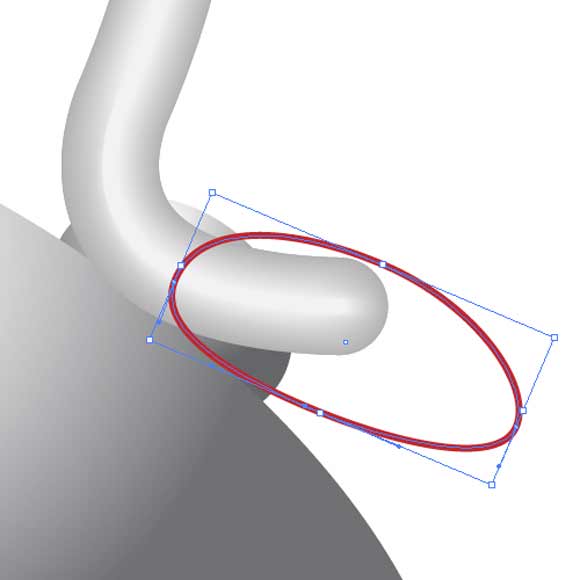
Step43
Remove the Stroke color. Select the distorted ellipse and the handle in the front and under Object hit Make Clipping Mask. You should end up with something like this.

Step44
With a few more adjustments and some nice details our alarm clock will look like this.
In this tutorial we’ve had an opportunity to create a cute alarm clock in perspective. The creation process was quite simple and the final result looks quite nice. Feel free to use different colors as well. You may end up with really nice results. I hope you liked this tutorial. If you have any questions, please post them in the comment section below. Thank you for following along.
[amember_protect guests_only]If you are already a Premium Member then just sign in and you can download source file for this tutorial.
Not a member? Sign up today or read more about our Premium Member area.

[/amember_protect]
[amember_protect user_action=’hide’ visitor_action=’hide’]
Download the source for this tutorial by clicking the button below:


It’s look like hard, but it’s very easy.. Thank you for sharing.
thanks for sharing, I learn something today.
It is really an awesome tutorial, Very nice and cleanly explained images.
I thank you a lot and also appreciate you for such a wonderful tutorial.
Actually I am trying to design a digital camera in tutorial and I had to stop due to some technical doubt, but now from this tutorial it has been cleared. Now I got the concept of wholesome creation is clear.
I thank you very much for such good explanation.
[…] How to Create an Alarm Clock in Adobe Illustrator […]
[…] How to Create an Alarm Clock in Adobe Illustrator […]
[…] How to Create an Alarm Clock in Adobe Illustrator […]
[…] How to Create an Alarm Clock in Adobe Illustrator […]