Creating an Email Icon in Adobe Illustrator
3Today we will be learning how to create a neat email illustration with Adobe Illustrator. A combination of a white envelope and the @ (at) symbol can be a perfect combination for the website icon.
![]()
All we have to do is use the 3D effect Extrude & Bevel, aPen Tool and some nice color gradients.
Let’s get down to business! It will be so much fun!
We will be creating this and download the source file at the end of the tutorial:

Creating the Envelope
There are a number of ways to create the envelope, but in this tutorial we’ll try to keep it simple. It does not mean it will look less professional.
Step1
Grab the Rectangle Tool (M) from the Tool Panel and click somewhere on the Artboard. The Rectangle Option box will pop up. Set the value to 300 x 200for width and height. The color is not important at this moment.

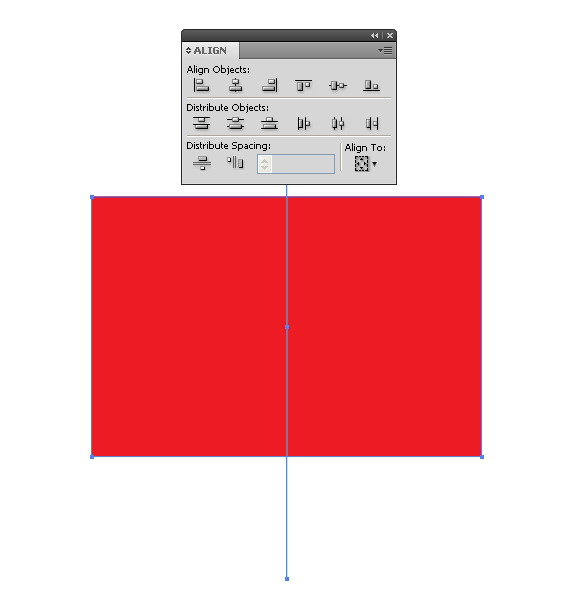
Step2
Select the Line Tool (/) from the Tool Panel and create a vertical line.Align the line with the rectanglevertically and horizontally by hitting Vertical and Horizontal Align Center under the Align Panel.
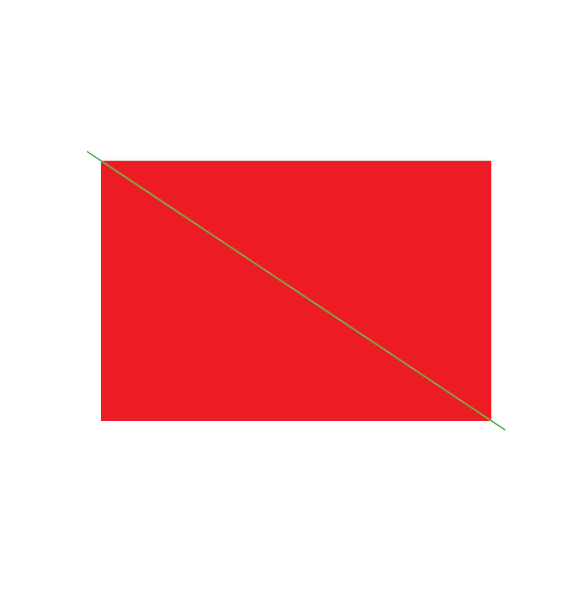
Step3
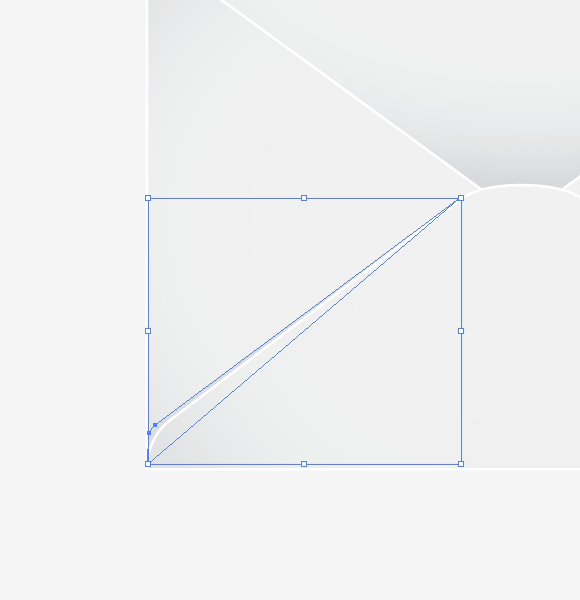
Rotate the line as shown in the picture below. Make sure you place the line to go through the rectangle’s corners.
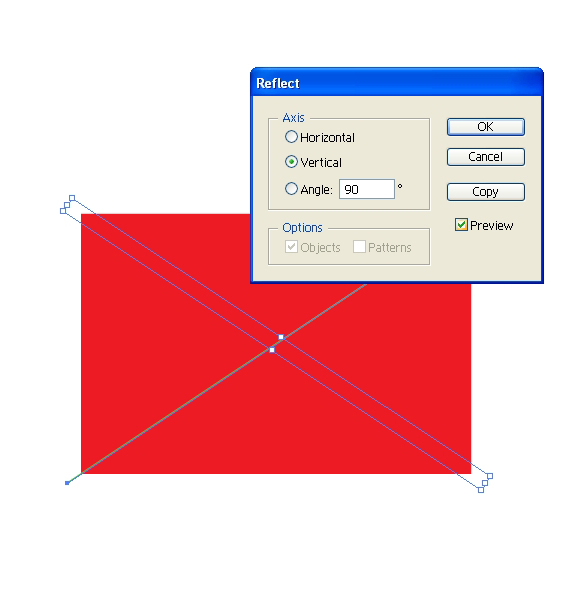
Step4
Select the line and under the Object select Transform>Reflect. Set the Axis to Vertical and hit the Copy button. It will create a mirror image.
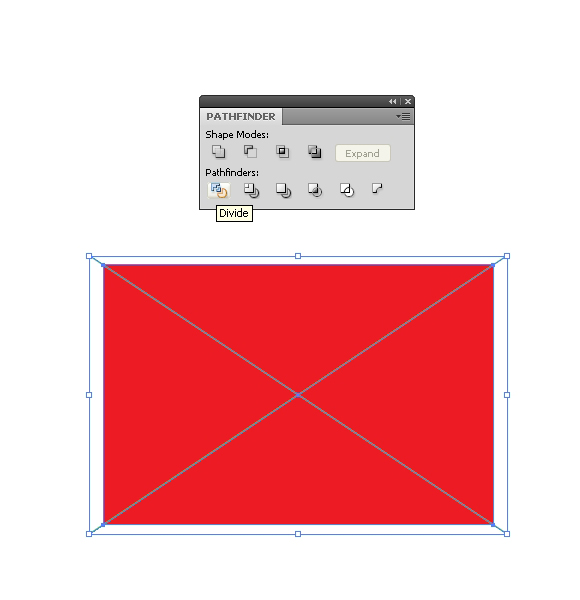
Step5
We will use these two lines to divide the rectangle. Select all the elements and under the Pathfinder Panel hit the Divide button. I will divide the rectangle into four parts.
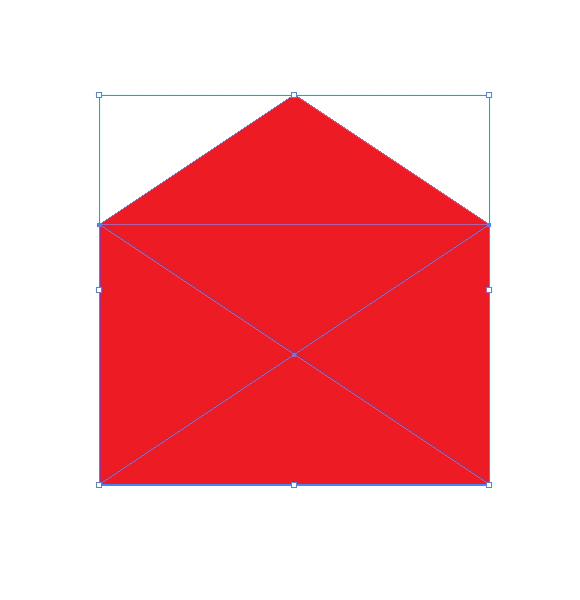
Step6
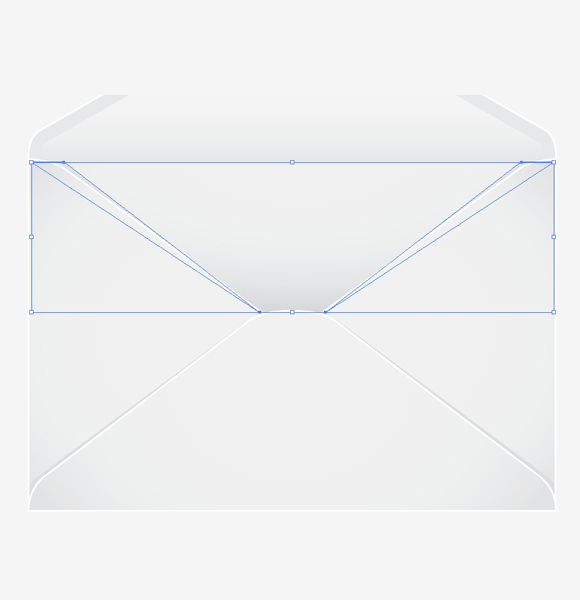
Ungroup (Shift + Ctrl /Cmd + G) the object and create a copy of the upper part. In order to do that, hit the shortcuts (Ctrl / Cmd + C, Ctrl / Cmd + F). Holding theShift key on the keyboard rotate the copy by 180 degrees and move it upwards until you get something like this.
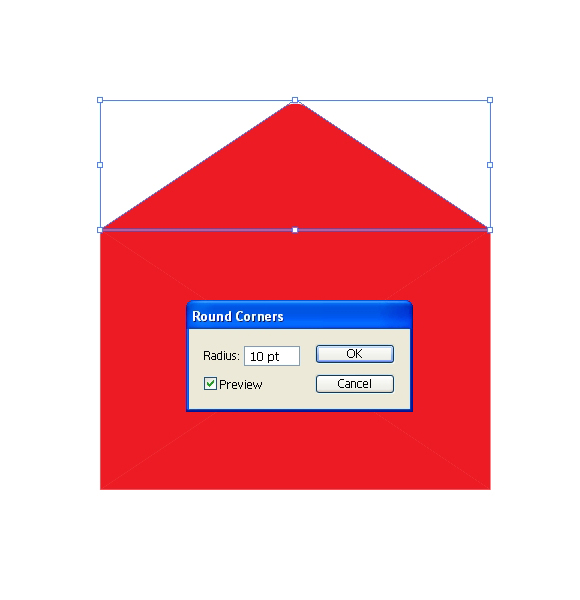
Step7
Let’s fix the top of the envelope’s cover. It will look better if we make it round. UnderEffect select Stylize>Rounded Corners. Set the value for Radius to 10pt.
Step8
UnderObject, select Expand Appearance. It will convert our envelope cover into an editable shape.
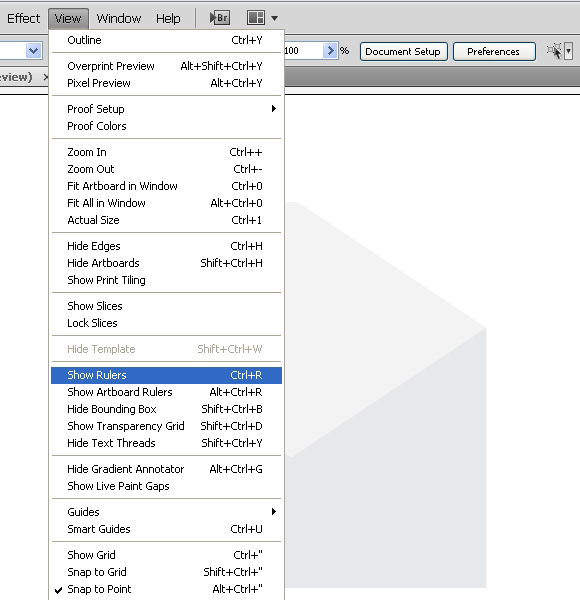
We have to add a few anchor points to make our envelope look like a real one. First, we will bring up the Ruler. The Ruler is a very convenient Illustrator feature when you have to create symmetrical elements.
Under Viewselect Show Rulers.
Step9
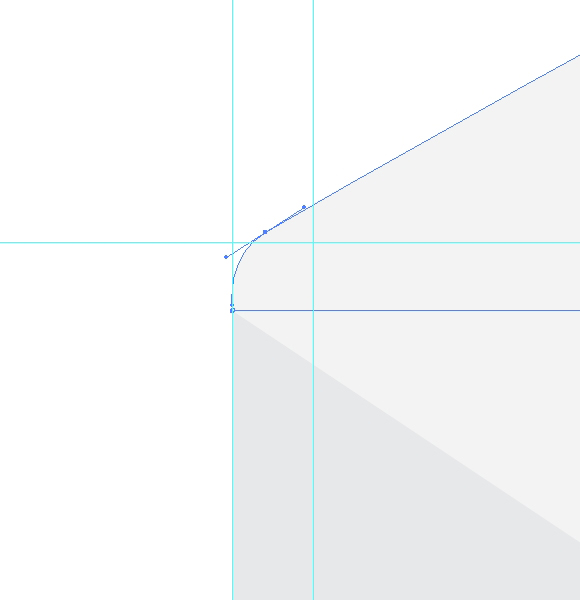
TheRuler will help us set the Guidelines. Grab the Add Anchor Point Tool (+) and add some anchor points.

Step10
Wit the Direct Selection Tool (A), grab the anchor point and move it as shown in the picture below. Make sure to align the left side of the cover with the Guide line.
Step11
Repeat it with the right side of the cover and, of course, with the front side of the envelope.

Step12
For the lower side of the envelope we will need to add one more Guideline so that we can add two more anchor points afterwards.
Step13
Feel free to change the Fill color of the shape so that you can better see what we are doing. Just grab the new anchor point and move it upwards. Adjust the position of the handler so that the edges match.
Step14
Repeat the previous step with the right side of the envelope.
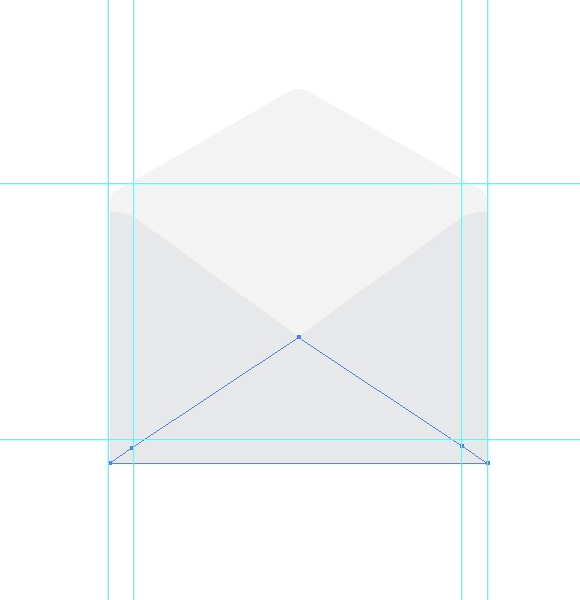
Step15
We need to adjust the middle part of the envelope as well. To do that, we have to cut off the upper part of the blue shape. With the Direct Selection Tool (A) grab the middle anchor point and move it upwards a little bit (hold the Shift key on the keyboard for straight dragging). Grab the Rectangle Tool (M) from the Tool Panel and create a rectangle as shown in the picture below.

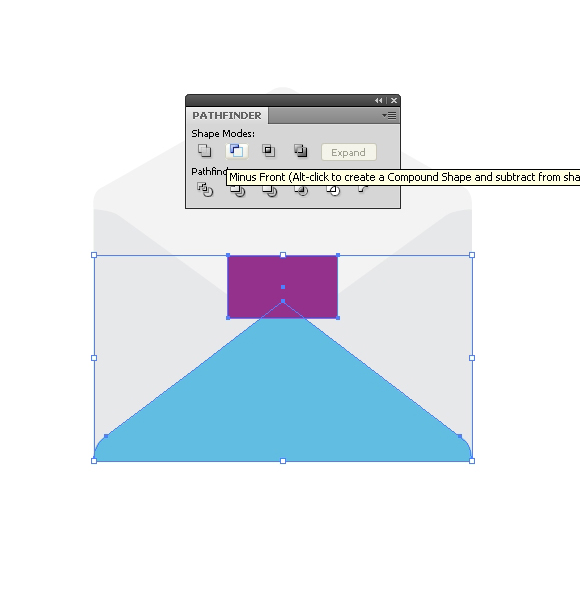
Step16
Select the rectangle and the blue shape and under the Pathfinder Panel hit the Minus Front button.
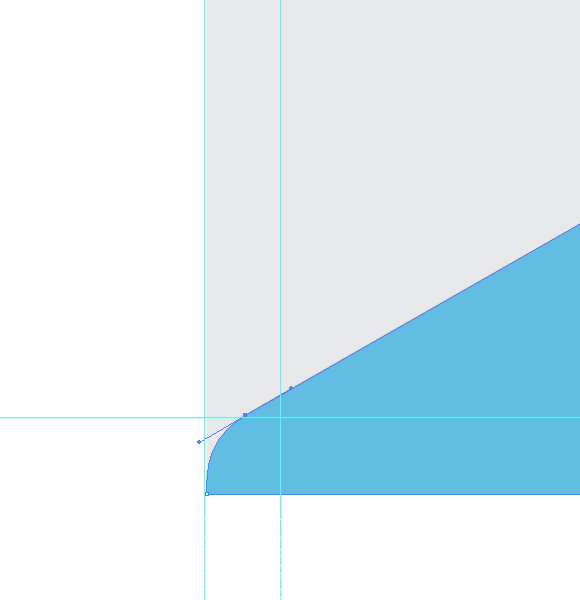
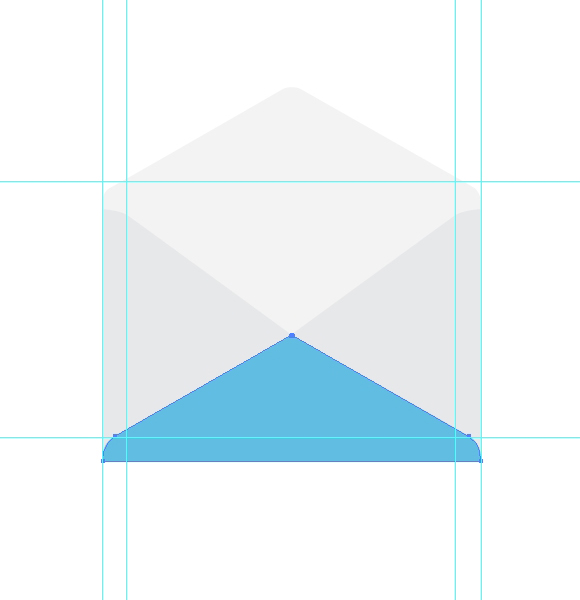
Step17
Let’s make the corners round. Under Effect select Stylize>Round Corners. Set the value for theRadius to 10pt. You should end up with something like this.

Step18
We have to create one more thing, the part of the envelope with the glue strip. Select the envelope cover and under Object select Path>Offset Path. Set the value for theOffset to -7.

Step19
We need to adjust the new shape a little bit. Grab the Direct Selection Tool (A), select the lower anchor points (don’t forget to hold theShift key on the keyboard in order to select more than one anchor points) and nudge it downwards using the arrow key on the keyboard.
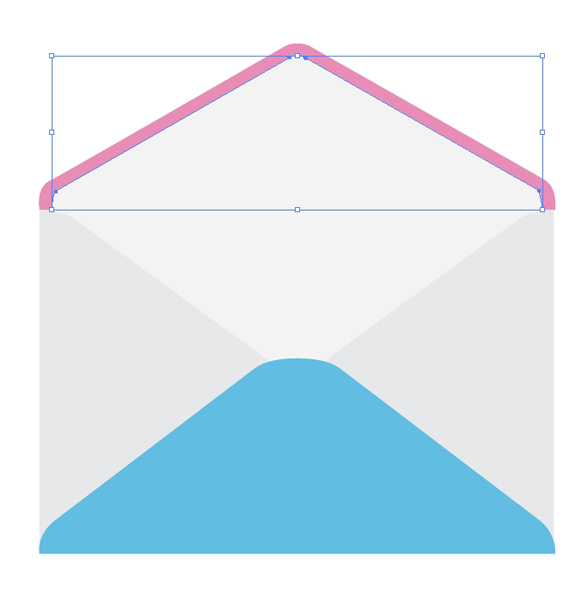
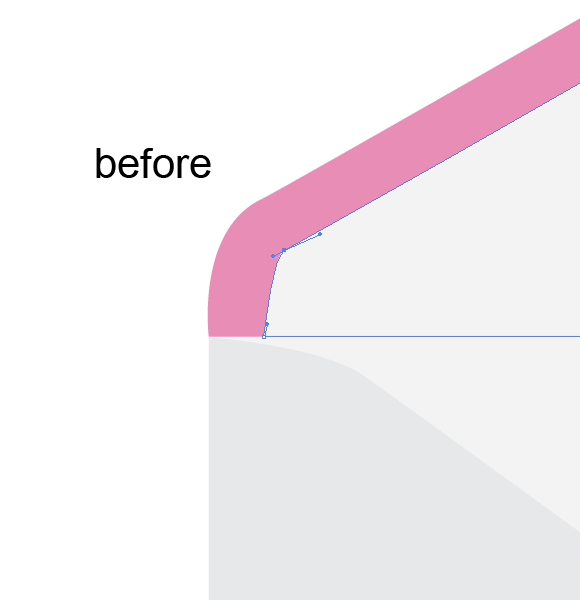
Step20
As you can see, our edges are not smooth anymore. To fix that, grab the Direct Selection Tool (A) and adjust the position of the handlers for each individual anchor point.
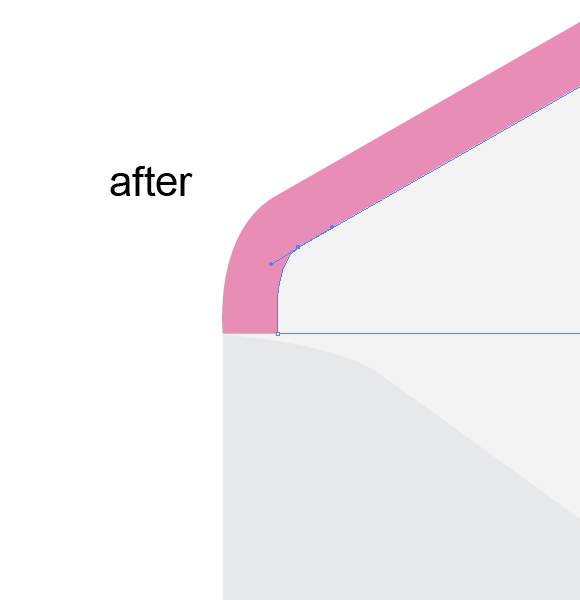
Step21
Repeat the previous step with the right side of the envelope as well.

Our envelope is now ready to be improved with some nice colors.
Colors
To create an ordinary envelope we will have to use white and light gray colors only. With those few colors we will try to emphasize the edges of the envelope and to create some nice shadows.
Step22
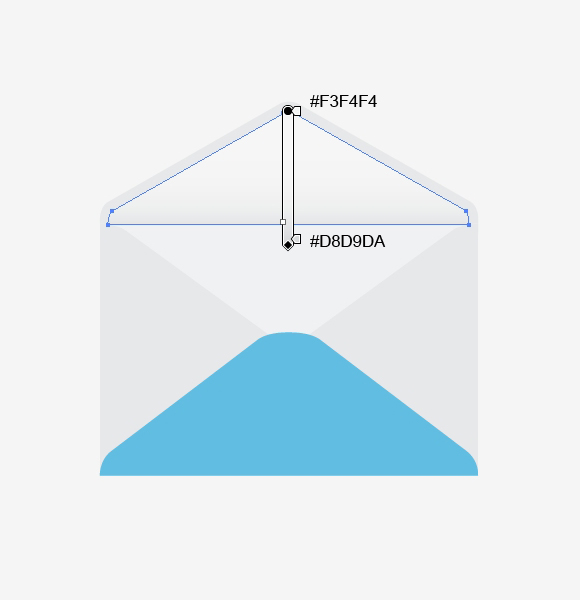
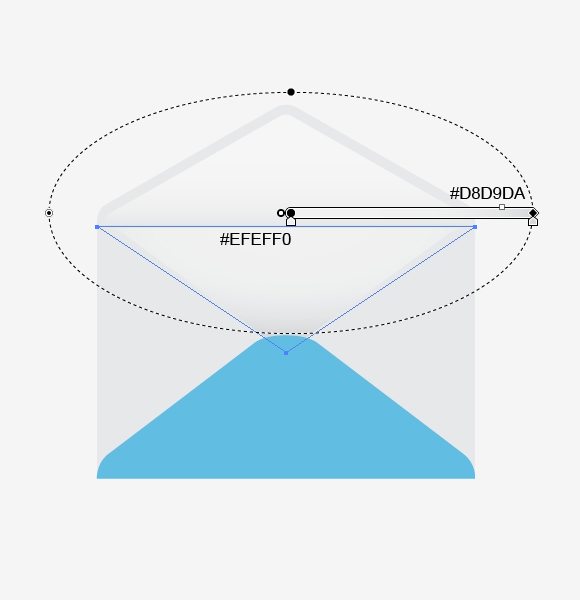
Set the Fill color of the part with the glue to #E6E7E8. Apply a nice linear gradient to the inner shape of the envelope cover.
Step23
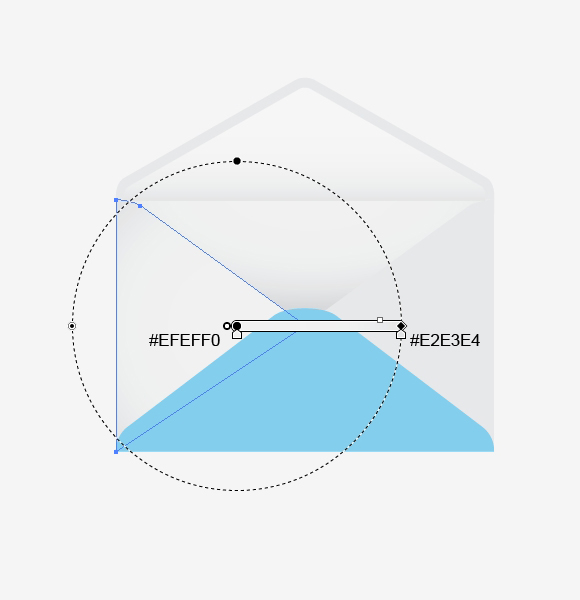
To the inner side of the envelope we will apply a radial gradient.
Step24
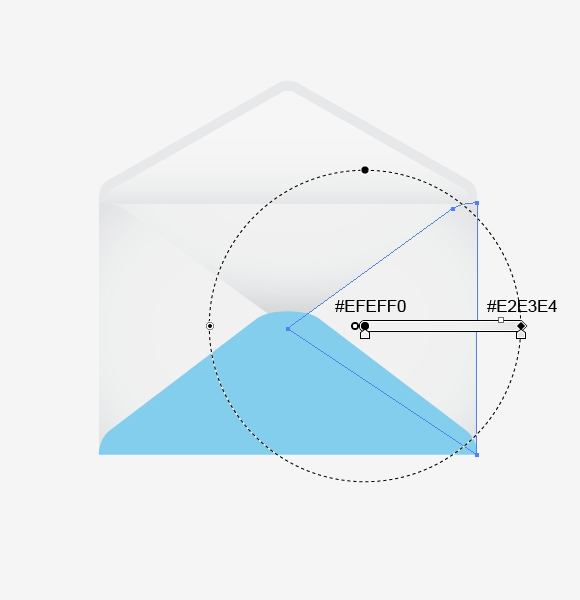
We will use a nice radial gradient for the exterior as well.
Step25
Feel free to set the Stroke color to white (#FFFFFF). It will emphasize the edges.

Step26
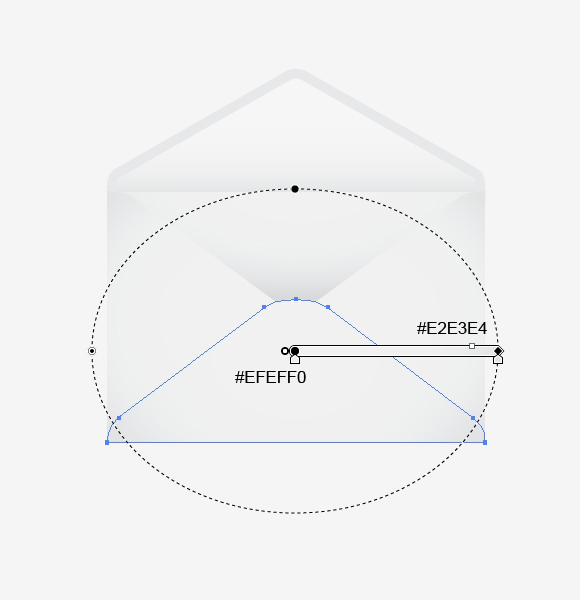
Grab the Pen Tool (P) from the Tool Panel and draw the shape as shown in the picture below.

Step27
Make sure to place it underneath the lower part of the envelope.
Step28
Create the same shape for the right side of the envelope.

Step29
You can create the same kind of shapes for the upper part of the envelope. It will give our illustration the necessary depth.
Step30
You should end up with something like this.

Creating the @ symbol
Let’s make our illustration more interesting. A glossy @ symbolwill help us to achieve that.
Step31
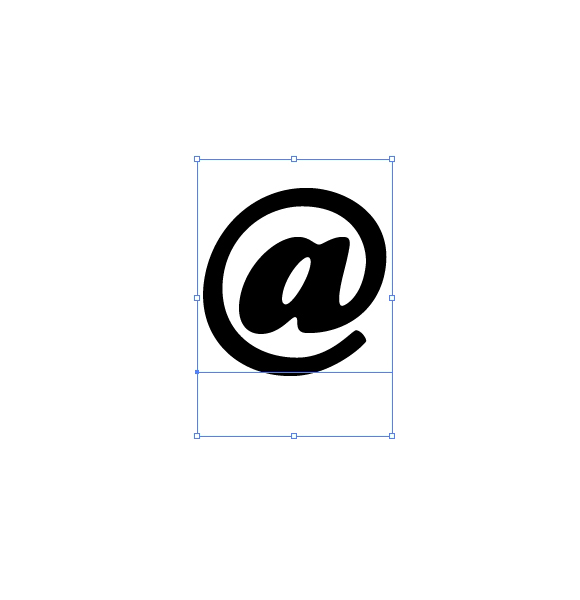
Grab the Type Tool (T) from the Tool Panel, select a nice thick Font and type the symbol @. I am using Cooper Std.
Step32
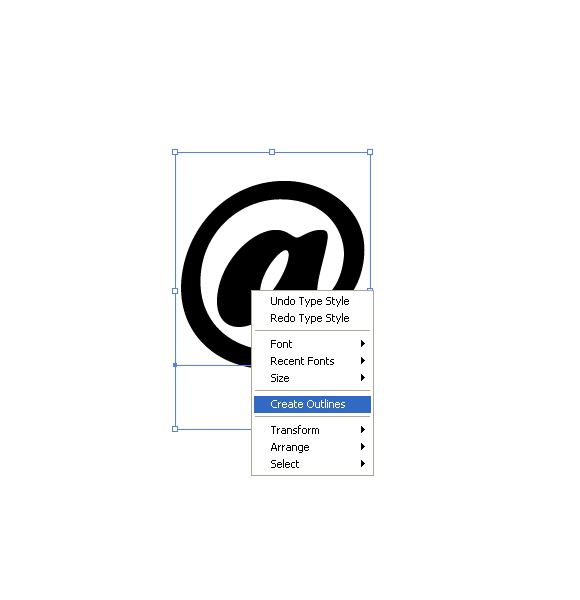
We need to convert the letter into an editable shape. To do that, right click and select Create Outlines.
Step33
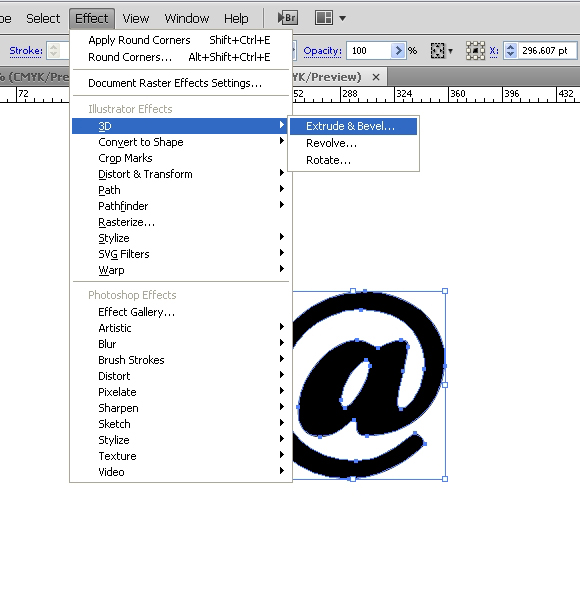
To apply a 3D effect under Effect select 3D>Extrude & Bevel.
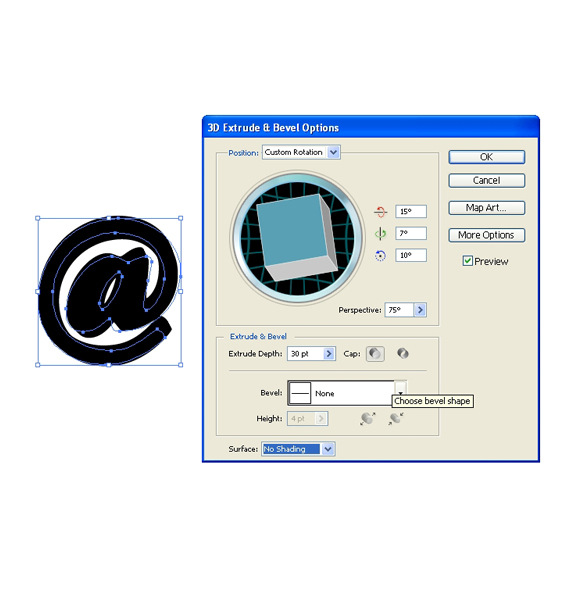
Step34
Adjust the parameters as shown in the picture below and hit theOK button.
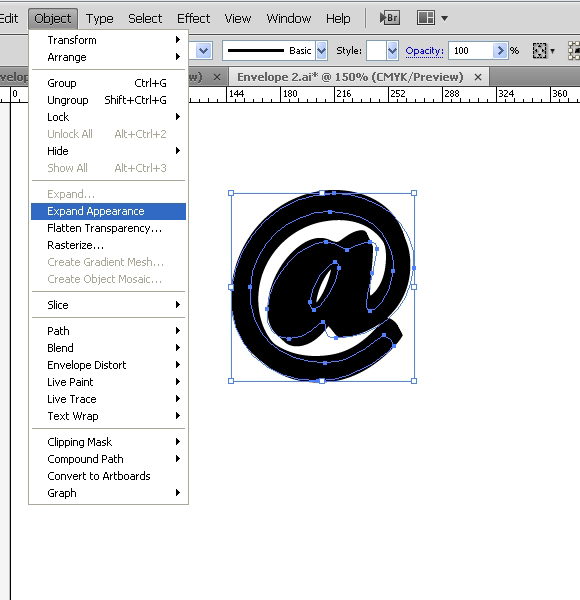
Step35
Don’t forget to expand our object. That wayit will become editable and ready for future adjustments.
Gradients
Now we can start to apply some nice gradients.
Step36
Ungroup (Shift + Ctrl / Cmd + G) the object. Be aware that the object consists of many parts, so you might have to ungroup ita few times.
And, here we go…
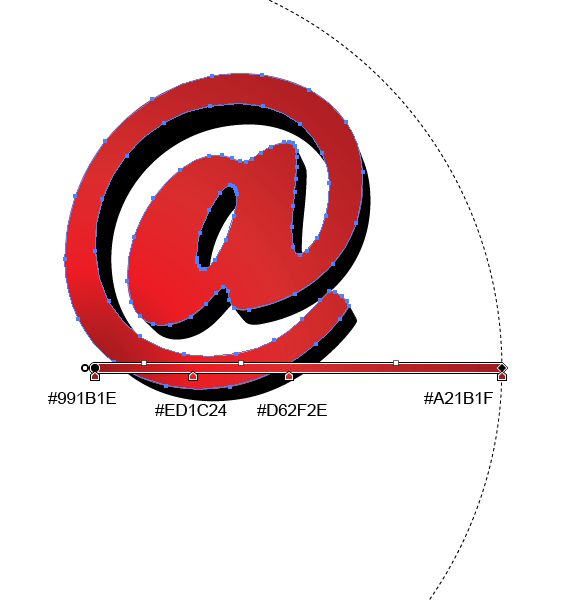
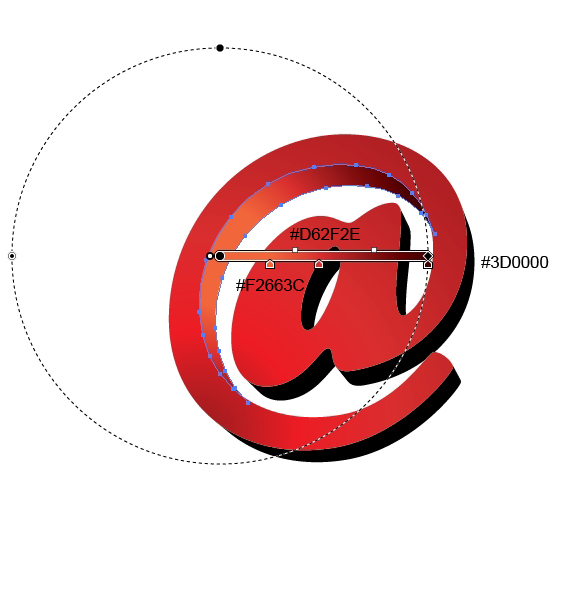
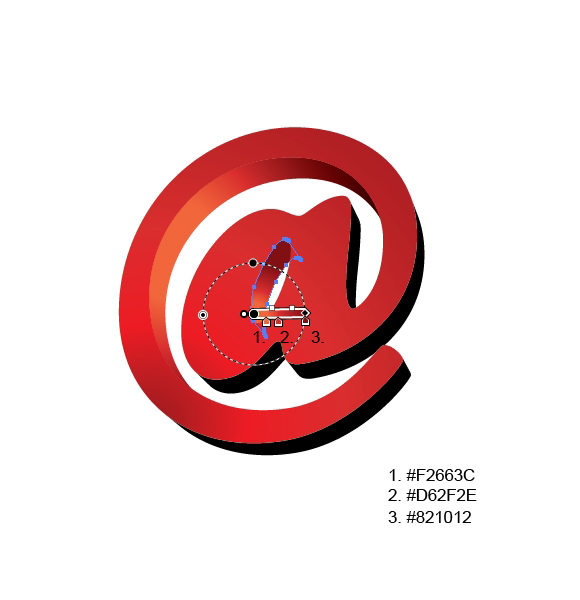
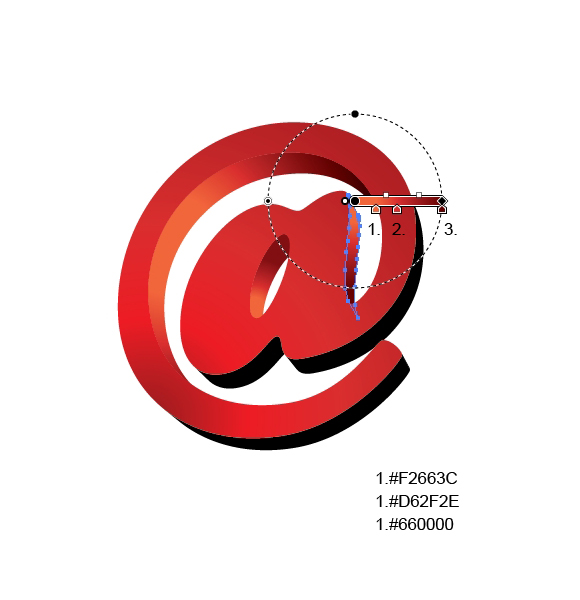
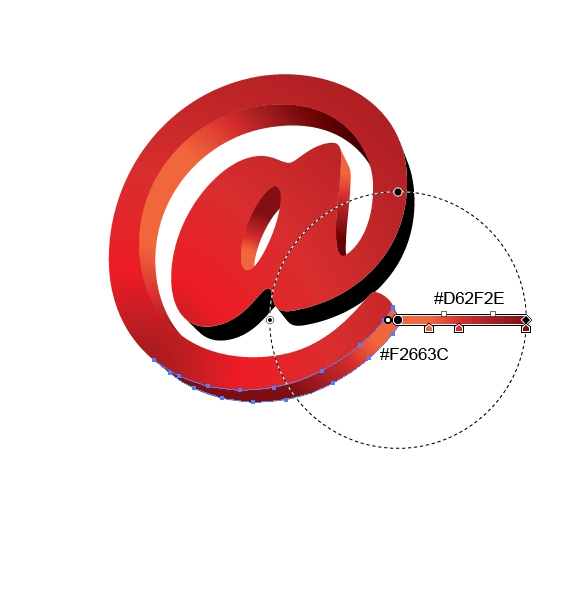
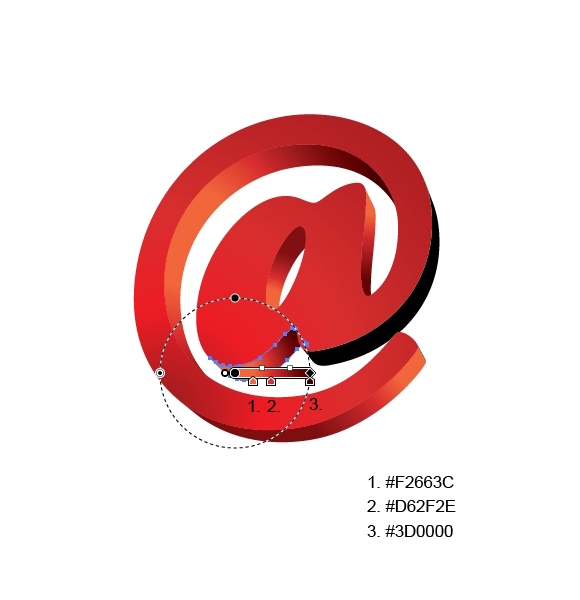
Don’t forget to create the edge highlight and the nice glossy reflection.
Step37
Create two copies (Ctrl / Cmd + C, Ctrl /Cmd + F) of the front side of the @ symbol. Nudge one of the copies to the left by 1-2 pixels. Select both copies and under the Pathfinder Panel hit the Minus Front button. Set the Fill color of the new shape to # F9C1C6.

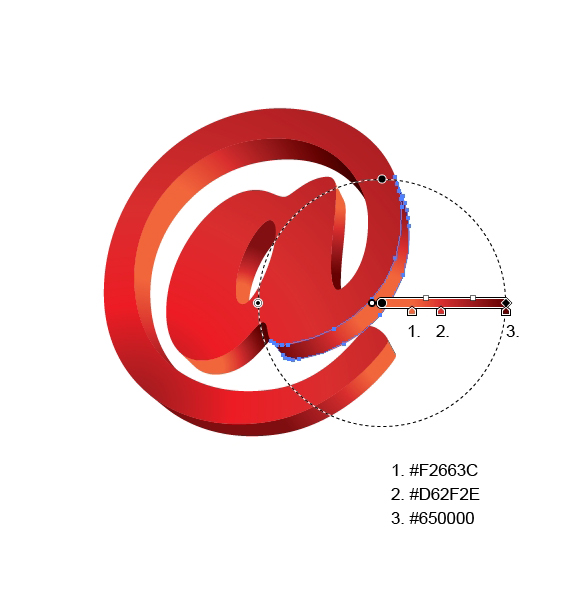
Step38
Grab the Ellipse Tool(L) from the Tool Panel and create an ellipse as shown in the picture below.
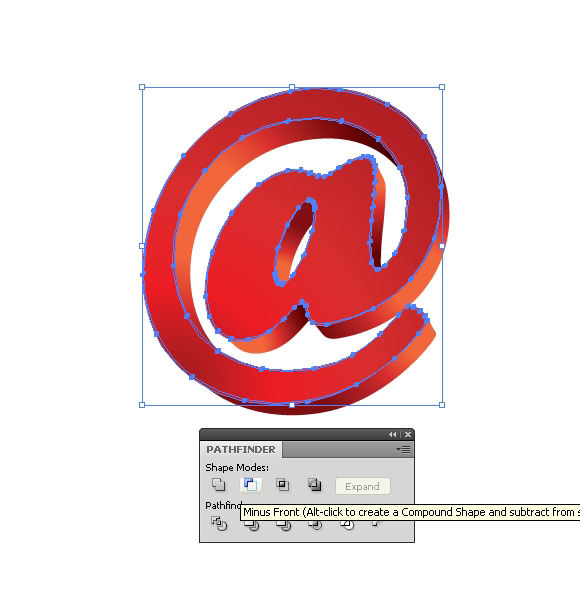
Step39
Select all the elements of the @ symbol and make a copy of them (Ctrl / Cmd + C, Ctrl / Cmd + F). Under the Pathfinder Panel hit the Unite button.

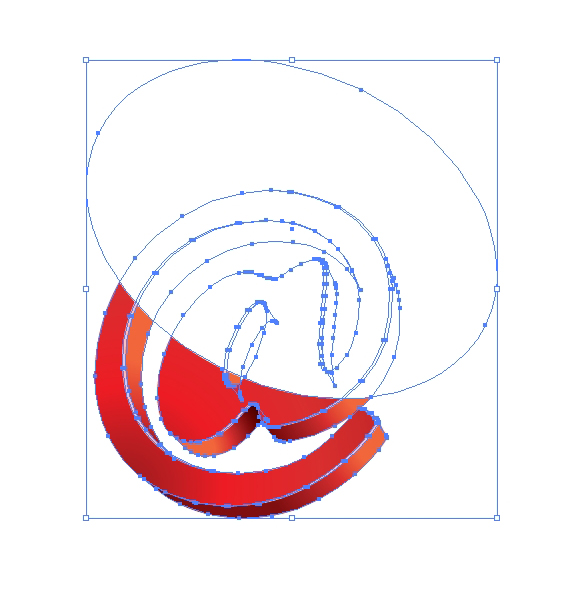
Step40
Select the shape we have just created and the white ellipse and under the Pathfinder Panel hit the Intersect button.
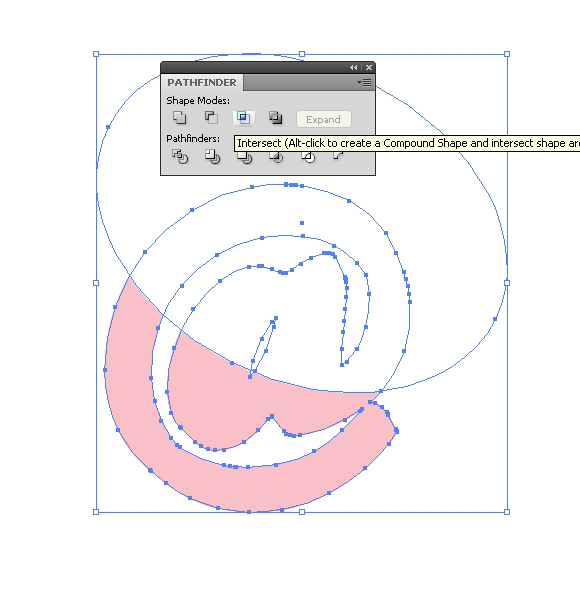
Step41
Lower the Opacity of the new shape to 15%. You should end up with something like this.
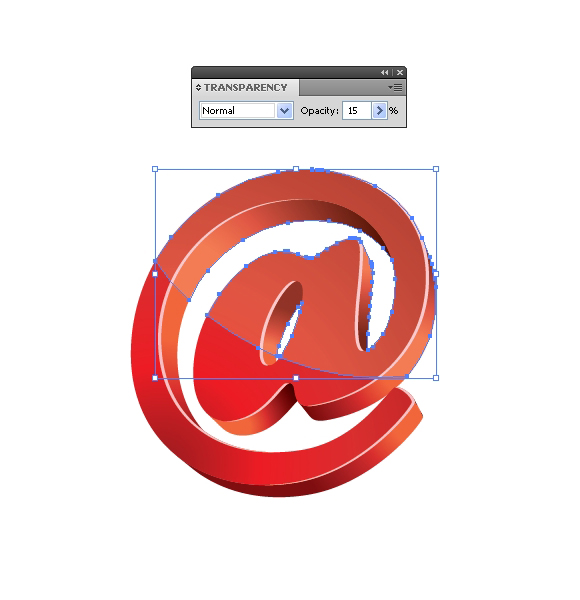
Step42
Select all the elements, Group them (Ctrl / Cmd + G) and place them in the envelope. To achieve that you need to apply the Bring to Front command to the foreground of the envelope. This way it will look like the @ symbol is inside the envelope.

Step43
There is one more thing we have to do, which is creating the shadow for our @ symbol.
Select the @ symbol and duplicate it (Ctrl / Cmd + C, Ctrl / Cmd + F). Ungroup (Shift + Ctrl / Cmd + G) the copy you have just created and under the Pathfinder Panel hit the Unite button. Set the Fill color to #414042. Lower the Opacity of the shadow to 13%.

Step44
Rotate and nudge the new shapeby a few pixels to the right. Send it behind the red @ symbol. You should end up with something like this.
Today we have had the opportunity to combine different kinds of tools and techniques in order to create a cute email icon. As you have noticed, some of the techniques we used are not perfect, but they can lead you and give you some ideas. Others can be achieved by certain adjustments. The most important thing is to have a good idea and some skills. I hope you liked this tutorial. If you have any questions I will be glad to answer them and help. Thank you for following along and do not forget to download the source file below.
[amember_protect guests_only] If you are already a Premium Member then just sign in and you can download these ActionScript 3 Flash preloaders.Not a member? Sign up today or read more about our Premium Member area.

[/amember_protect]
[amember_protect user_action=’hide’ visitor_action=’hide’]
Download the email vector icon for this tutorial by clicking the button below:


[…] Creating an Email Icon in Adobe Illustrator […]
[…] Creating an Email Icon in Adobe Illustrator […]
[…] Creating an Email Icon in Adobe Illustrator […]