WEB 2.0 Buttons AI Tutorial
6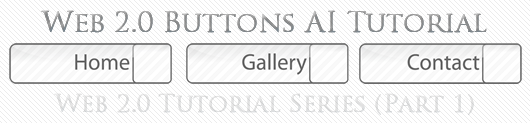
There are many times we want to make cool web 2.0 graphics for our website or blog. In this series we will learn a lot about how to make modern web 2.0 graphics. We will start on how to create web 2.0 buttons.
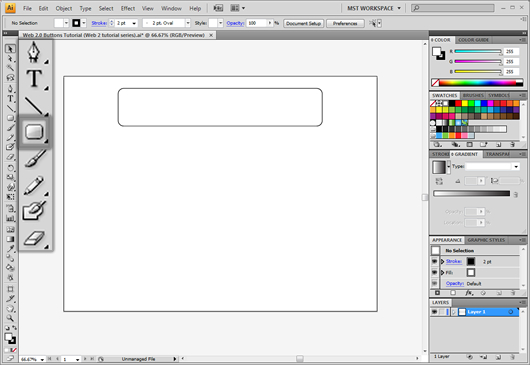
We will first start with a new document on illustrator.

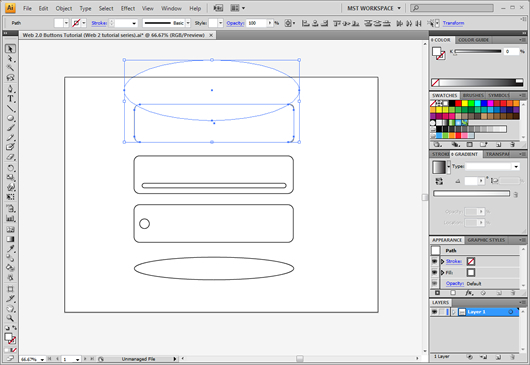
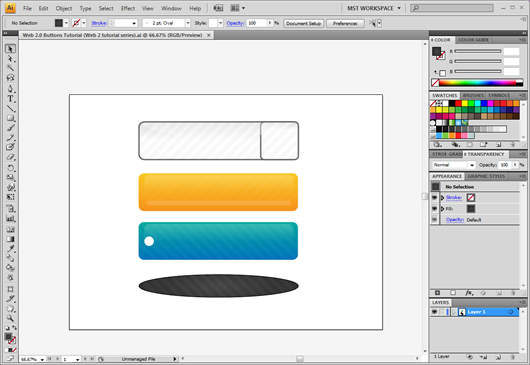
Now let’s make some outlines for our buttons. We want the shapes to be cool enough. For the initial draft let’s create a rounded rectangle from the shapes panel as shown :
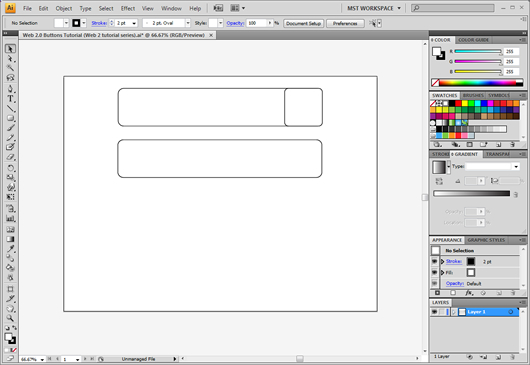
We will yet create another rectangle in square dimensions and put it inside our main rectangle. The result should look like this :

The outline of our first button is ready, let’s go on to another style. We will create again a rounded rectangle (or simply copy paste our current one)
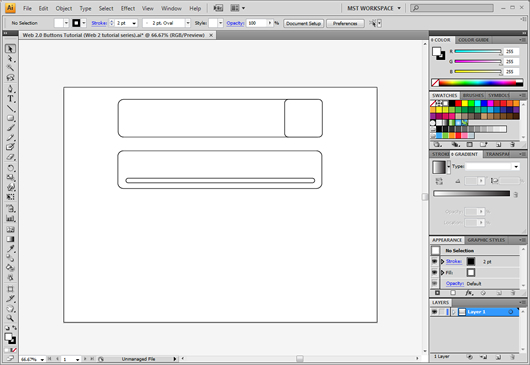
Then inside the button we will draw a really thin rounded rectangle on the bottom part of our button
We will repeat the procedure and make the outline for our third button
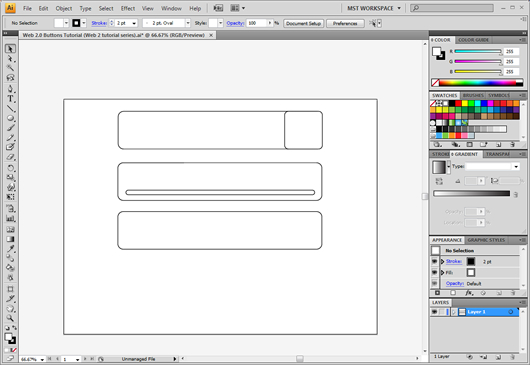
To stylize it a little bit we will add a circle on the left center side of the button

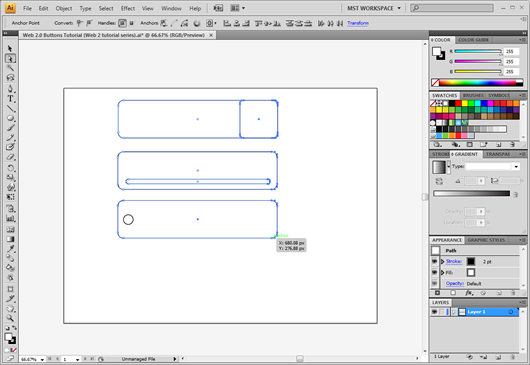
We can play with the button sizes simply by dragging the anchor points left or right using the direct selection tool (white arrow)
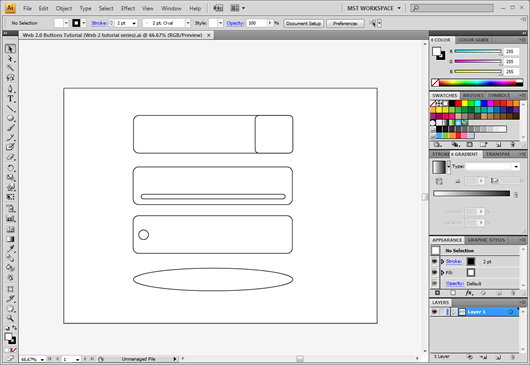
For our fourth button we will go ahead and draw an ellipse
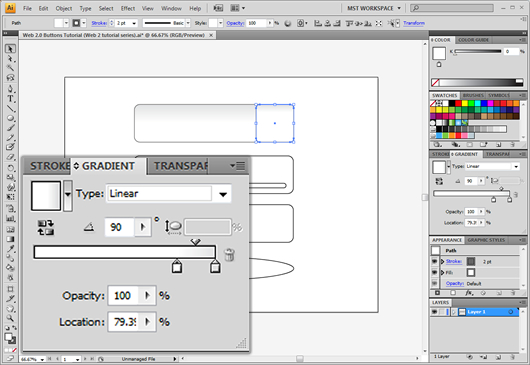
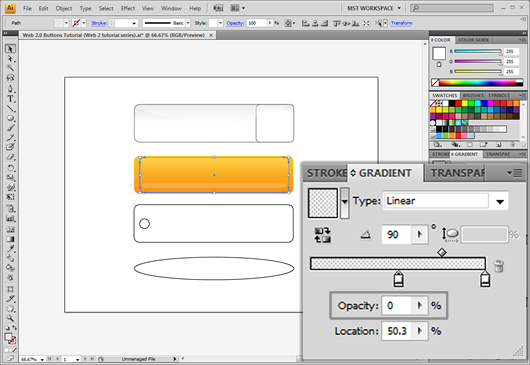
As the sketch mockups are ready we will go on to adding some coloring and effects to our buttons. Starting with the first button we will apply a light white-grey gradient with the start point being white and the end point being a very pale grey, we will also drag the start point in around the middle and add a direction of 90 degrees.
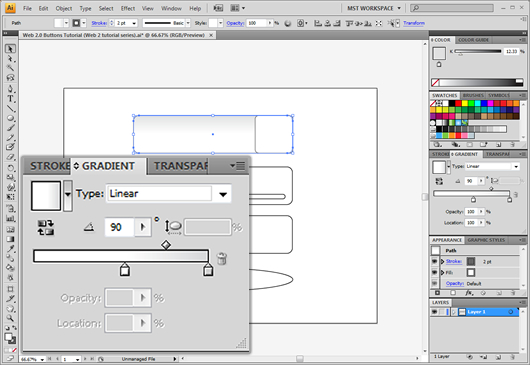
We will apply the same gradient on the small rectangle as well, only that the start point will be even more aligned to right
We will go ahead and add some shine. To do this we will create an elipse, and we will also duplicate the main button.
Then we will right click -> Make clipping mask

We will finally add some 40% transparency to it. The result should look like this :

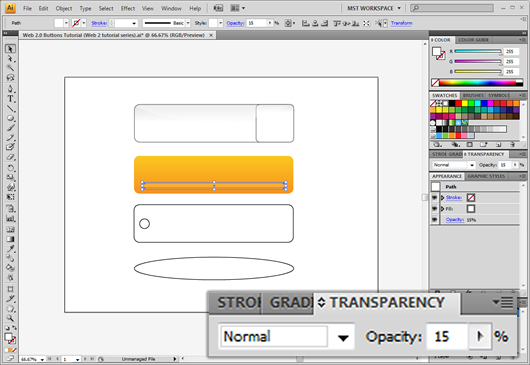
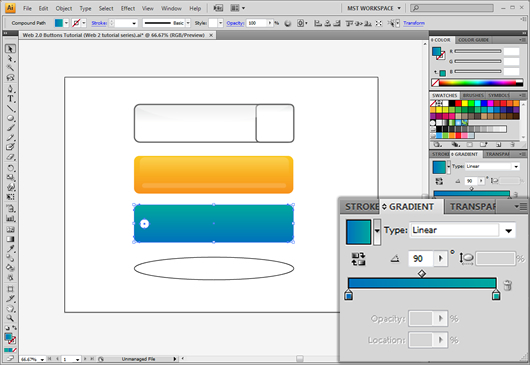
For the second button we will apply a pretty light gradient between saturated and light orange. With the direction set to 90 degrees.
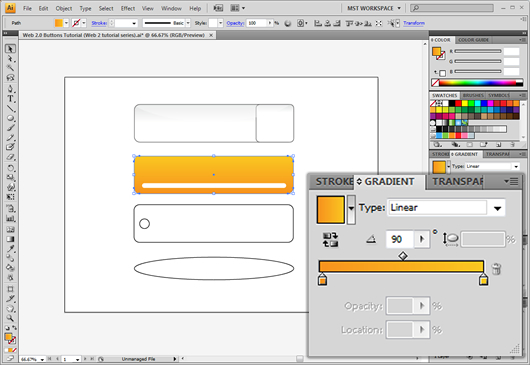
We will then set the opacity of the white thin rounded rectangle to 15%.
Then we will copy the main rectangle and add a white to white rectangle with the starting point set to 0% opacity and the end point set to 20% opacity we will also drag the starting point to around the center.
For the stylizing of the 3rd button will firstly select both elements and right click -> Make compound path. Then we will add a gradient with blue as a starting color and ending color a very pale blue-green coloration always with the direction set to 90 degrees.
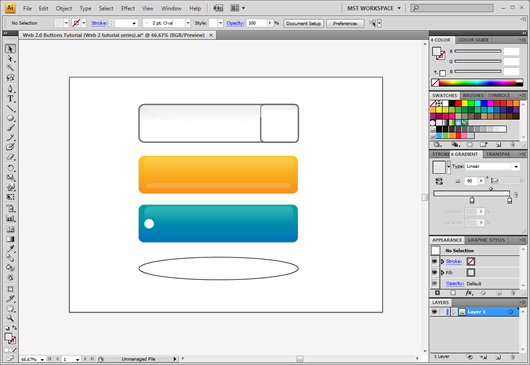
We will then copy paste the shine we created for the second button on our third button placing it a little bit lower though.
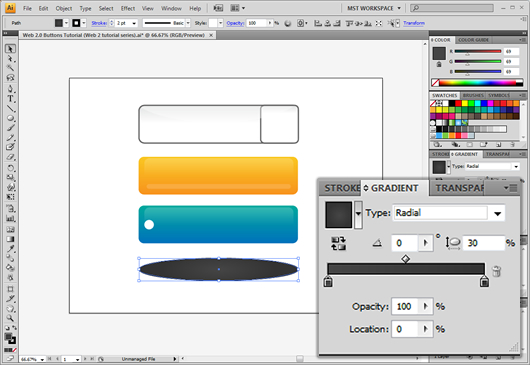
For our 4th button we will use a pretty pale radial gradient with grey colorations and oval ercentage set to 30% as shown
As the effects of the buttons are ready we will add some texture to them. To do this we need first to create a texture pattern. We will create a thin rectangle and copy paste it many times. After that we will rotate all the rectangles around 45 degrees. We will also make sure we press ctrl + g in order to group them

Just like we did when we applied the shine we will copy the main rectangle and right click -> make clipping mask. Then we will also apply a 3% transparency.
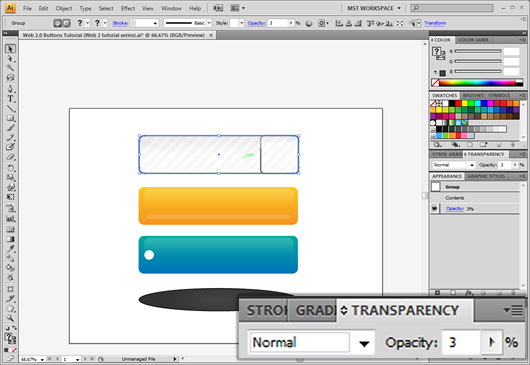
We can add the same texture on the other buttons as well just we should make sure to color the rectangles white and not grey. We can also play with the effect direction by right clicking -> transform -> reflect
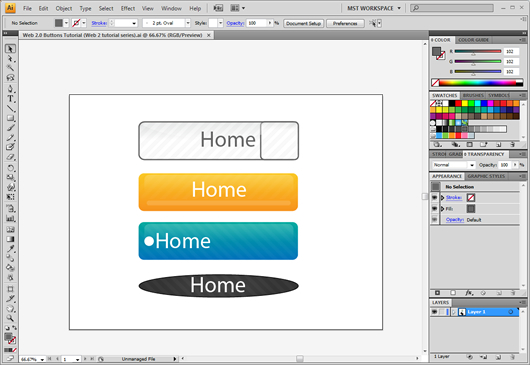
We can finally add some text

Download: AI


[…] There are many times we want to make cool web 2.0 graphics for our website or blog. In this series we will learn a lot about how to make modern web 2.0 graphics. Original post: WEB 2.0 Buttons AI Tutorial […]
Very good tutorial! Never tried to make a button in AI but ill try it now 🙂
[…] GraphicMania.net?WEB 2.0 Buttons AI Tutorial?????Illustrator?Web2.0?????????????????????????? […]
[…] WEB 2.0 Buttons AI Tutorial […]
I make all buttons in Photoshop, di not know that I can do it in Illustrator, thanks!!
.-= diseño y web´s last blog ..Como instalar WordPress en Cpanel =-.
Wow, its superb….All the steps are explained very beautifully. Many thanks for sharing this informative resource. Kudos to you 🙂