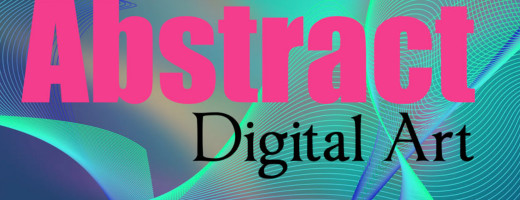
How to Create Abstract Lines in Illustrator (Part 2)
0
This tutorial is the the second part where we will learn how to create an Illustrator background with abstract lines. In this part, we will go through creating the abstract lines and apply different colors to it.
In the first part How to Create Abstract Lines in Illustrator (part1), we learnt how to create the abstract lines. Here, we will continue to complete the tutorial by creating different styles of abstract lines and use it in the background of your design.
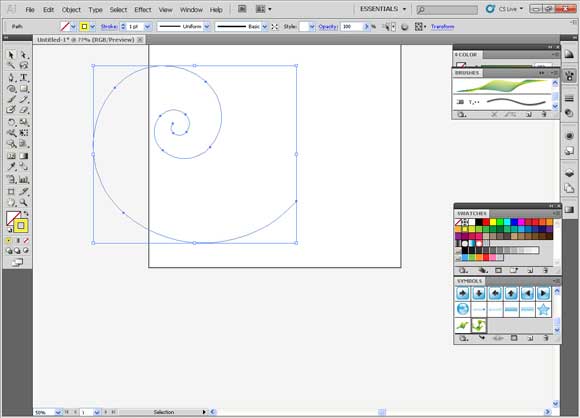
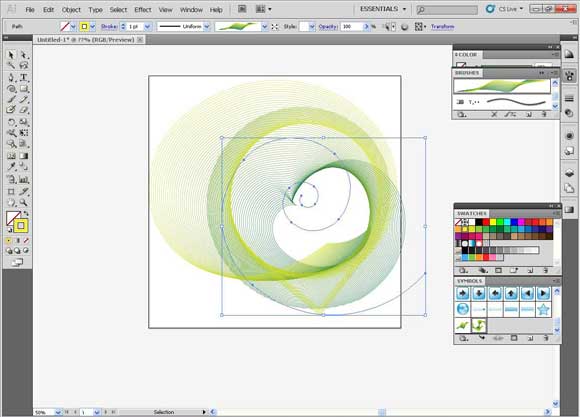
Step14
Repeat the step of drawing different lines until you make many shapes.
Step15
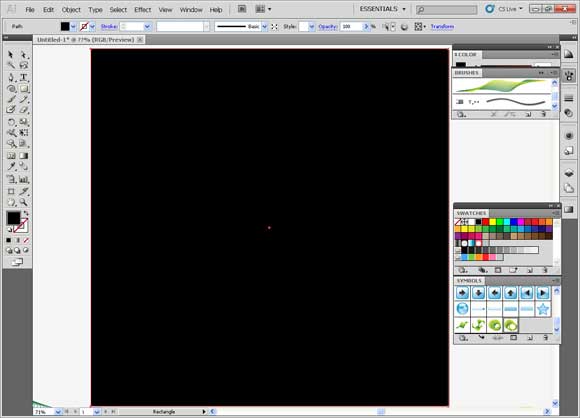
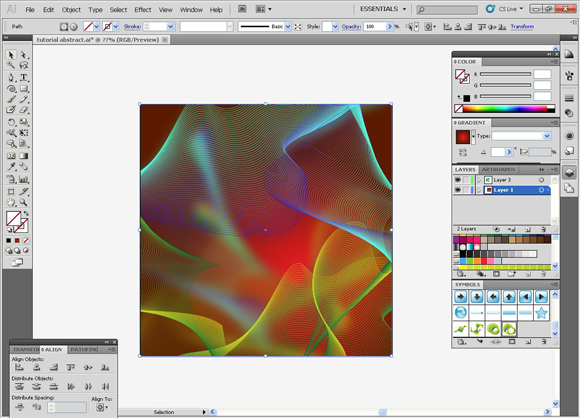
Now, we are going to make the background and effects. Draw a rectangle with the same dimensions as your document.
Step16
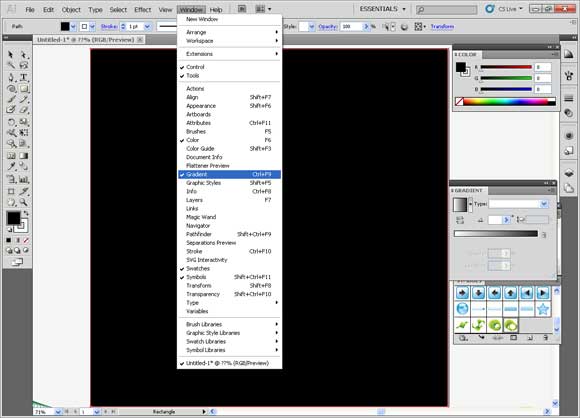
We will fill it with gradient. You should make sure the gradient panel is open or open it from the window menu.
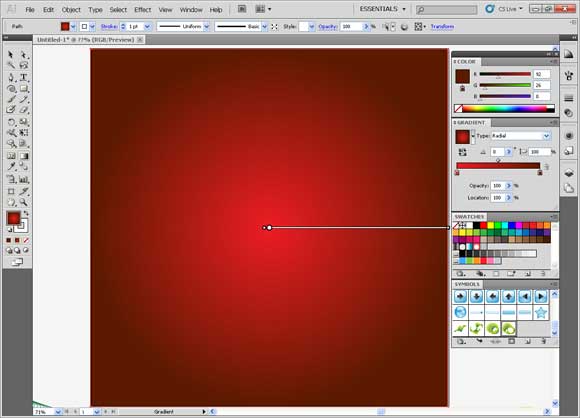
Step17
Then drag any color swatch from the swatches panel and drag it on the gradient panel over the slider. You can add many colors. You can also delete any color by dragging it down. Here we choose bright red and dark red.
Step18
Drag it from the center toward the bottom right.
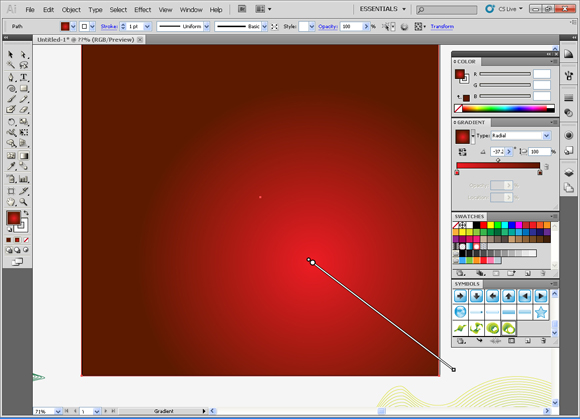
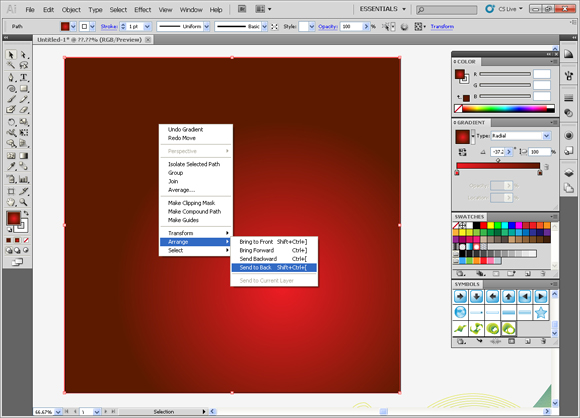
Step19
Now, we have to make it in the back behind the other objects. We do this by choosing arrange from the object menu then choose send to back, or by right click then choose arrange and then send to back.
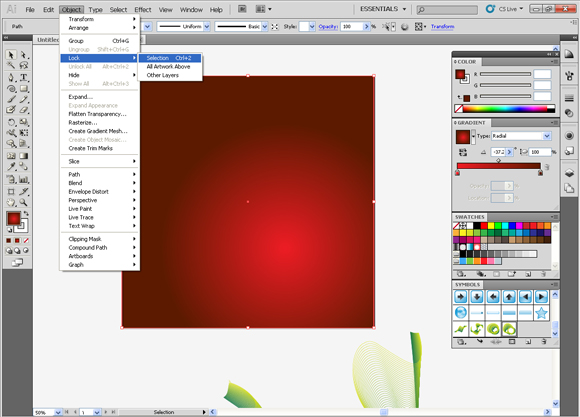
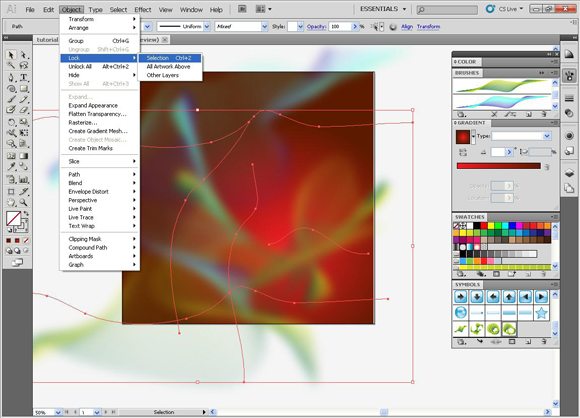
Step20
To make sure that it will not move while drawing the other object, we lock it then choose lock selection from the object menu.
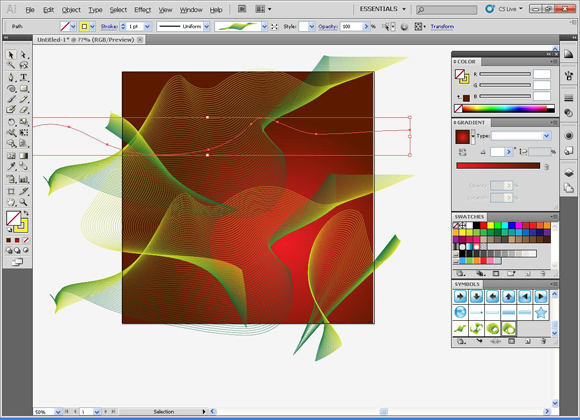
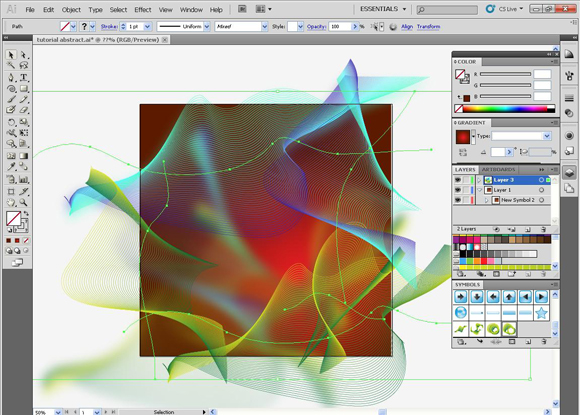
Step21
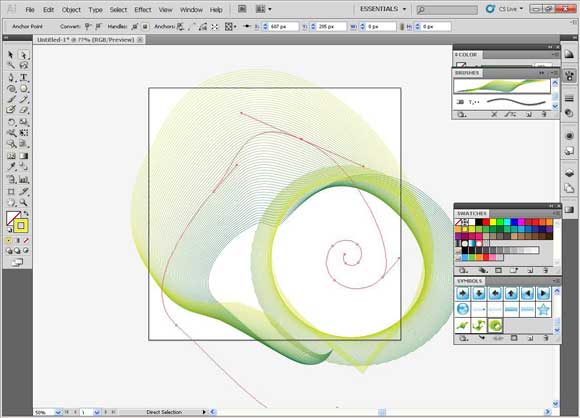
Bring the shapes we made before and put them in the middle of the document.
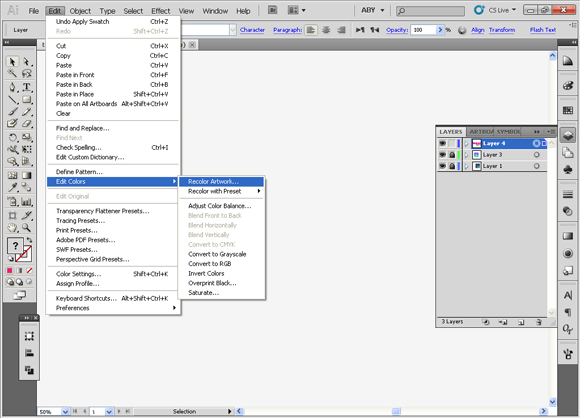
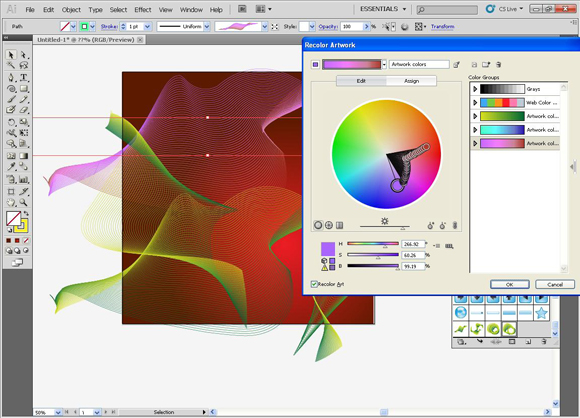
Step22
If you like to change the colors of the shapes in whole, you can use the Recolor Art work Icon which is in the Control Par. You can find it also in the edit menu under “Edit Colors”

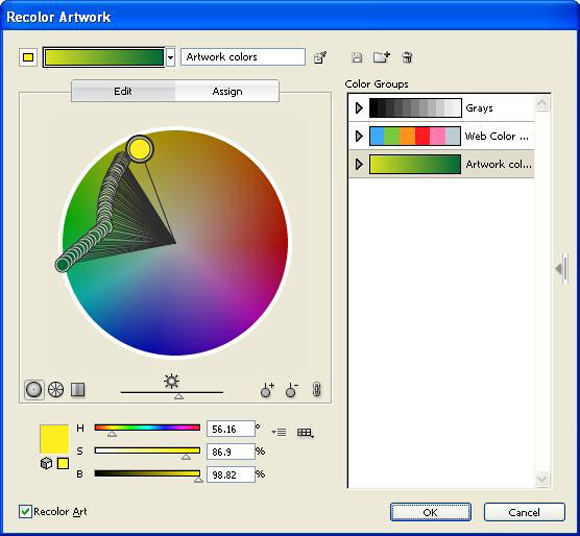
Step23
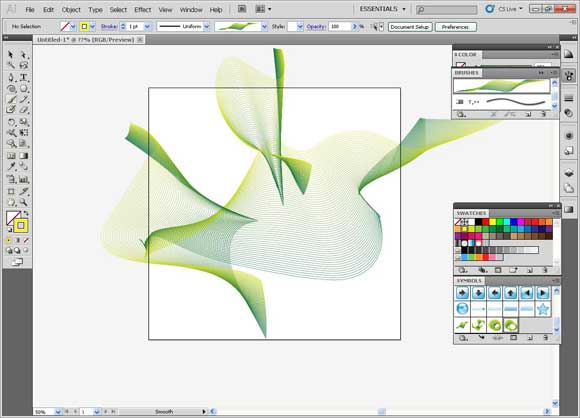
You will find the next window which shows the art work as preview and the option for the Recolor. Don’t forget to press the link icon to connect the colors with each other so that the whole will be colored. As you see, move any of the colors until you get the harmony you like. Here we choose this harmony of green. The other one we choose a harmony of violet
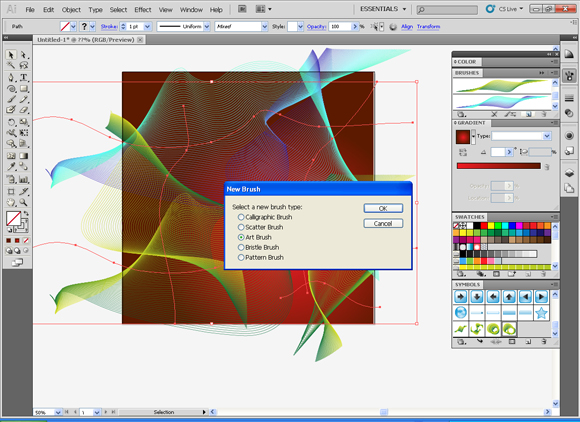
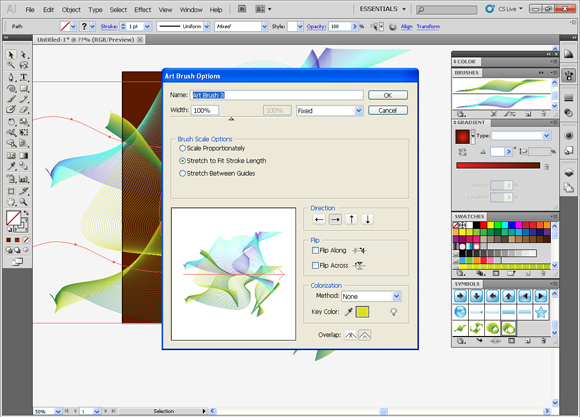
Step24
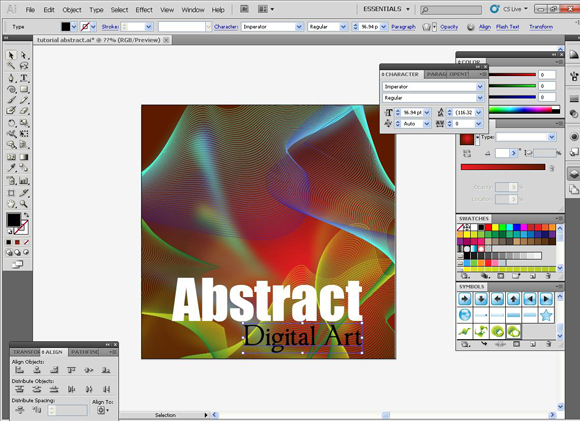
Then we select all the items of the lines to make them as a brush. From the brush pallet, click the icon of new brush then choose art brush. Be sure that stretch to fit stroke length is selected and the direction is horizontal to right.
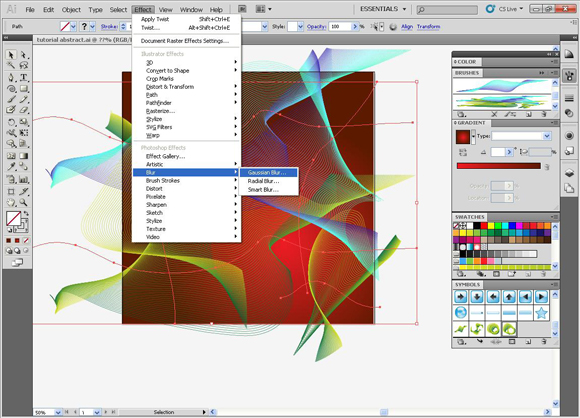
Step25
Here, we are going to make the existing ones to be blurry. From the effect menu, choose blur then Gaussian blur.

Step26
Lock the blurred object so that it won’t move when clicking CTRL+2
Step27
Now draw some curve lines with the brush of lines that we made. Here, we took a copy of the lines before blurring them and pasted them on a new layer. You know that the object on a different layer when you see its out lines with different color.
Step28
Now we are going to get rid of the extra parts that extend out of the area of our art board by making a clipping mask.
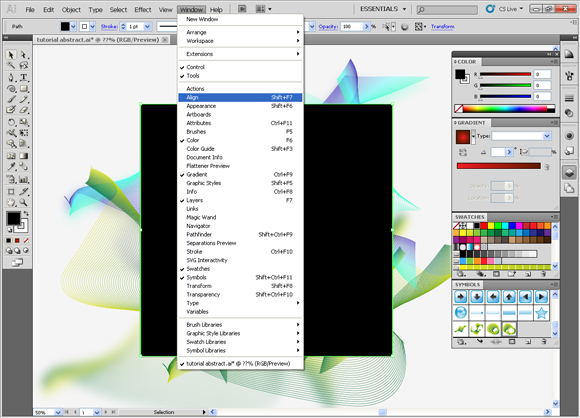
While you are in the new layer that contains the lines, draw a square with the same dimensions as art board (1000 x 1000). The color doesn’t matter because it will be used as a path not as a shape.
After drawing, use the align tool to be sure that it is aligned in the center horizontally and vertically. Open the align panel from the window menu.
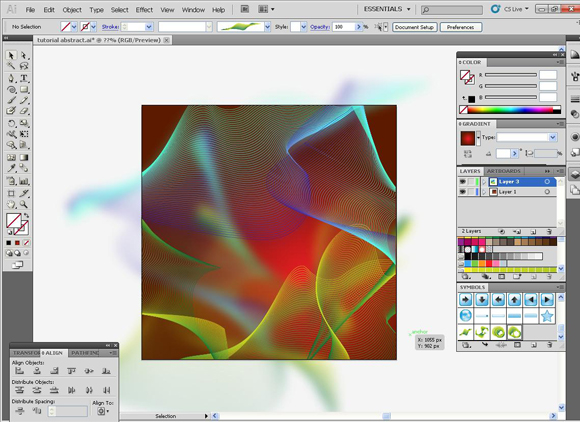
Step29
Select the square and choose the icon that shows center horizontally and vertically.
Step30
Click on the clipping mask icon on the layer panel.
Step31
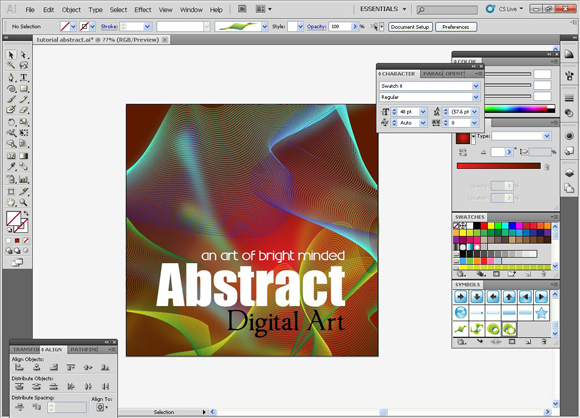
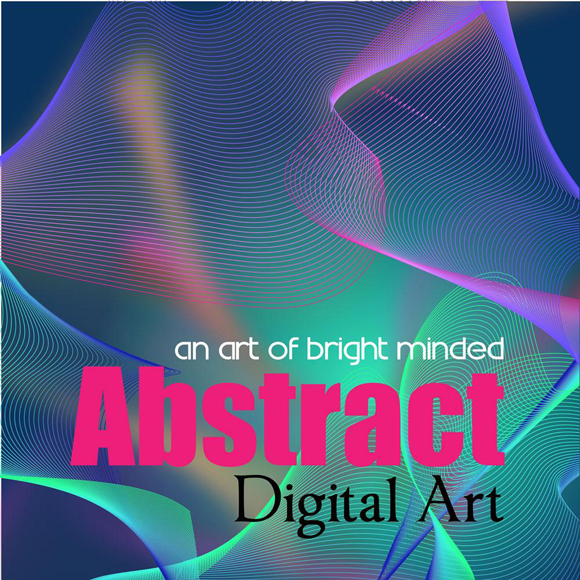
And now, we will add the text to the background using the Text tool
Also, you can choose different color combinations as below
If you are already a Premium Member then just sign in and you can download the source files of this tutorial.
Not a member? Sign up today or read more about our Premium Member area.