Man and Earth Photoshop Tutorial
8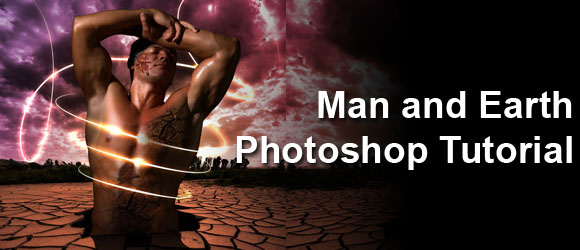
In this Photoshop tutorial, we will learn steps by step how to create a photo manipulation effect for a man getting out of the ground with some dramatic effects and glowing lines in the background.
Level: Intermediate
Tools: This tutorial is created in Photoshop CS5, but you can easily follow it if you have earlier version of Photoshop.
Resources: The images used in this tutorial are from Shutterstock photos.
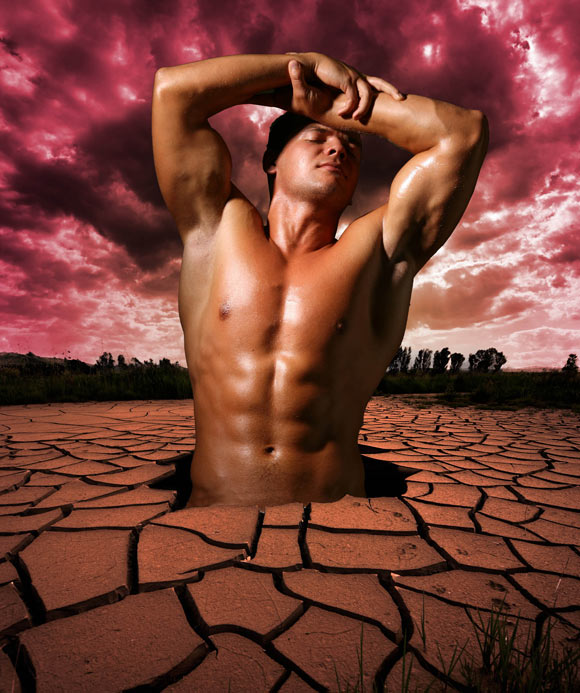
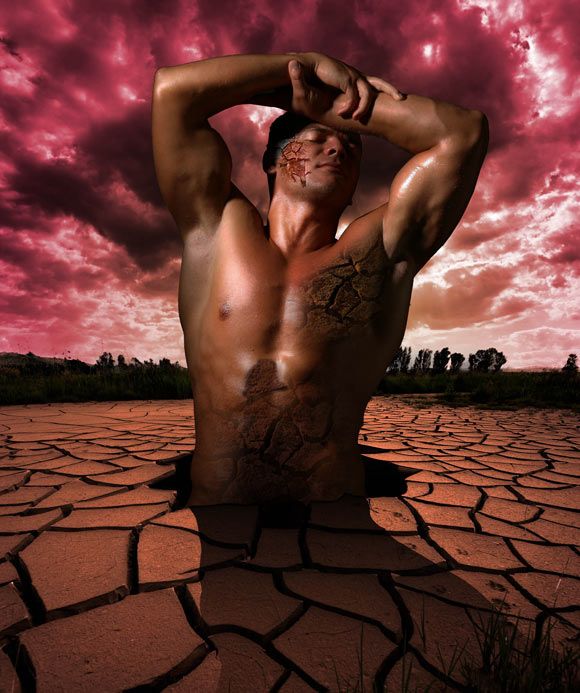
Below is the result that should be reached by the end of this tutorial, and you can download the Photoshop source file of this tutorial by the end of the Tutorial.

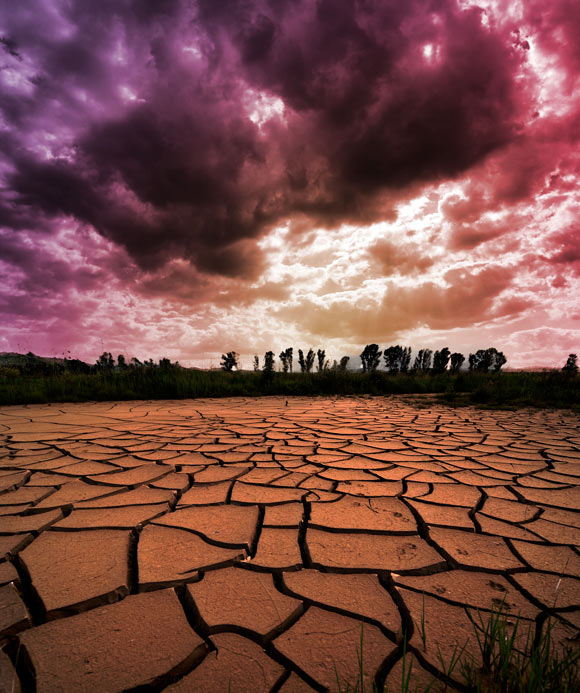
Before we start, you can find below a preview for the images that are used during this tutorial, and we will see how it is used while going through the tutorial steps.
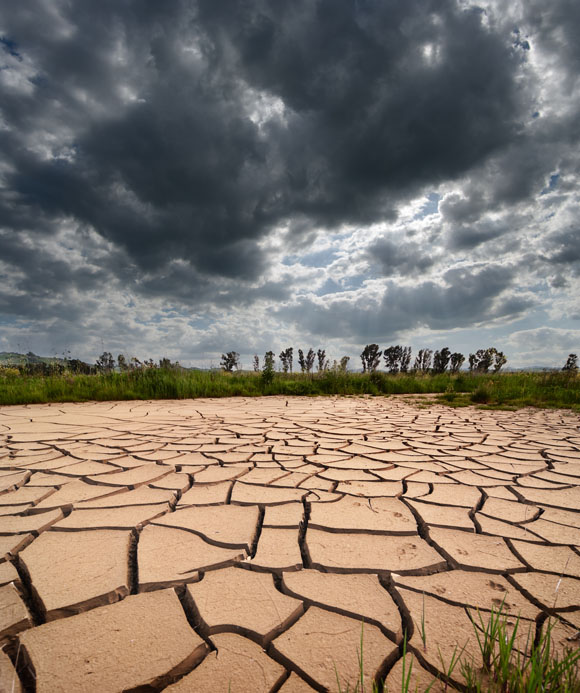
Image by shutterstock
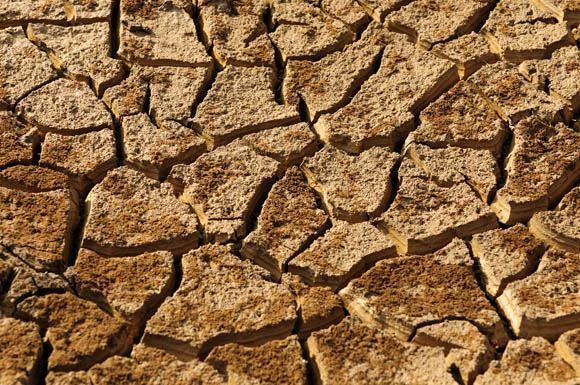
Image by shutterstock
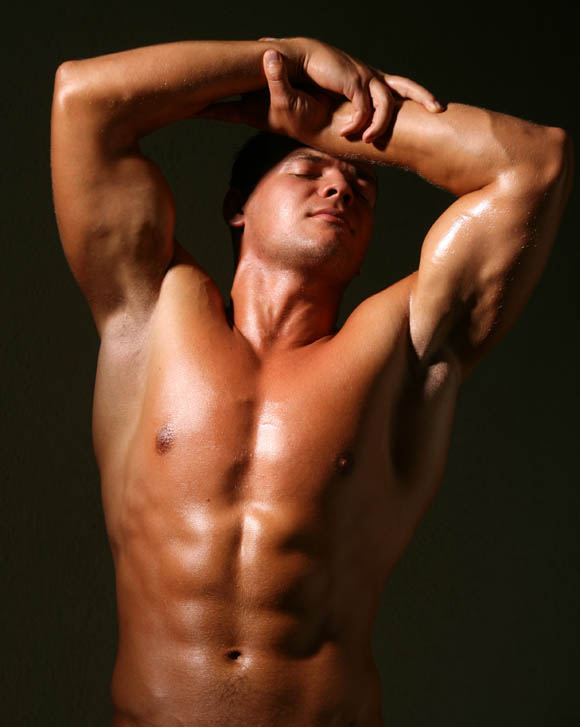
Image by shutterstock
Now, let us start with our tutorial’s first steps:
Step1
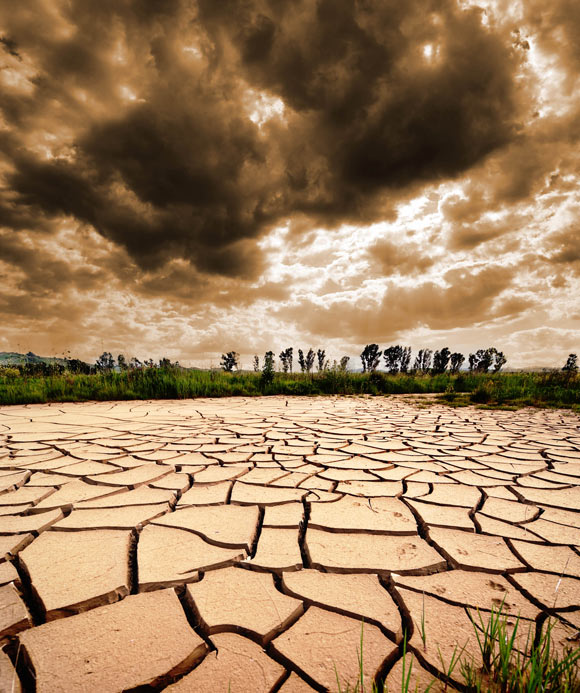
Open the Landscape image.
Step2
From the Image > Adjustments, choose Equalize to give the background more dramatic effect.

Step3
Select the Quick Selection tool and select the sky. Click and drag to select the sky areas around the trees. Sometimes, the selection may get parts of the trees; you can deselect these areas by holding ALT key while dragging over these areas.
Step4
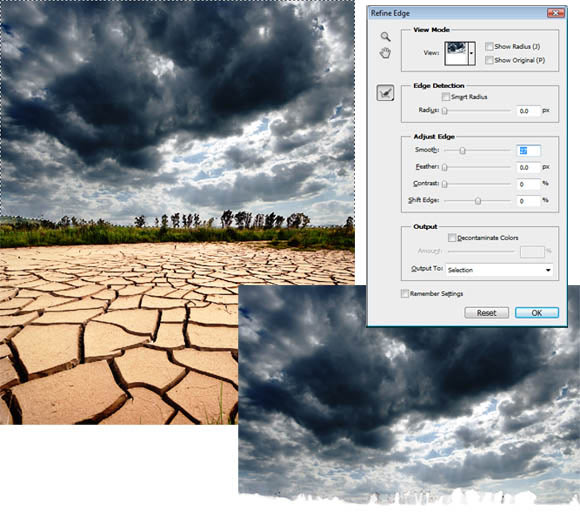
While the sky is selected, choose Refine Edge from the top Properties bar.
Step5
In the Refine Edge dialog box, set the Smooth value to 27 and move with the curser through the selection edges around the trees to refine the edges and make it smooth.
Step6
While the sky is selected, copy it twice into two layers.
Step7
Hide the upper sky layer and select the first sky layer.
Step8
From the Image > Adjustments, choose Hue and Saturation.
Step9
Check the Colorize option and change the Hue value to 30 and Saturation to 50.
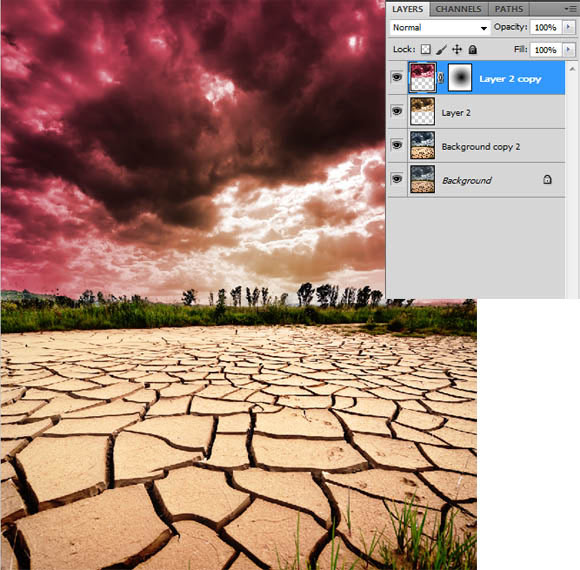
Step10
Select the upper sky layer and from the Hue and Saturation dialog box, check the Colorize checkbox and set the hue to 360 and the Saturation to 40.
Step11
Select the sky layer by clicking in the layer thumbnail in the layers panel while holding the Ctrl key (Command in Mac).
Step12
Inverse the selection by clicking Select > Inverse.
Step13
Use the Brightness and Contrast from the Image > Adjustments to make it darker.
Step14
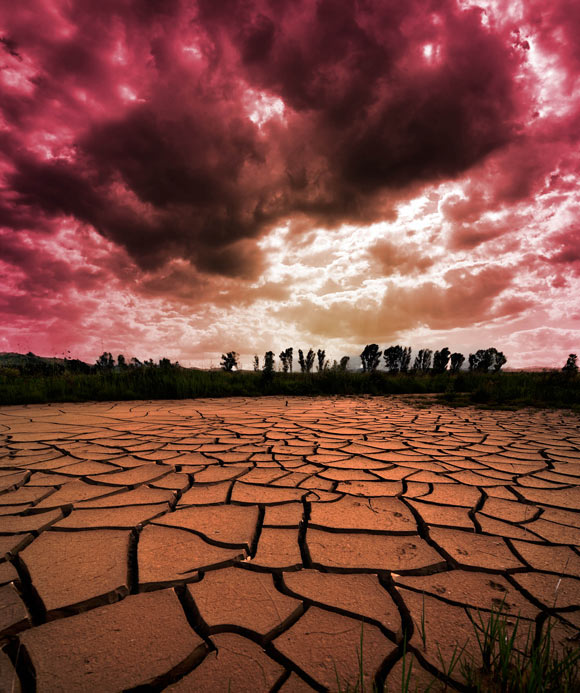
Repeat the above steps with another copy of the sky with different colorize options such as setting the Hue to 284 and the Saturation to 25. The final sky effect should be as following:
Step15
Duplicate the ground layer and use the Hue and Saturation to give the ground the same scheme of the sky colors. Check the Colorize option and set the Hue to 360 and Saturation to 40.
Step16
Create a mask on the selected ground layer.
Step17
Select the Gradient tool and make sure that the gradient is set to black to alpha gradient and set the gradient type to Radial Gradient.
Step18
Apply the gradient to the mask to the ground.

Step19
Isolate the man model and copy it to the current document. Place it as the image below.
Step20
Create a selection for the area around the model as below.
Step21
Use the Hue and Saturation dialog box to darken the selected area. Apply this dark value in the two ground layers.
Step22
Remove the parts of the model that appears outside the created hole.
Step23
Duplicate the man layer and make it darker using the Brightness and Contrast from the Image > Adjustment menu.
Step24
Create a mask on the dark man layer.
Step25
Select the Brush tool. Set its Opacity to 50 and its color to black. Paint over the mask to reveal the lighter copy of the man layer. Carefully, paint to reveal the bright areas and give the total look for the man layer more contrast and dramatic light effect.
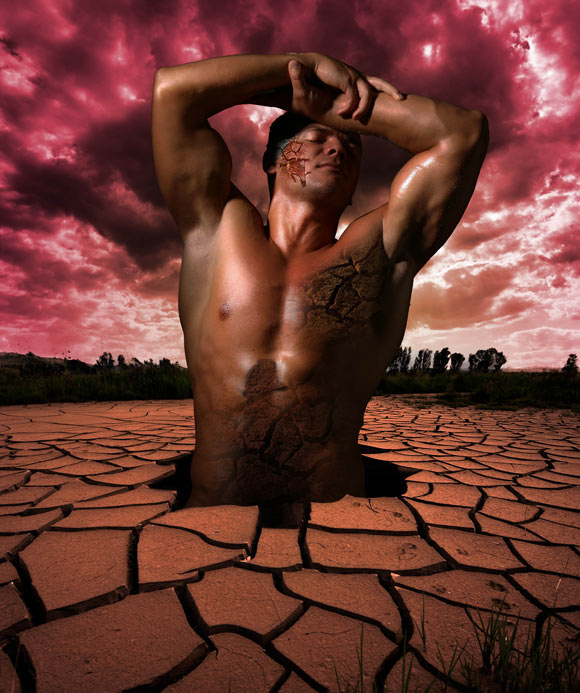
Step26
Copy the stone texture and add it to the man stomach starting from the gap in the group.
Step27
Load selection around the man outer edges by clicking on the man layer thumbnail while holding the Ctrl key (Command in Mac).
Step28
Select the stone layer and click the Mask icon to apply the mask over the stone layer.
Step29
While the mask thumbnail is selected on the stone layer, use Gradient tool to refine the texture of the stone to the man body.
Step30
While the stone layer is selected, make sure that the layer main thumbnail is selected and use the Gradient tool to darken the lower parts of the stone to appear like it is showing up from inside the gap.

Step31
Repeat the stone texture steps with other places such as the face and the chest.
Step32
Select the man layer and duplicate it.
Step33
Select the duplicated layer and fill it with black color.
Step34
Flip it to appear like the man shadow by selecting the layer using the Free Transform tool and set its place and rotation as the image below.
Step35
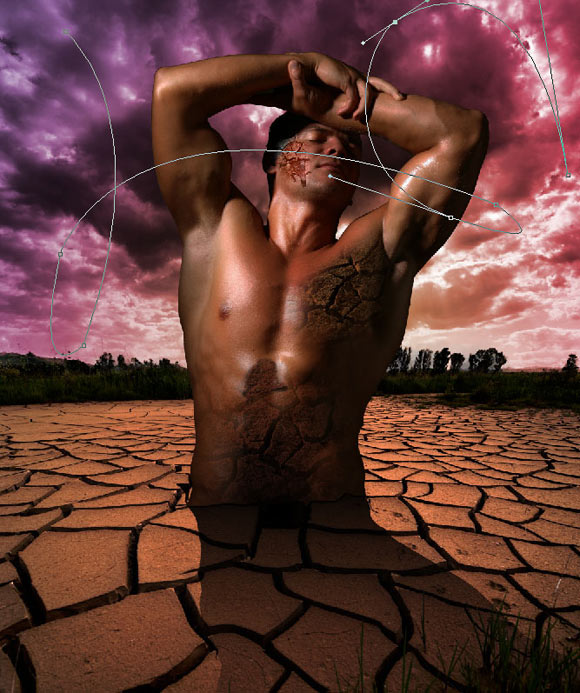
Now, let us add some glowing effect through the sky and around the man body. First Select the Path tool and draw the path on a new layer behind the man as below:
Step36
Select the Brush tool and select the Hard Round brush with Size 14 and Hardness %100. Make sure that the Tablet pressure control size is selected. Make sure that the foreground color is white.
Step37
Select the Path tool again and right-click on the path and choose Stroke Path. The Stroke Path dialog box appears, make sure that the selected option is Brush and the Simulate Pressure checkbox is active.
Step38
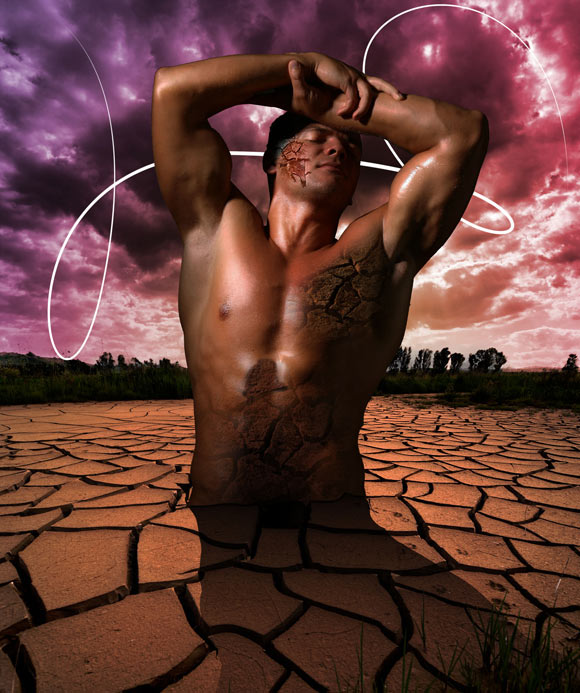
The path becomes stroked with a thin line with thin tips. You can hide the path by clicking on the Path layer in the Path panel while holding the Shift key.
Step39
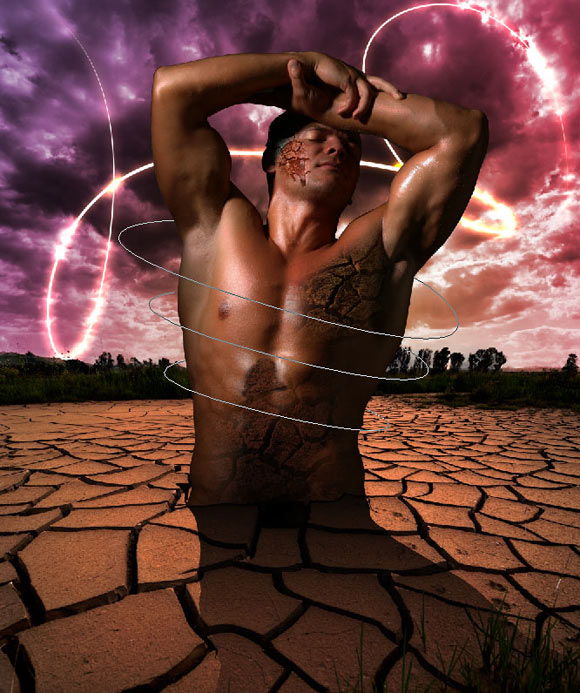
Add a new glow effect from the Layer Style and set its option as following:
Blend Mode: Color Dodge
Opacity: 100%
Spread: 3%
Size 40%
Step40
Apply this glow on the layer, and the results will be ad below:

Step41
On a new layer above the man body, create new paths around the man body as shown below:
Step42
Repeat the brush and glowing steps we mentioned above on the new path and the final results will be as following:
This is the end of our today’s tutorial. I hope you find it useful.
[amember_protect guests_only]If you are already a Premium Member then just sign in and you can download the source files of this tutorial.
Not a member? Sign up today or read more about our Premium Member area.


[/amember_protect]
Thanks for sharing this nice post!
I always like to read your blog.
really beautiful photo manipulation tutorial. thanks for sharing
.-= Tutorial Lounge´s last blog ..How to create Fantacy Woman in Amazing Photo Manipulation =-.
Thanks for sharing this nice post!
I always like to read your blog.
Yeah, it’s good, very useful, thanks 🙂
nice tutorial, the result is wonderfull.. thanks
Great step by step tutorials!!!
Thanks for sharing a useful tutorial. Very useful for my photoshop work. Nice sharing and keep posting.
this is truely a brilliant result from a very easy tutorial.. well worth following .. thanks for the share