Photo Manipulate Tutorial Using Photoshop
4
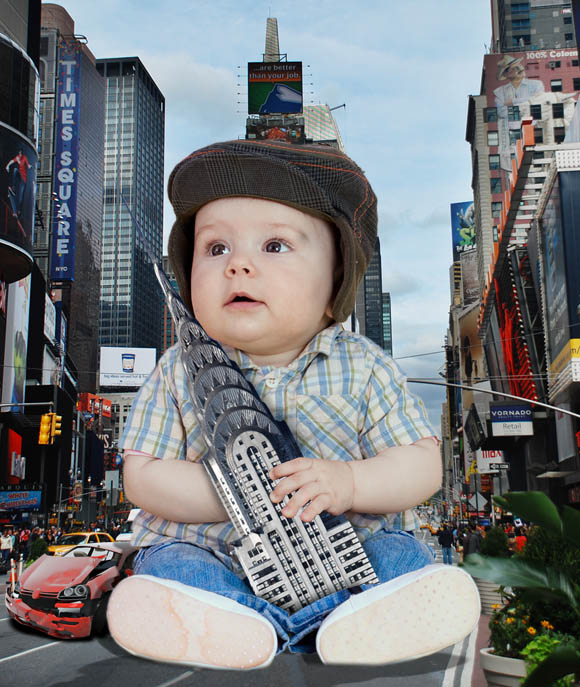
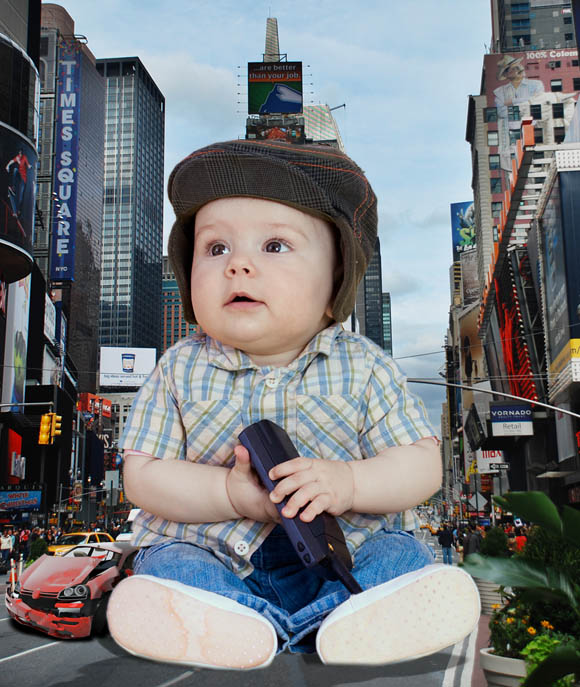
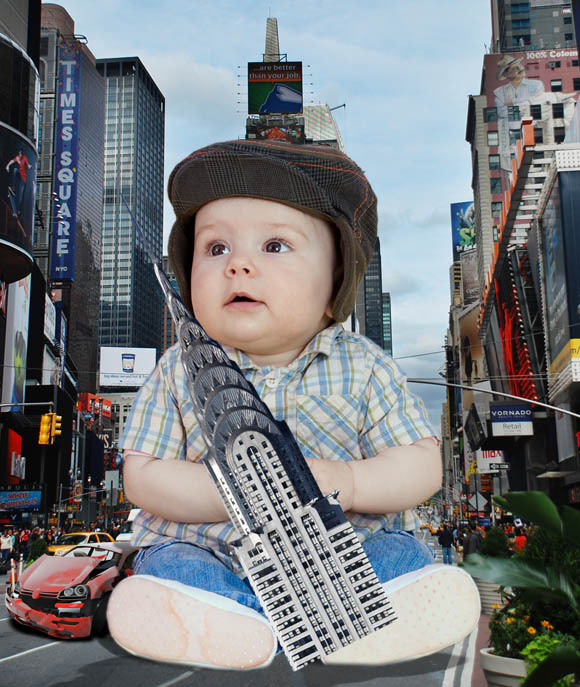
It is time for a new Photoshop tutorial; today’s tutorial is for a photo manipulation trick that is used in ads and posters. In this tutorial, we will see step by step how to put a giant baby in the middle of New York streets playing with part of the Chrysler building.
In this tutorial, we will be using Photoshop’s basic tools such as the new Quick Selection tool in Photoshop CS5, masks, and adjustment layers to create this effect. Also, we will use the Color Match feature to give all the images the same color tone for the background. The final result of the tutorial should be like below
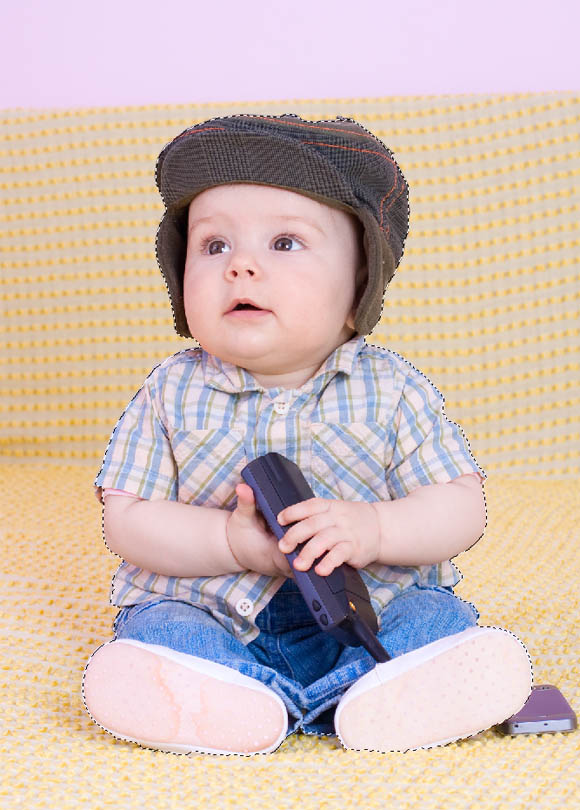
As usual, let’s check the images that are used in the tutorial before going into the tutorial steps. These images are from Shutterstock.

Image by shutterstock

Image by shutterstock
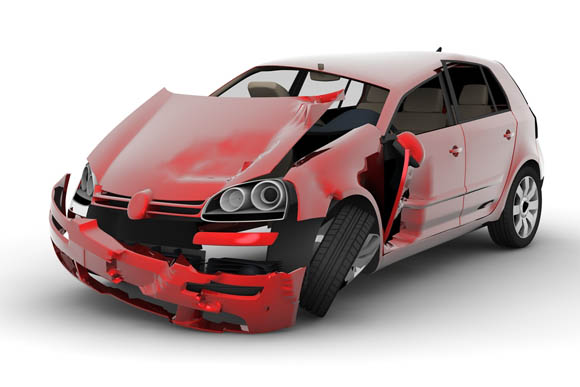
Image by shutterstock
Now, let us start with the first step in our tutorial that I hope you enjoy.
Step1
Open the kid’s image and select around the kid using the quick selection tool. The new quick selection tool provides an easy method to select objects with accuracy and better results. Select the Quick Selection tool and drag around the kid and you can increase or decrease the size of the selection brush using the Ctrl+ { and Ctrl+} (Cmd +{ and Cmd+} in mac). Some times, the selection goes over parts that you do not want to select. However, you can switch between the plus and minus icon on the top Properties bar to add to the selection or remove areas from it.
Step2
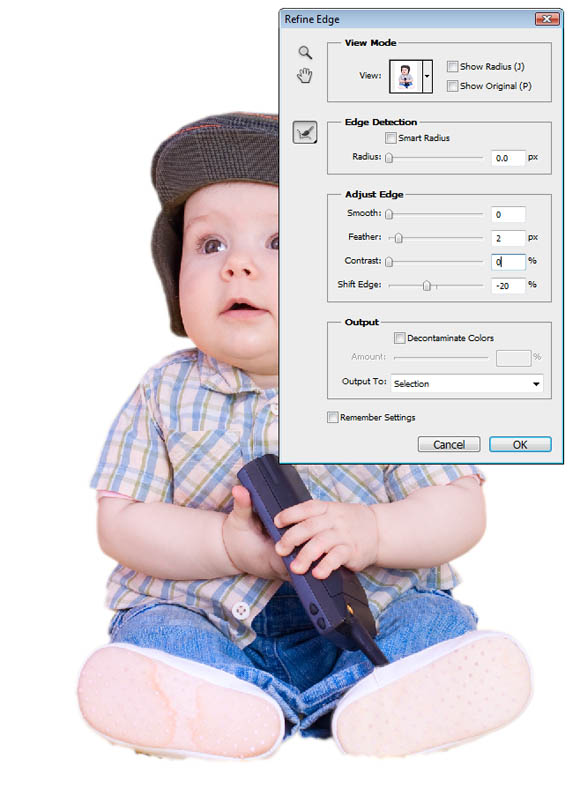
Convert the selection by choosing Select > Inverse to select the kid only. You can refine the selection by clicking the Refine button in the Properties bar.
In the Refine Edges dialog box, increase the Feather to be 2 px and the Shift Edge to -20. These values depend on the size of the document and how you want the selection to look.
Step3
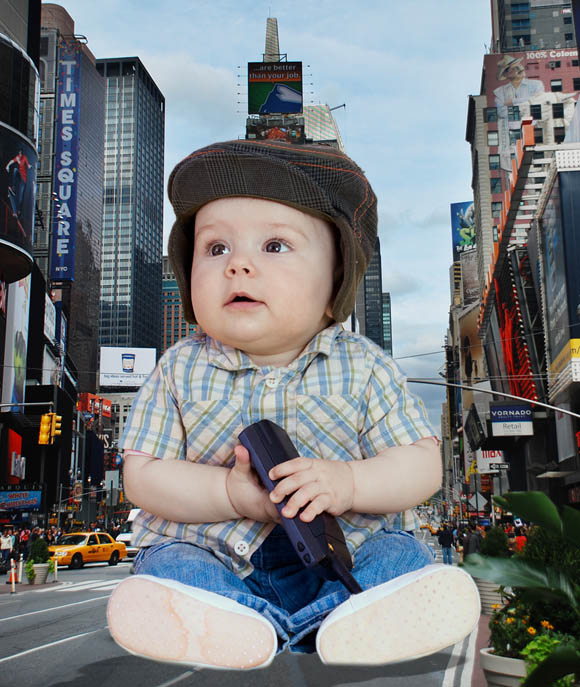
Copy the kid to the street image and place him on the ground as in the image below

Step4
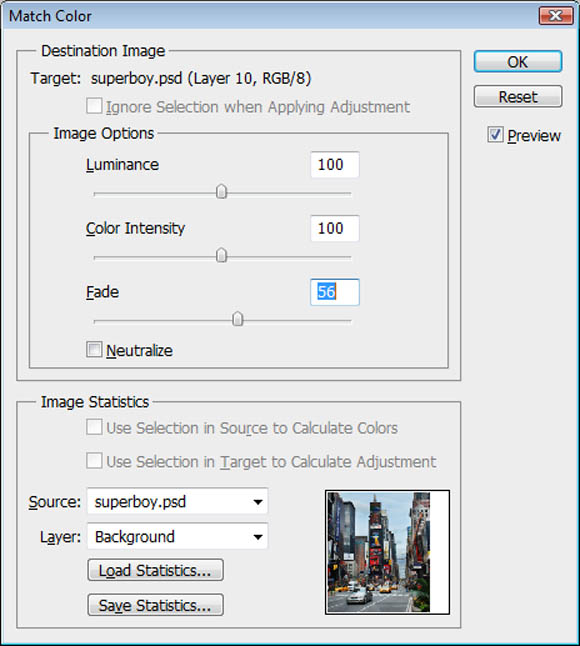
The kid colors are not matching the street image’s color tone. However, we will use the Image > Adjustment > Match Color
In the Match Color dialog box, select the Source to be the current file and the layer to be the street layer. The results may not be as expected. So, change the fade value to make the kid’s colors fit well with the background tone.
Step5
Now, we will create the shadow of the kid on the ground. Make a selection of the kid layer and change its feather (Shift+F6) to 5.
In a new layer, fill the selection with a black color, and flip the black color layer and free transform it to fall like a shadow for the kid on the ground as the image below. You can reduce its opacity from the Layers panel to lighten the shadow.
Step6
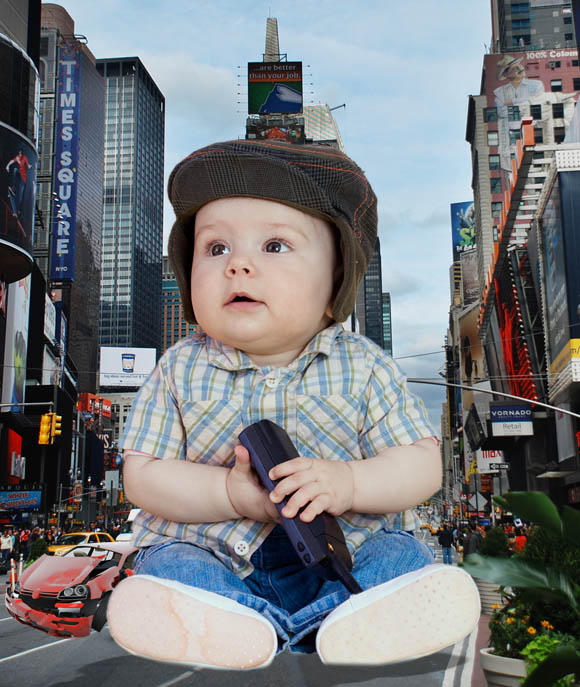
After adding the kid image to the scene, let us add the crashed car behind him. You can do this by selecting the crashed car and paste it in the scene behind the kid.
Step7
Use the Match color feature to give the car the same tone of the street as we did in step4.
Step8
Create a shadow for the car on the group by repeating the same technique we used to create the kid shadow in step 5.
Step9
Since the car is behind the kid, we need to have a shadow for the kid falling on the car. Make a selection of the kid layer by clicking on the layer thumb while holding the Ctrl key (Cmd key in Mac).
Step10
Create a new Brightness and Contrast Adjustment layer from the Layers panel. Lower the brightness to make it darker and move it to the left to fall on the car.
Step11
Use the brush to draw over the Adjustment layer mask to remove the unwanted dark areas as in the image below. You’ll notice that I used this layer to create some shadows around the kid’s right leg as well.

Step12
In this next step, we will give the kid a toy to play with instead of the cell phone. We will replace it with part of the Chrysler building. I googled to find the best angle for the Chrysler building that suits the angle of the kids hand and copied it to the kid file.
Step13
Create a selection around the kid’s left hand and fingers and Invert the selection. While the building layer is selected, click the Mask icon to display the kid’s hand over the building.
Step14
Remove the building bottom to appear as if it were lying on the boy’s jeans. You can do this by painting over the building mask to remove the unwanted areas of the building.

Step15
Use the brush with black color and 20% opacity to create a shadow for the building on the kid’s shirt and body. And create a new layer over the building and draw a shadow for the kid’s jeans on the building as well.
This is the last step in our tutorial. You can now follow these steps and apply it on different kids’ images with different actions and activities. The important point is to choose the best position and angle for the kid and the images that will be used in this photo manipulation.
Now, we reached the end of the tutorial steps, I hope you find it useful.
[amember_protect guests_only]If you are already a Premium Member then just sign in and you can download the source files of this tutorial.
Not a member? Sign up today or read more about our Premium Member area.


Really nice , Thanks for sharing , Baby is also so sweet
Good manipulation work ! Nice work. Thanks for step by step process.