Poppies of Summer Wallpaper Tutorial
6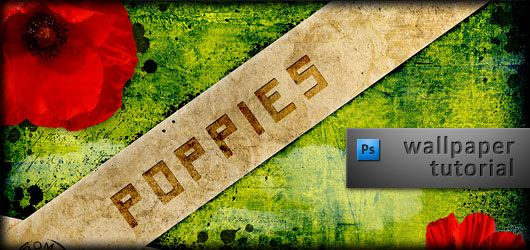
In this exclusive photoshop tutorial, you will learn step by step how to create this amazing poppies effect wallpaper in Photoshop.
If you like this tutorial, please share it through the be social networking buttons and join our News feed to receive tutorials and inspirations directly into your email. So, lets start with the tutorials.
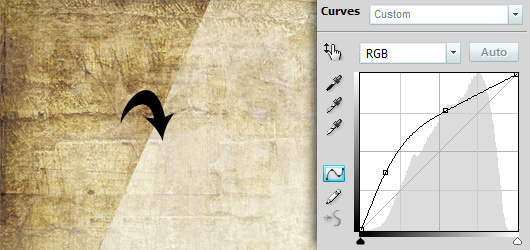
1. Take a paper or wood “dirty” texture. Adjust its color and lightness with Curves or other tool.
2. Apply gradient map to this texture to adjust its color.

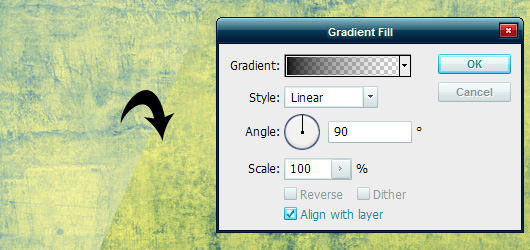
3. Add a new adjustment layer with gradient fill, transparent to black, 90 degrees, as shown.
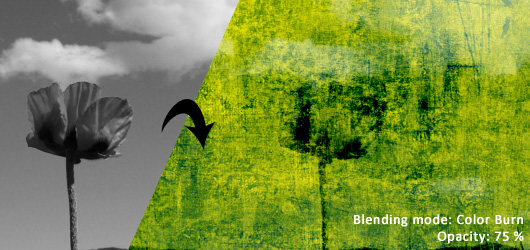
4. Place a b/w photo of a poppy field, and set its blending mode to Color burn and decrease the opacity to 75% or so.
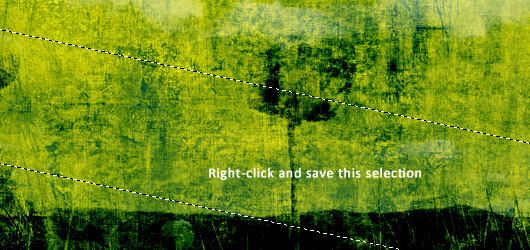
5. Select rectangular marquee tool, draw a rectangle, then right-click and select “Transform selection”. Scale and rotate it so it looks like a wide strip across the image. Right-click and save this selection.
6. Place a new image with paper texture, rotate it or scale as you need. Rasterize it. Select Rectangular marquee tool, right-click and load the previous selection. Then add mask to new paper texture and the selection will automatically become the mask.
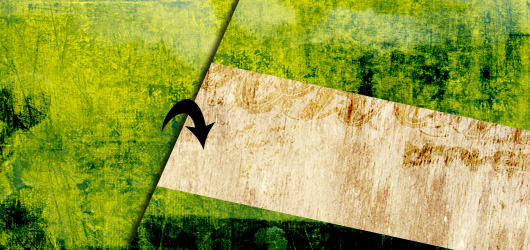
Then repeat the same actions with another texture and selection.
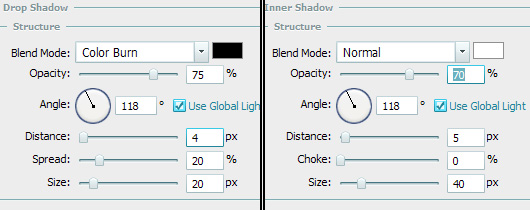
7. Edit the blending options of the “paper strip”: add Drop Shadow and Inner shadow with the following parameters.
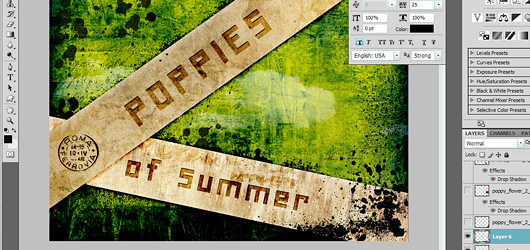
8. Add a new layer and paint a postmark with the postmark brush. After these steps you get this.

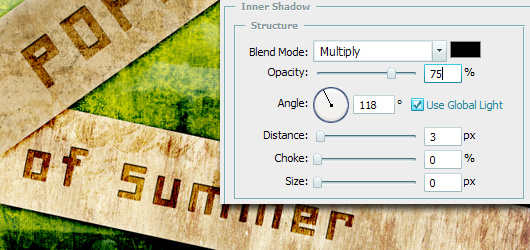
9. Add text – color: Black – each line in separate text box. Then rotate the text boxes along the paper strips. Change the blending mode of the text layers to Color burn and adjust the opacity. (Poppies = 50%, of Summer = 75%) Add inner shadow with the following parameters.
10. Add new blank layers (below the paper strips and above them), and paint with splatter brushes wherever you want, whatever blending mode you want (I used Normal and Color burn). You get this.
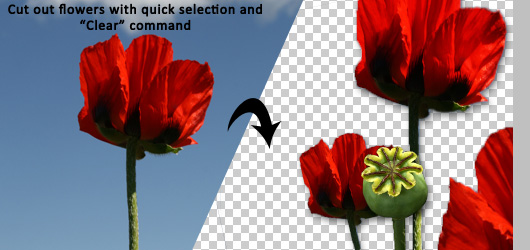
11. Add poppies! Take some stock photos, and cut the flowers out with either quick selection tool (in CS4) or Pen tool, selecting the flower and clearing the rest of the picture (Edit -> Clear).
12. Align the flowers on the wallpaper, scale and rotate them as you like. Add Drop shadow to them, make final corrections and you’re ready.


Credits
Night-fate-Stock
Princess-of-Shadows
Neokeitaro
Steppeland


[…] This post was mentioned on Twitter by HowDo.us, HowDo.us and PhotogZone, Web Design News. Web Design News said: Poppies of Summer Wallpaper Tutorial http://bit.ly/4hZNex […]
[…] Read more from the original source: Poppies of Summer Wallpaper Tutorial | Flash, Design, Vector … […]
[…] post: Poppies of Summer Wallpaper Tutorial | Flash, Design, Vector … Share and […]
[…] the rest here: Poppies of Summer Wallpaper Tutorial | Flash, Design, Vector … Posted in Photoshop | Tags: amazing, Photoshop, please-share, share-it-through, social, […]
[…] original here: Poppies of Summer Wallpaper Tutorial | Flash, Design, Vector … SHARETHIS.addEntry({ title: "Poppies of Summer Wallpaper Tutorial | Flash, Design, Vector […]
A nice reminder of why poppies r important
May the last wintness to that terrible war rest in peace !