How to Create a Seamless Pattern in Adobe Illustrator CS6
7A short time ago Adobe has released the new version of Adobe Illustrator CS6, which comes with new, useful features, and one of these features is the new Pattern tool.

Creating patterns in Illustrator was one of the painful tasks, because it needs tricks and accuracy to create seamless patterns that flow easily when they are repeated in the design.The new Pattern tool provides an easy and accurate method to create seamless patterns in a few steps, as we will explore in today’s tutorial.
Related posts:
- How to Create an Alarm Clock in Adobe Illustrator
- Creating an Email Icon in Adobe Illustrator
- How to Create a Vintage Floral Frame in Adobe Illustrator
- Japanese Style Floral Illustrator Tutorial
- How to Create a Hand-Drawn RSS Icon in Illustrator
- How to Create a Trophy Cup in Adobe Illustrator
- Fresh and Useful Adobe Illustrator Tutorials
- Adobe Illustrator Tutorials to Fuel Your Creative Vector Skills
If you are a Graphic Mania Premium Member, you can download the source files at the end of the tutorial, and you can also learn about our membership here.
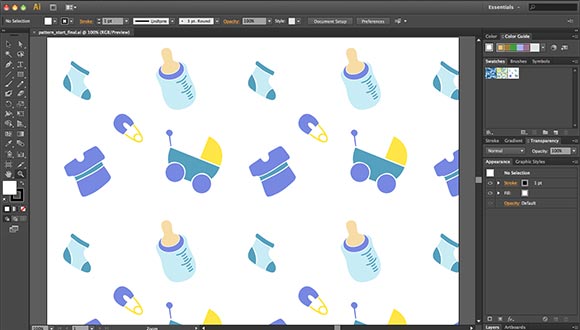
First, let us preview the final look of the seamless pattern below:

Step1
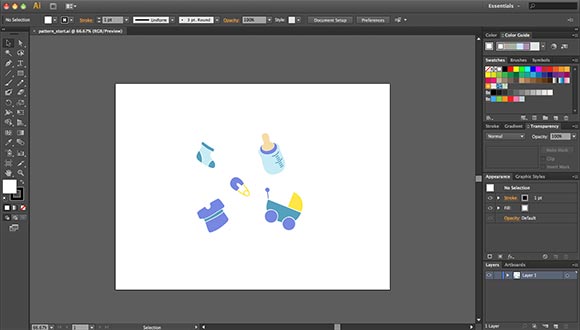
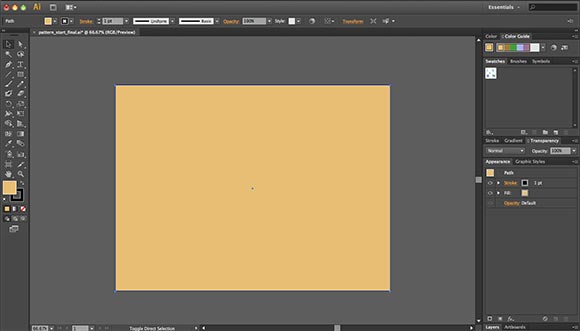
I started with a document that includes the artwork that I would like to turn into a pattern. Here, I started with the file Pattern_start.ai from the source files. You can start with your own artwork as well.
Step2
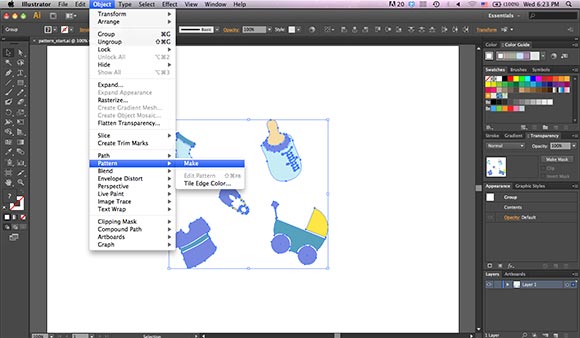
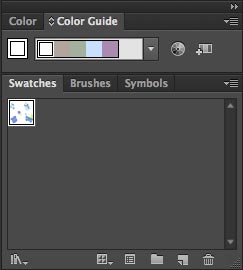
Select the artwork in the stage and from the Object menu, choose Pattern>Make, this will convert the artwork into a pattern and add it automatically to the Pattern swatches. Also, the Pattern Options panel appears and lets you edit the pattern in Pattern editing mode.
Before we continue, let us overview the Pattern Options panel:
- At the top left of the panel, you can find the Patterns Tile tool, which allows you to set the size of the pattern.
- The Name field lets you name or rename the pattern.
- The Tile Type lets you set how pattern preview appears and how the patterns are arranged. It can be Grid, Brick by Row, Brick by Column, Hex by Column or Hex by Row.
- Also, you can set the Brick Offset in the Offset value that is activated once you select any of the Brick tile options.
- The Width and Height sets the size of the pattern tile.
- Check the Size Tile to Art checkbox to set the tile size to be the same as the artwork.
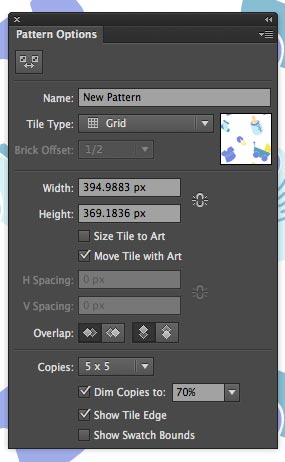
- Check the Move Tile with Art to link the tile area with the artwork.
- The H and V Spacing value sets the space between tiled patterns.
- The Overlap icon controls how the tiles overlap with each other; it can be Left on Front, Right on Front, Top in Front or Bottom in Front.
- The Copies sets how many tiles will appear for preview.
- Dim Copies changes the opacity of the tile copies.
- Show Tile Edge sets how the tile edge appears.
- Show Swatch Bounds sets if the objects outside the tile bounds are repeated or not.
Step3
Now, let us get back to our steps and click on the Patterns Tile tool on the top left of the Pattern Options panel and set the pattern size to allow better arrangement of the pattern.

Step4
Click Done on the top of the Pattern editing mode to apply changes. Delete the object from the stage; they already exist in the pattern Swatches panel.
Step5
Use the Rectangle tool to create a large rectangle on the stage.
Step6
While the rectangle is selected, double click the pattern from the Swatches panel. This will apply the pattern to the rectangle.
When you need to edit an existing pattern, you can double click on it to open the Pattern Options in order to edit the artwork and save it or save a copy of it.
In this tutorial, we learned how to use the new Patterns tool to create a seamless pattern much easier than before. You can start creating your own seamless pattern designs as seen above.
[amember_protect guests_only]If you are already a Premium Member then just sign in and you can download source file for this tutorial.
Not a member? Sign up today or read more about our Premium Member area.

[/amember_protect]
[amember_protect user_action=’hide’ visitor_action=’hide’]
Download the source for this tutorial by clicking the button below:


I must be really sad as I just step and repeat everything! Thanks for sharing though!
I’m learning Illustrator CS6. My question is can you create a new document ie. an 8.5×11 artboard and then you create a pattern on that from scratch. I saved it as an .ai file but can you then use that to apply as a pattern swatch? Or is this only possible when you click pattern make?
I created a new document and created a pattern from scratch then saved it as an .ai file. Is there a way to import this into my swatches panel? I’ve tried and can’t figure it out. Is there another way to save it?
You need to save the pattern in AI or ASE format. Go to the document where you created you pattern and from the Swatches panel, click the panel context menu from the top right and choose Save Swatches Library as AI or ASE. In the new document, You can choose Open Swatches Library> Other Library and navigate from your new pattern library. Hope this helps 😉
You need to click Object>Pattern>Make in order to convert it to a pattern. You can check my new Illustrator book for complete Illustrator learning guide:
http://www.amazon.com/Illustrator-Foundations-Vector-Graphics-Illustration/dp/0240525930/ref=sr_1_3?s=books&ie=UTF8&qid=1340728616&sr=1-3
good tutorial..thanks Rfiq
Very helpfull 🙂