How to Create Folded Text Effect in Illustrator CS6
6Adobe Illustrator is one of the great tools that can help you extend your creative boundaries with its amazing new and existing features and tools. In the following tutorial we will learn how to create a folded text effect in Illustrator CS6.

In this Illustrator tutorial we will create a text and fold parts from it to create our final artwork using simple and easy Illustrator features, such as the Pathfinder panel, the Gradient tool and the Transform tools.
Related posts:
- How to Create an Alarm Clock in Adobe Illustrator
- Creating an Email Icon in Adobe Illustrator
- How to Create a Vintage Floral Frame in Adobe Illustrator
- Japanese Style Floral Illustrator Tutorial
- How to Create a Hand-Drawn RSS Icon in Illustrator
- How to Create a Trophy Cup in Adobe Illustrator
- Fresh and Useful Adobe Illustrator Tutorials
- Adobe Illustrator Tutorials to Fuel Your Creative Vector Skills
Now let us preview the final look of the folded text artwork below:

And let us start our tutorial. You can download the source file for this tutorial by clicking the Download link at the bottom. You will need to have a Graphic Mania Premium membership to download this source ? learn about the amazing resources you can get from our membership here.
Step 1
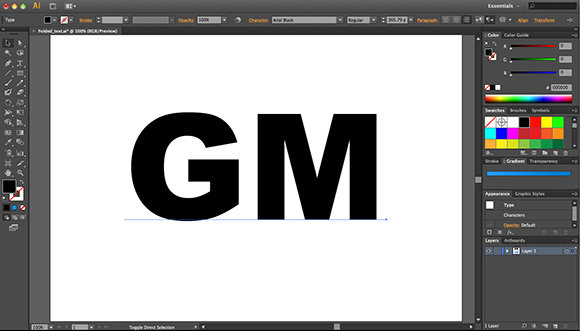
Open a new Adobe Illustrator document; use the Text tool to write GM in a big bold font, for example Arial Black.
Step 2
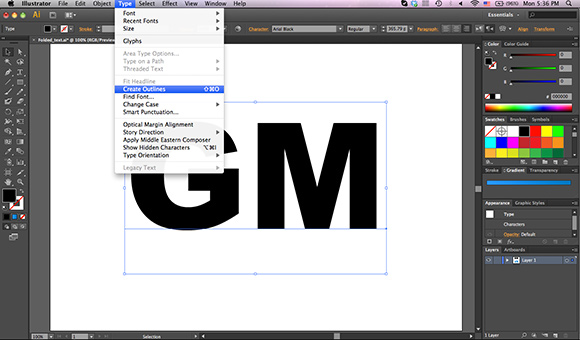
Convert the text to outline by choosing Create Outline from the Type menu.
Step 3
Right-click on the text and choose Ungroup to separate the two characters.

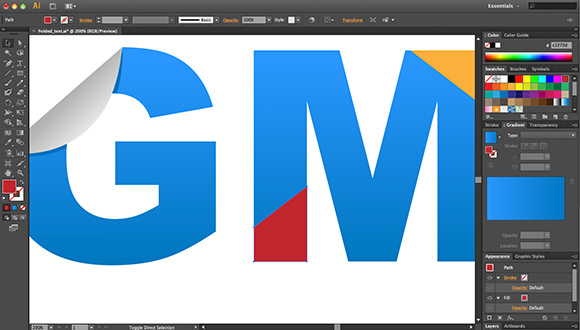
Step 4
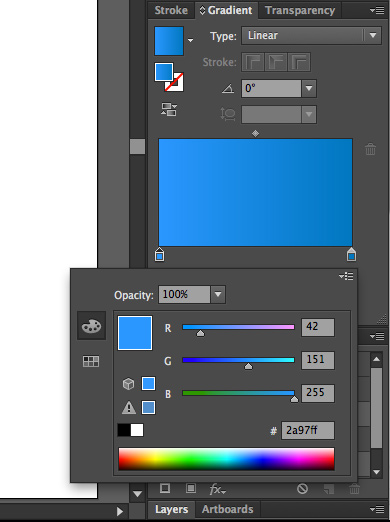
In the Gradient panel, create a dark/light blue gradient.
Step 5
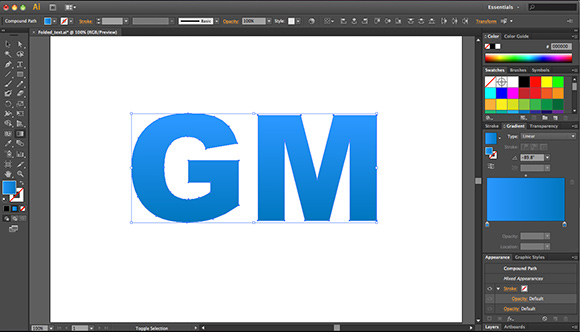
While the text is selected, use the Gradient tool to apply a similar gradient to the one in the figure below.
Step 6
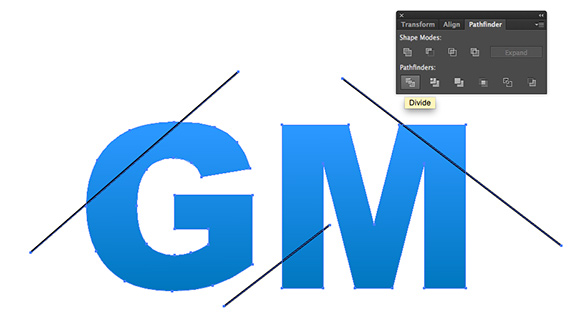
Use the Line Segment tool and create three lines as shown in the figure below:

Step 7
Open the Pathfinder panel, select the text and the lines and from the Pathfinder panel, click on the Divide icon. This will divide the text into parts.
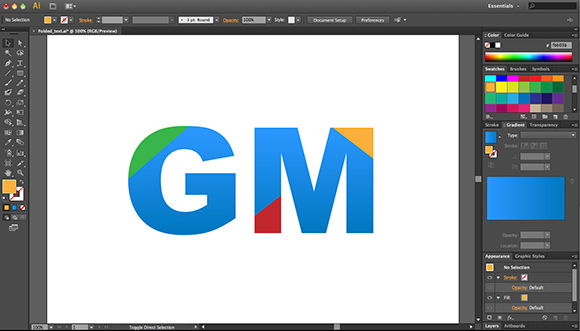
Step 8
Right-click the text and choose Ungroup. Then, change the color of the cut parts to different colors to separate them from the main text.
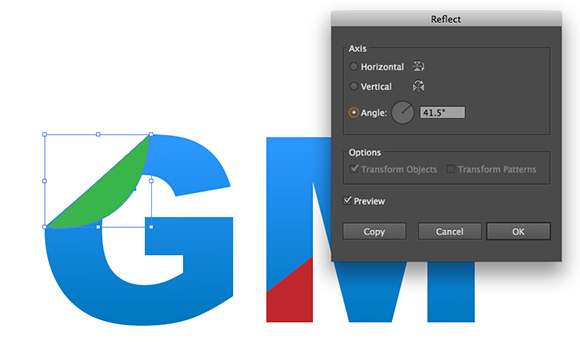
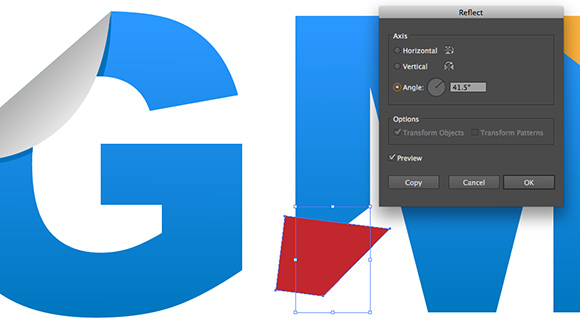
Step 9
Select the first green part of the text. From the Object menu, choose Transform> Reflect. Then, choose Angle and set its rotation to 41.5 degrees.
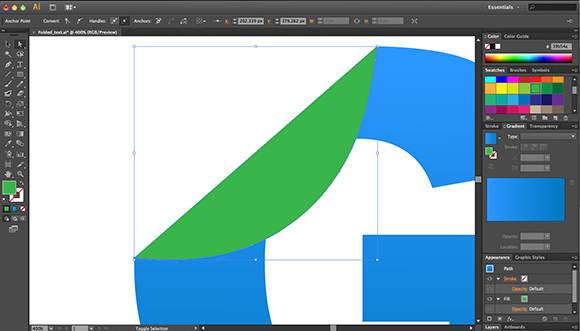
Step 10
When we zoom in, we will notice that the anchors are not exactly placed over the ones under them, we will use the Direct Select tool to select the anchor points and align them with the nearest anchor on the main text shape.
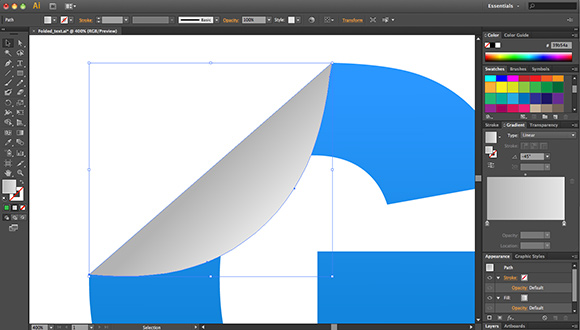
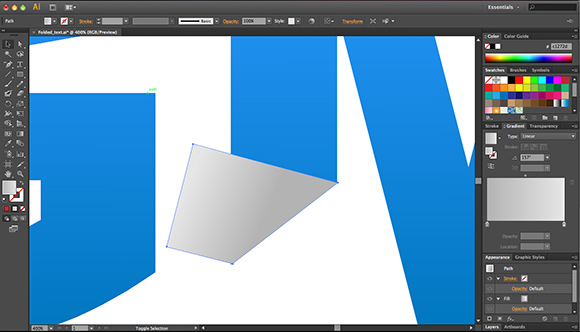
Step 11
Go to the gradient panel and create a dark gray/ light gradient. Use the Gradient tool to apply to the first flipped part.
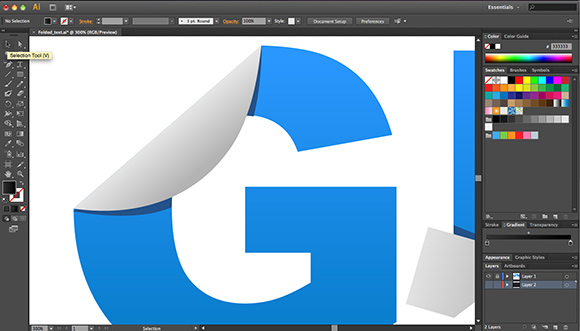
Step 12
Select both the first flipped part and the main letter under it. Copy them and paste to duplicate, or just drag them while holding down the Alt (Option) key. We will use this duplicate to create a shadow of the folded part on the main shape.
Step 13
In the duplicated parts, change the color of the main letter to dark blue to make it look like a shadow.
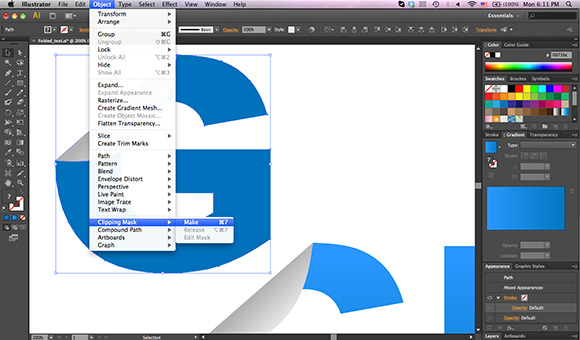
Step 14
Select both the dark blue letter and the folded part and from the Object menu, choose Clipping Mask> Make.

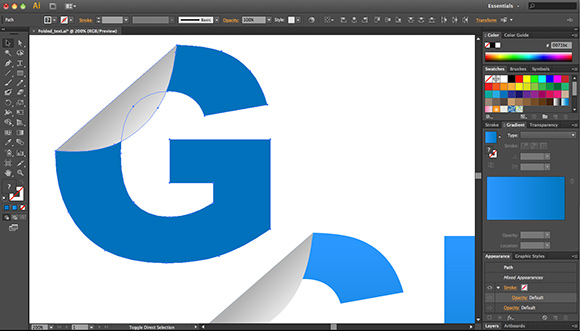
Step15
Position this masked over the original folded part. Using the Direct Select tool, select the anchor points and change the size of the shadow part to make it extend from the main folded part.
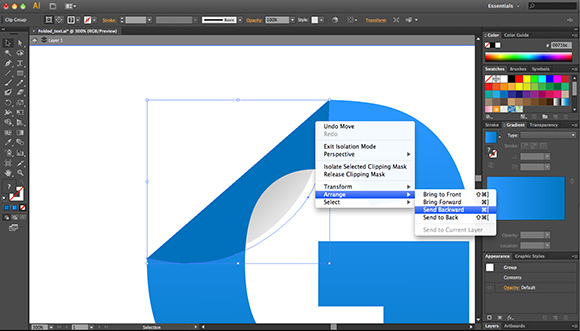
Step 16
Right-click the blue part and choose Arrange> Send Backwards.
Now, let us move to create the second folded part as below:
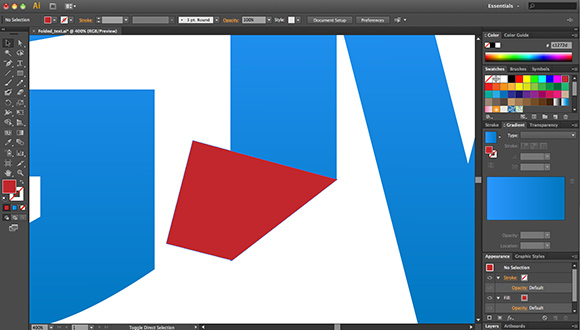
Step 17
Select the bottom part of the “M” letter that we had cut in step number 7. Change its colors to a solid color to separate them from the main text color, for example make it red.
Step 18
From Object, choose Transform> Reflect. In the dialog box, choose Angle and set it to 41.5 degrees.
Step 19
When we zoom in, we will notice that the anchors are not exactly placed over the ones under them, we will use the Direct Select tool to select the anchor points and align them with the nearest anchor on the main text shape.
Step 20
Go to the gradient panel and create a dark gray/ light gradient. Use the Gradient tool to apply it to the second flipped part.
Step 21
Repeat the steps from 12 to 16 to create a shadow for the second part on the main “M” letter.

Step 22
Move to the third cut part and repeat the above steps to create the third folded part. The only change is when you reflect the folded part, as you need to se the Angle value in the Reflect dialog box to 140.5 degrees. And the final look of the 3rd folded part is as follows:

Step 23
Select all the objects and group them by clicking Cmd+G (Ctrl+G in Windows). From the Object menu, choose Transform> Reflect, and choose Horizontal from the dialog box.
The final look of the text effect should look like below:
Finally, I hope you enjoy this Illustrator CS6 tutorial and find it useful. Please feel free to share with us your questions and comments about this tutorial.
[amember_protect guests_only]
If you are already a Premium Member then just sign in and you can download source file for this tutorial.
Not a member? Sign up today or read more about our Premium Member area.

[/amember_protect]
[amember_protect user_action=’hide’ visitor_action=’hide’]
Download the source for this tutorial by clicking the button below:


This tutorial is really simple to follow and creates a really nice looking graphic.
Cool graphic effect..i want to use it in my blog’s header, it’s great tutorial, thanks.
Neat tutorial but couldn’t you pretty much do the same thing with CS5? Or did I miss a CS6 specific step?
Hey, Nice tutorial Thanks for sharing.
The result looks great. Thanks for the instructions.
perfect…..was lookn for it……thnxxxx!!!!!!!!!!!!!!