How to Create Islamic Style Poster in Photoshop
12Articles about creating posters in Photoshop are one of the most common tips on the web, because they help you to learn how to use the different Photoshop tools and features through real, practical examples. In our Photoshop tutorial today, we will learn how to create an Islamic style poster in Photoshop using Islamic calligraphy style and motives.
This Photoshop tutorial will guide you through the different steps of creating this poster effect and will show you how to add text to it. You can download the PSD source file of this tutorial by clicking the download button at the end of the article.
Related posts:
- Quick Tip: How to Create a Seamless Pattern in Photoshop
- How to Customize Skyscraper Background in Photoshop
- How to Create a Photo Manipulation Poster in Photoshop
- Amazing Photo Manipulation Tutorials
- How to Create a Comic-Book Style Image of Yourself
- How to Create HDR Photos in Photoshop CS5
Now, let us start with our Photoshop tutorial:
Step1
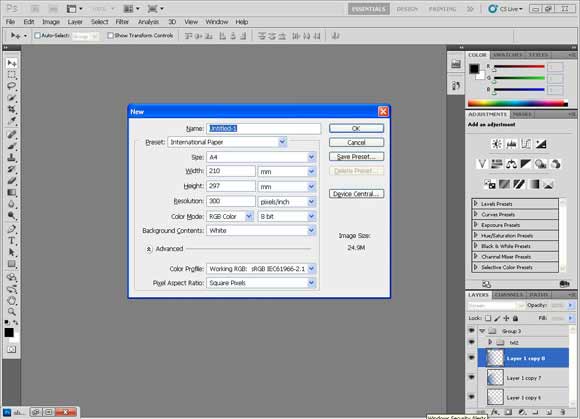
Begin by opening a new file of A4 size, with the dimensions of 210mm x 297mm.
Step2
Set the resolution to 300 ppi and the mode to CMYK (the suitable resolution and mode for print).

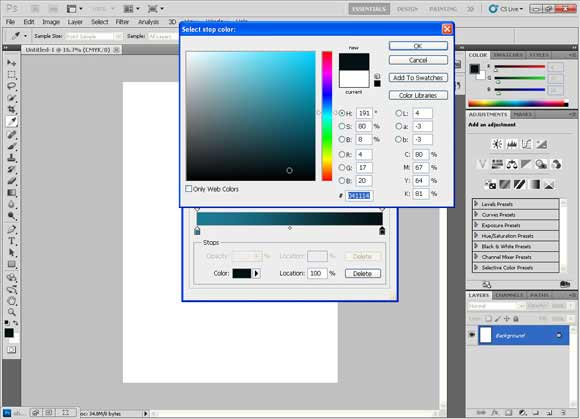
Step3
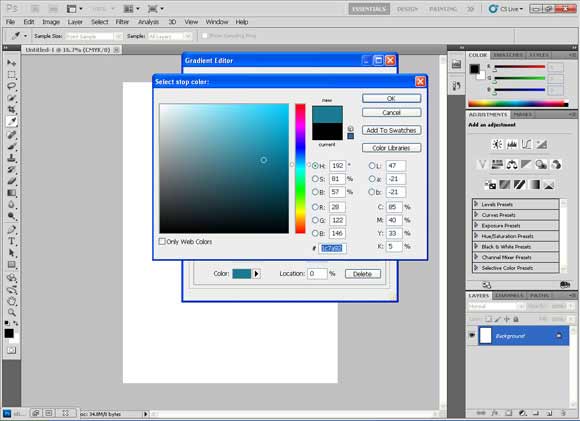
The first step is to make a radial gradient with the following colors:
- First Color, Light teal: Color #1c7a92
- Second Color, Dark teal: Color ##041114
Step4
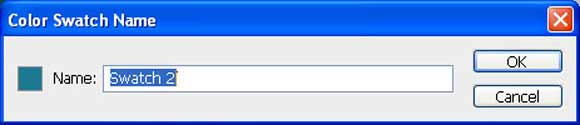
You can save the color swatch to your swatch palette by clicking “Add to swatches” and giving it any name you like.

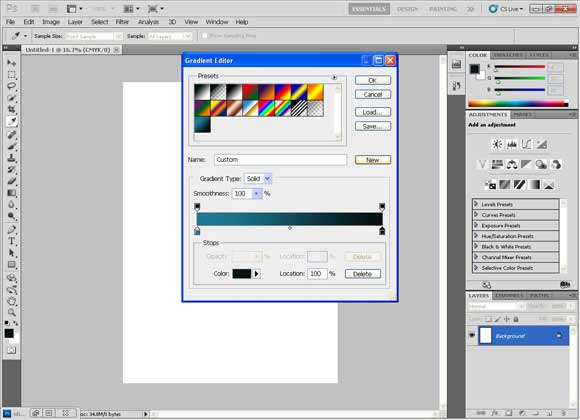
Step5
You can also save the gradient color to your gradient colors by clicking “New”.
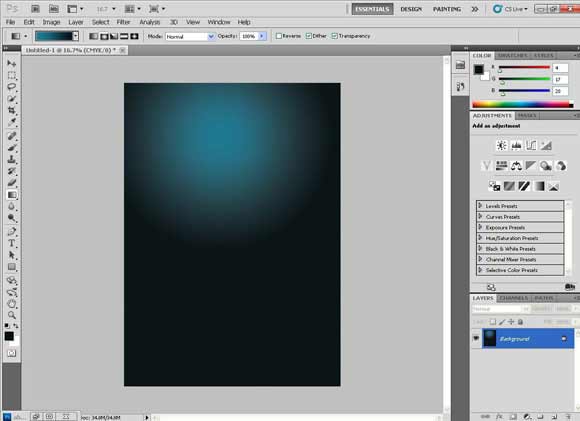
Step6
Click and drag from the center to the upper area to get these shades.
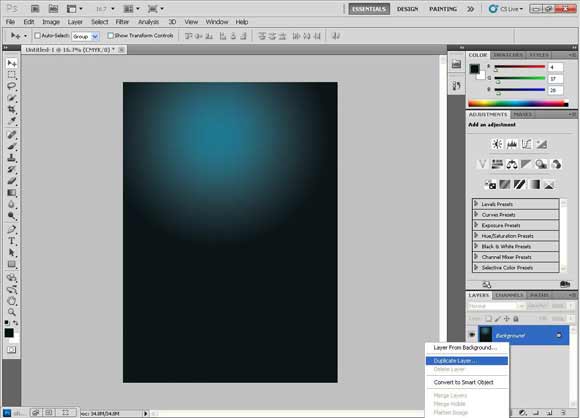
Step7
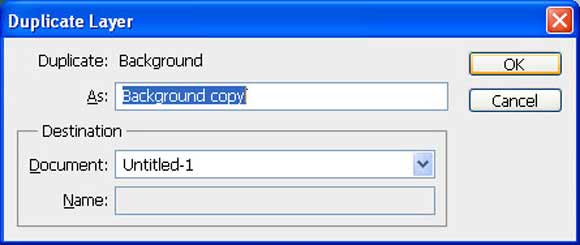
We will duplicate the gradient layer by right clicking, choosing “Duplicate layer” and giving it any name.
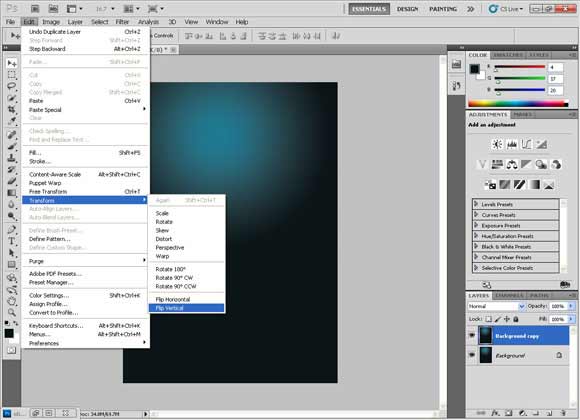
Step8
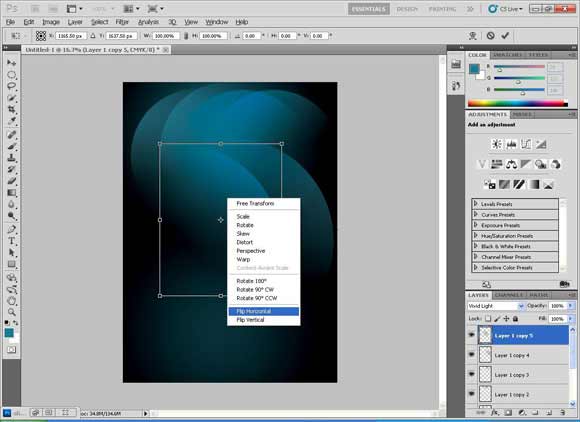
Flip it vertically by choosing Edit > Transform and then „Flip vertical”.
To obtain this effect, we will change the mode of the layer to “Soft Light”.
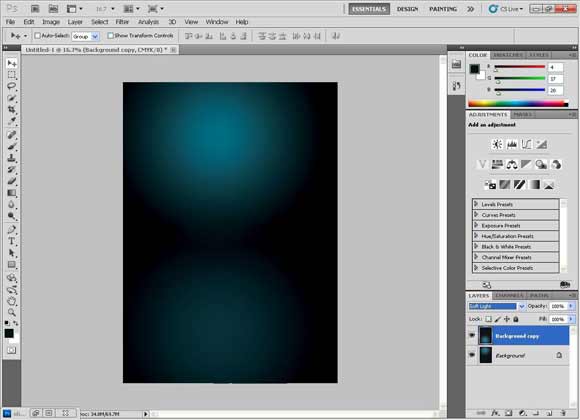

Make a new layer.
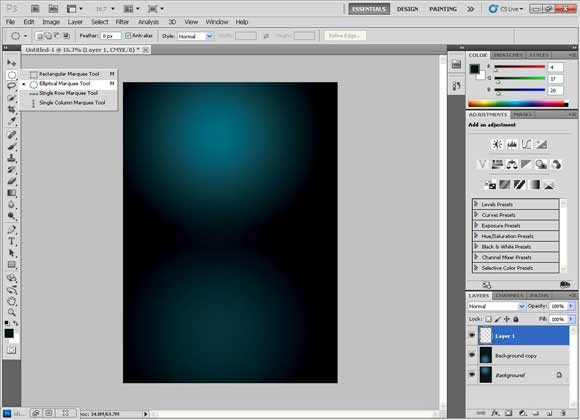
Step9
Make a circle selection with the elliptical marquee tool while holding down the “Shift” button (to make it a perfect circle, not an elliptical).

Step10
We will fill the circle with a gradient of the same light teal we have used before with transparent, after you chose the color for the foreground. First Color, Light teal: #1c7a92.
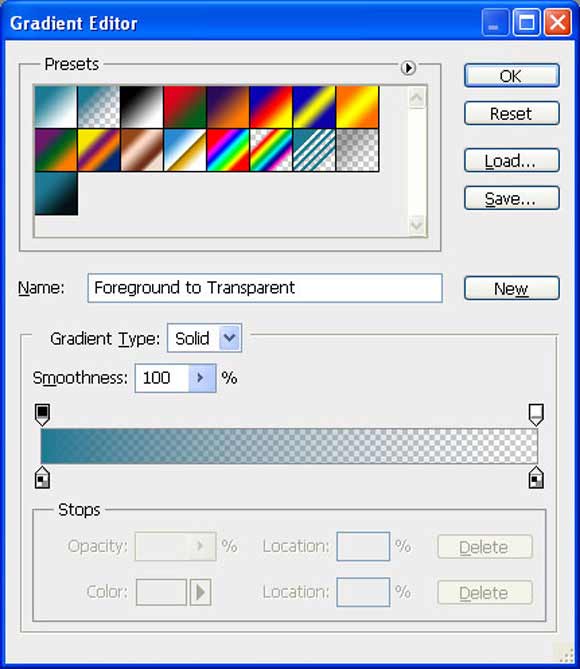
You will find this gradient as the second one on the palette.
Step11
Drag from top to bottom to get a slightly soft color then fade it to transparent.

Step12
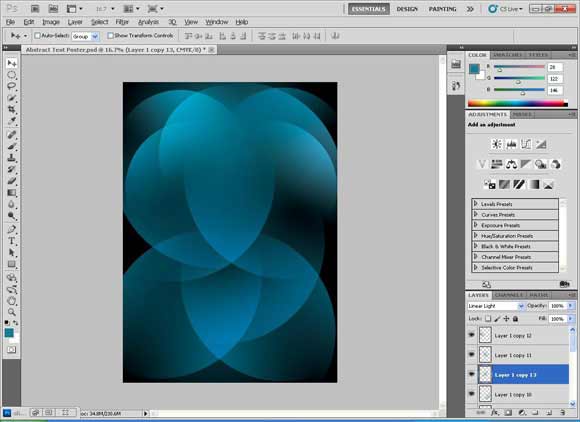
Duplicate the layer many times and flip them horizontally and vertically. Duplicate the layers until you get this shape.
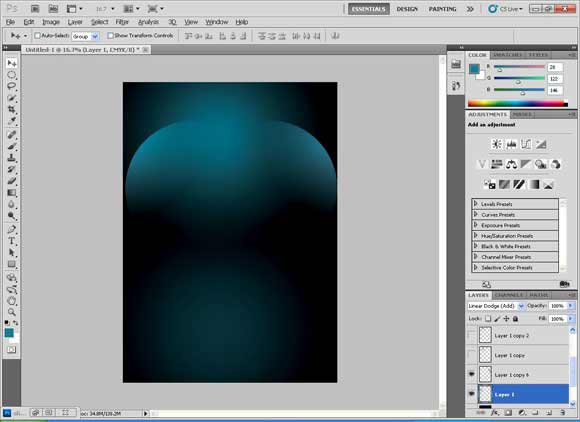
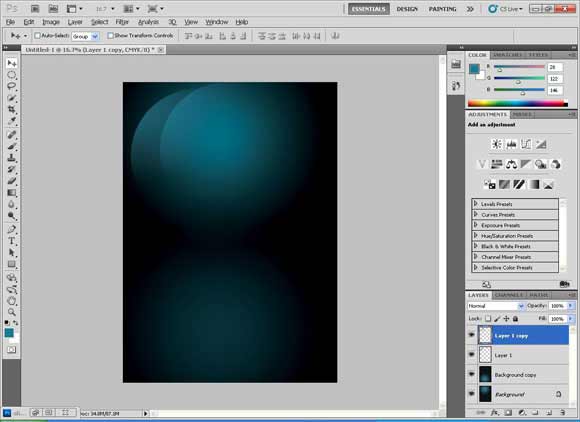

You can also scale it to make it a little bigger. To keep the scaling proportionally hold down “Shift”.
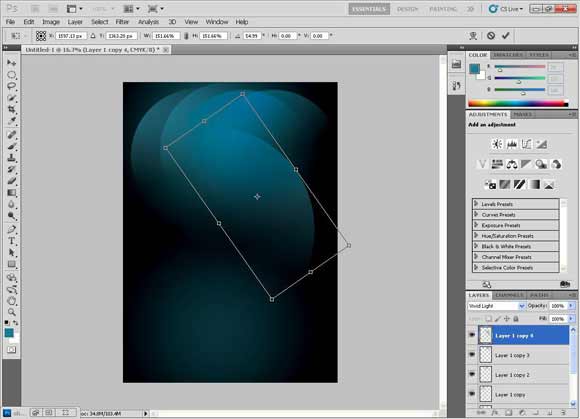
You can also manipulate them as you like to get different wonderful shapes.
Step13
We will gather all the shapes in one folder “group” by clicking on the first layer while holding down “Shift” and then clicking on the last one. Then choose “New Group from Layers” from the layer panel options.
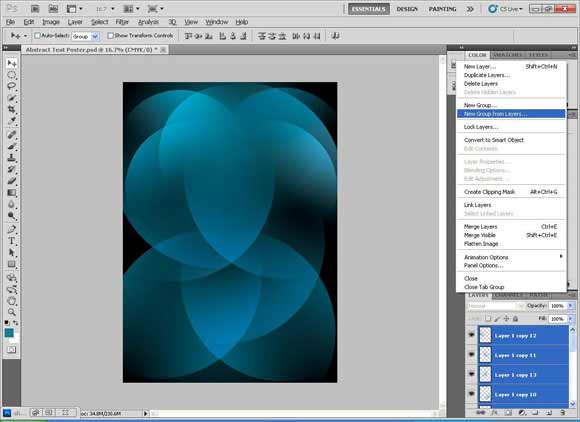
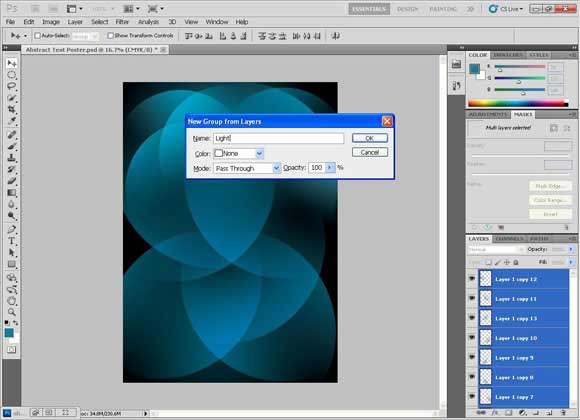
Step14
Name the layer group “Light”or any other name you like.
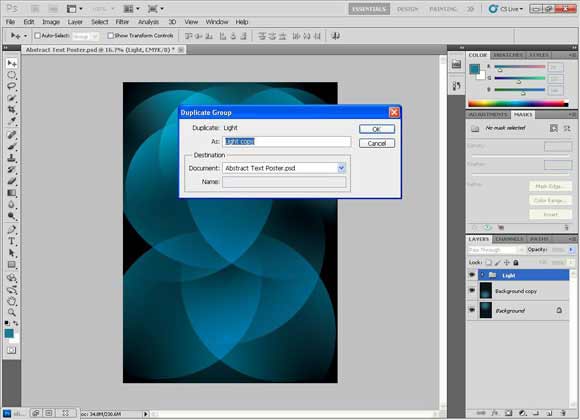
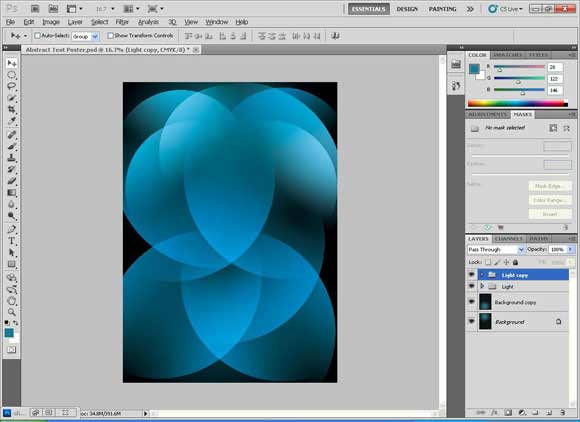
Step15
Then Duplicate the group” Light”. You can move it a little to blend them with a nice effect.
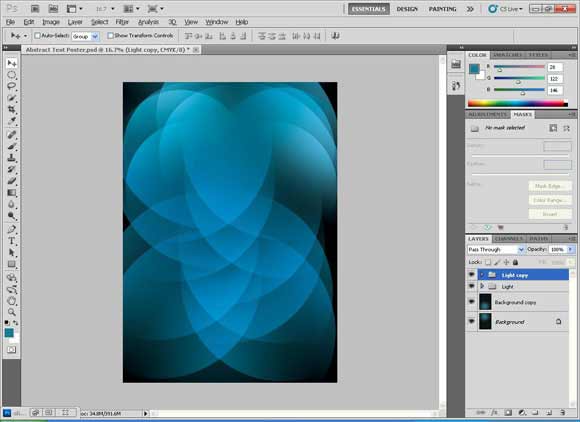
Step16
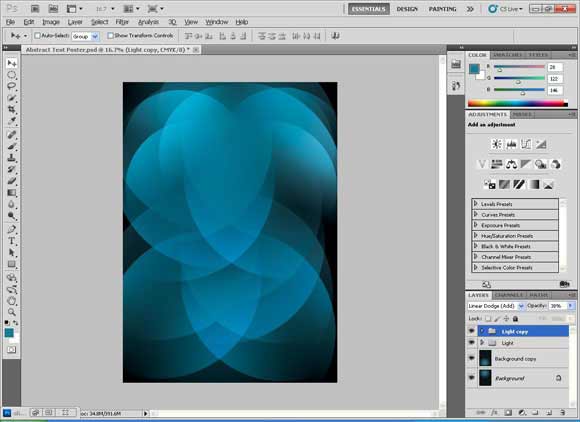
To make the colors completely different, we will add a new adjustment layer “Hue and Saturation” on top of the new group.
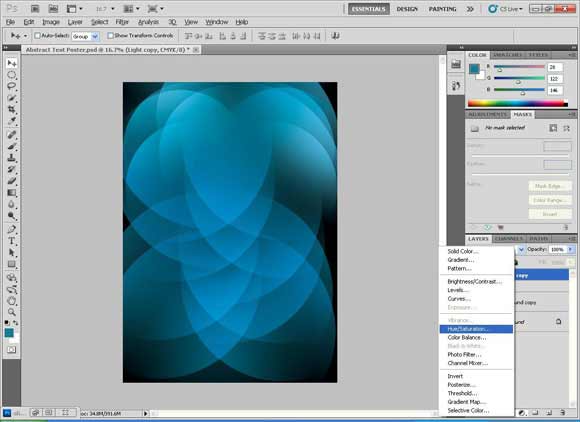
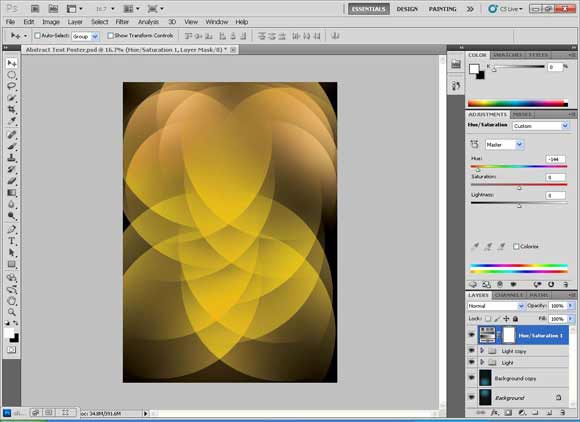
Step17
Drag the “Hue” slider to get a very diverse color as it moves on the color wheel.
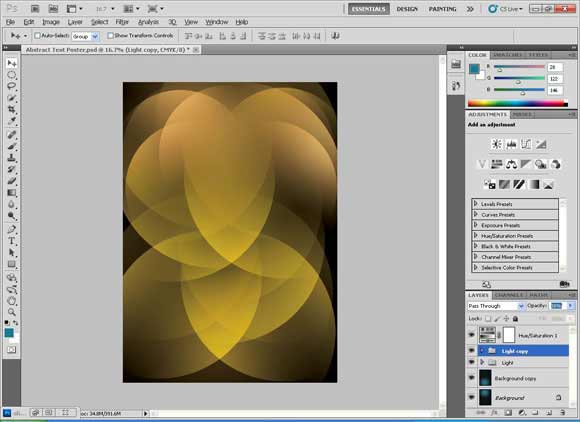
Step18
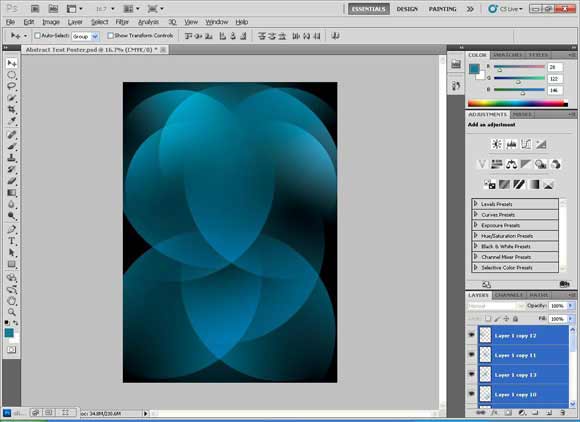
Or to make the color brighter blue we will change the layer mode of the group to “Linear Dodge (Add)”.
Step19
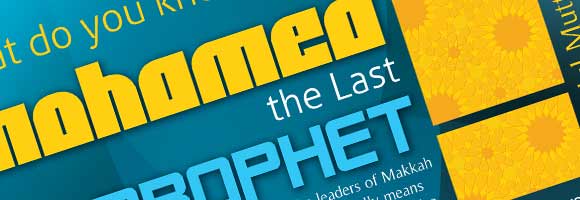
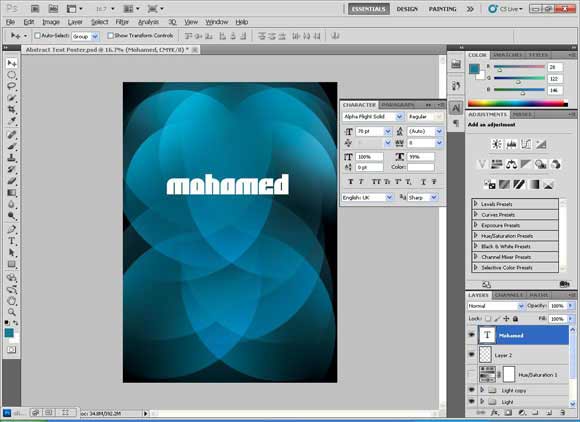
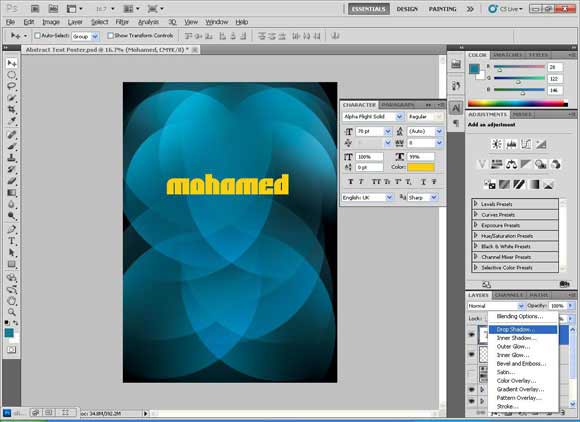
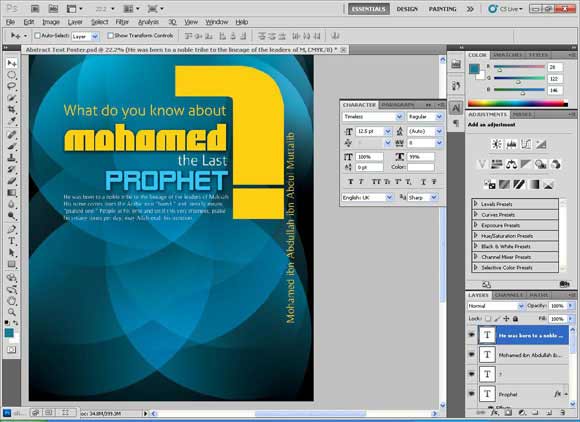
Now we will begin adding the text. Write the word” Mohamed” in the font “Alpha Flight Solid”, size 70pt, width: 99% in yellow color: #ffcf10.

Step20
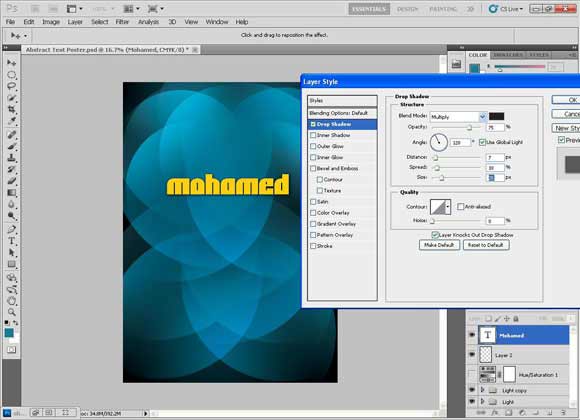
Add a drop shadow from the layer style options which are in the layer palette.
Step21
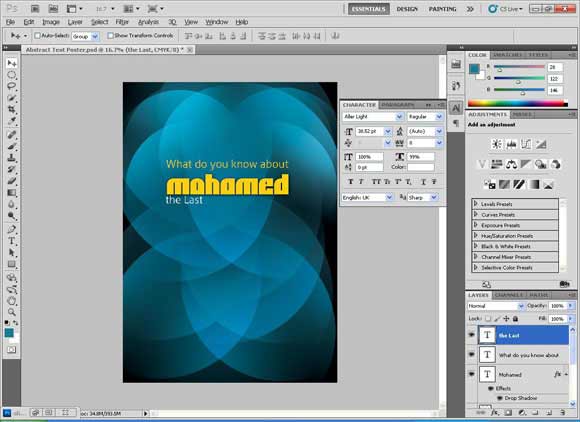
Add “What do you know about” in the font „Aller Light”, size 31.67pt, and a yellow color: #ffcf10.

Step22
Add “the last” in the font „Aller Light”, size 30.52pt, and a white color: #ffffff.
Step23
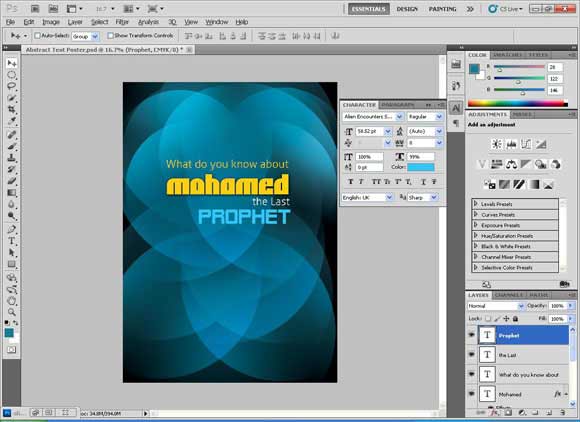
Add „Prophet”, in the font “Alien Encounters Solid”, size 58.52pt, and a cyan color: #34c6f4.
Step24
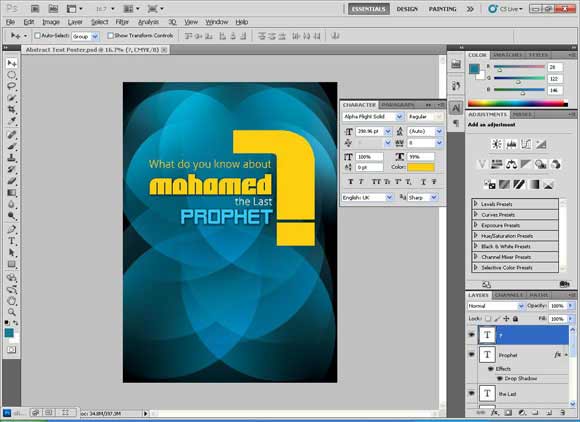
Add “?”, in the font „Alien Encounters Solid”, size 398.96pt, width: 99%, and a yellow color: #ffcf10.
Step25
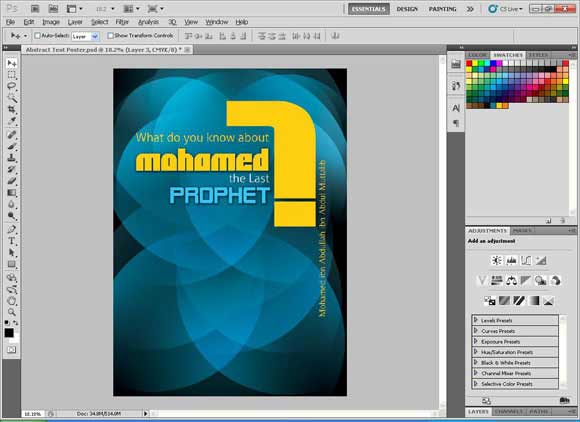
Add “Mohamed ibn Abdullah ibn Abdul Muttalib”, Font: “Timeless”, 22.98 pt, width: 99%, and a yellow color: #ffcf10.
Rotate it by 90 degrees CC (which means “counterclockwise”, the opposite of the clock’s direction) by choosing Edit > Transform and then „Rotate 90 CC”.
Step26
Add “He was born to a noble tribe to the lineage of the leaders of Makkah His name comes from the Arabic root “hamd” and literally means “praised one.” People at his time and until this very moment, praise him many times per day, may Allah exalt his mention.” Font: “Timeless”, 12.50 pt, width: 99%, and a white color: #ffffff.
Step27
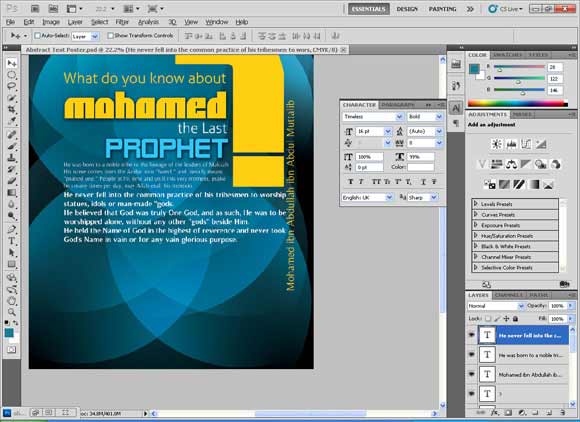
Add “He never fell into the common practice of his tribesmen to worship statues, idols or man-made gods. He believed that God was truly One God, and as such, He was to be worshipped alone, without any other “gods” beside Him. He held the Name of God in the highest of reverence and never took God’s Name in vain or for any vain glorious purpose.” Font: “Timeless”, 16 pt, width: 99%, and a white color: #ffffff.
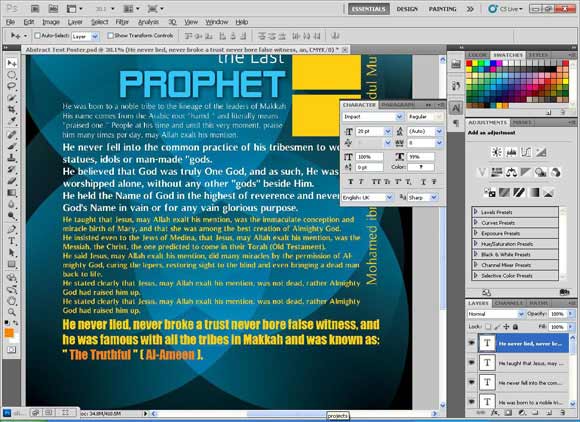
The add the text “He taught that Jesus, may Allah exalt his mention, was the immaculate conception and miracle birth of Mary, and that she was among the best creation of Almighty God. He insisted even to the Jews of Medina, that Jesus, may Allah exalt his mention, was the Messiah, the Christ, the one predicted to come in their Torah (Old Testament). He said Jesus, may Allah exalt his mention, did many miracles by the permission of Almighty God, curing the lepers, restoring sight to the blind and even bringing a dead man back to life. He stated clearly that Jesus, may Allah exalt his mention, was not dead, rather Almighty God had raised him up. He stated clearly that Jesus, may Allah exalt his mention, was not dead, rather Almighty God had raised him up.” Font: “Timeless”, 16 pt, width: 99%, and a yellow color: #ffcf10.
Step28
Add “He never lied, never broke a trust never bore false witness, and he was famous with all the tribes in Makkah and was known as: “The Truthful” (Al-Ameen).” Font: “Impact”, 16 pt, width: 99%, and a yellow color: #ffcf10.
Set the words “The Truthful” and “Al-Ameen” to an orange color: # f5841f.
Step29
Now we are going to write on a path.
Draw a curve that fits with the curve of the “?” using the pen tool.
After drawing and the path is still active (which means that it looks like a virtual line with two ends), use the type tool and roll over the path. You will notice that the sign of the type tool changed to show a sign of writing on path.
Add “www.rasoulallah.net”, Font: “Arial”, 17.52 pt, width: 99%, and a yellow color: #ffcf10.
Step30
To hide the sign of the path open the path panel from the Window Menu then Path and click on an empty place within the panel, or simply choose another layer in the Layer Panel.

Step31
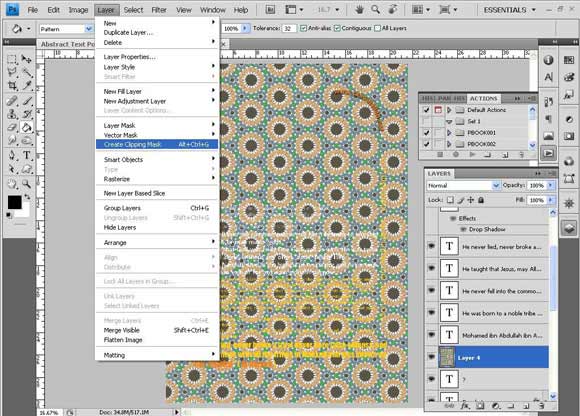
Now we are going to add an Islamic touch to the design by adding an Islamic Motive to the “?”.
Download the Islamic Pattern, open it and drag it above the layer of the “?”.
To make the pattern visible on the area of the “?” only, we will use the “Clipping Mask” tool. Let’s choose “Create Clipping Mask” from the Layer Menu.
Step32
To give the pattern a nice look we will change the layer mode of the pattern to “Color Burn”.
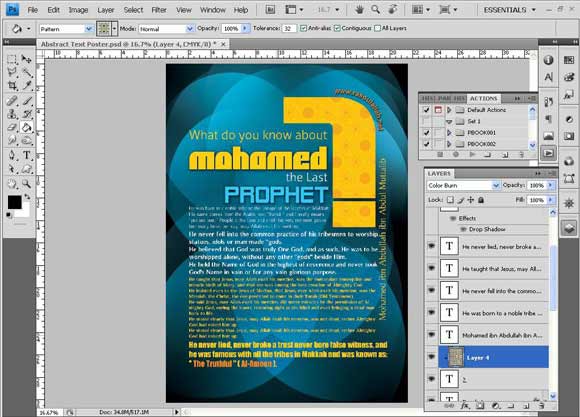
I hope you enjoyed making this Abstract Text Poster as much as I did and do not forget to download the source file for this tutorial. If you do not have the fonts used in this Photoshop tutorial, you can simple use any available for for the text.
[amember_protect guests_only]If you are already a Premium Member then just sign in and you can download source file for this tutorial.
Not a member? Sign up today or read more about our Premium Member area.

[/amember_protect]
[amember_protect user_action=’hide’ visitor_action=’hide’]
Download the source for this tutorial by clicking the button below:


great job!!! keep uploading Islamic stuff and tutorials!!!!
thanks
Excellent Tutorial. Thanks
Great tut
ThNks for sharing
Great idea, and the design very well. I greet you on your intelligence
As salam o alekum my namy name is ahmad raza i am learning photoshop cs4 .I see your tutorial i like this i want some more tutorial can you send me i am waiting your replay.
Excellent Tutorial. Thanks
Great that you like the tutorials, we will add more tutorials very soon and if you like to see more, you can just use the google search to find more resources to learn from.
really it’s sample and creative tuts , thanx so much Abeer & Rafiq for your efforts , ^_^
Thanks ya Mohamed 😉
Thanks, Abeer Mohamed. Good tutorial!
real super tut! thanks for sharing, useful for beginers 🙂
Great tutorial!
Excellent job