How to Create Simple Flash AS3 Slide Show
9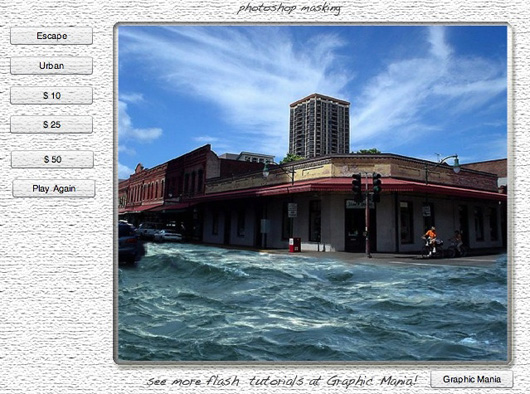
In this tutorial. I would like to show you more with the button component, (next I will show how to make your own
buttons, it’s easy!) also using buttons to go from scene to scene, and to link to a web page.
Related posts:
- Create Your First Android AIR App in Flash
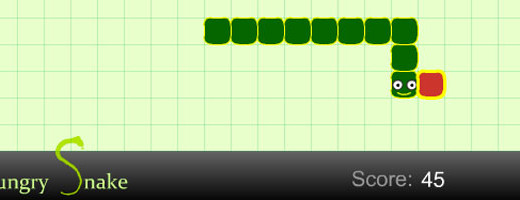
- How to Create a Snake Game in Flash Using AS3
- Creating Reflection in Flash Using AS3
- Bitmap Data Manipulation in Flash ActionScript 3
- Creating and Controlling Flash Animation with XML
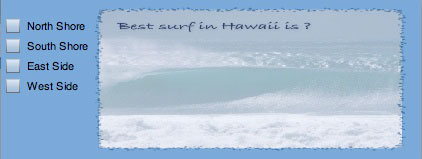
- How to Build a XML Driven Quiz Application in Flash
- Approach to Understand XML and Flash Workflow
We will make a slide show, but this example could be used for a flash website too. Finally how to create a background in Photoshop and import your PSD into Flash. I also wanted to put together a little portfolio of my Photoshop & Illustrator work together for myself.
Open Photoshop, and create a file with these dimensions

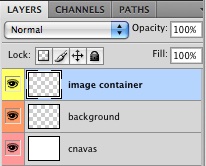
I like to work in layers while in Photoshop, and I prefer to not use the canvas, and so I always create a background layer. Also create another layer called container, this is where the images will be loaded in flash.
Your layers should look like this
Lock the canvas layer, as we don’t need it. Go onto the background layer and using the rectangle tool trace out a huge rectangle to cover the entire canvas. Once you have this go to Filters–>Texture and choose texturizer. Photoshop will tell you that you need to rasterized the document, go ahead and click yes. Then choose textureizer with these values
Click OK, and then lock the layer.
Now go onto the container layer and using the rounded rectangle tool create an area towards the right of the canvas with a wide enough area for the photos. After you have made your rounded rectangle, give it a dark background, I have chosen.

Now lets add some effects to this layer. You can play with different effects, which is how I came up with what I did. Here are my choices:
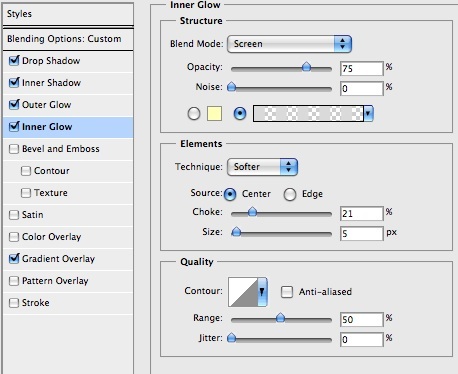
Lock this
layer, and we are done. If you are new to Photoshop as I am, I have included the psd in the source files. This is what the finished psd looks like.

Now open flash, and create a new flash document (AS 3) of 640px X 480px. Save the file as slide_show.FLA. Now we will import the PSD file into flash. Go to File–> Import and click, find. Once you locate the PSD file (mine is on the desktop) click “Import to Library”. I will just use the default and import all layers, but you can just import which layers that you need as well. For example we don’t need the canvas layer, and we could have separated the background and canvas layer as well, but to keep it simple, I am just importing all the layers.
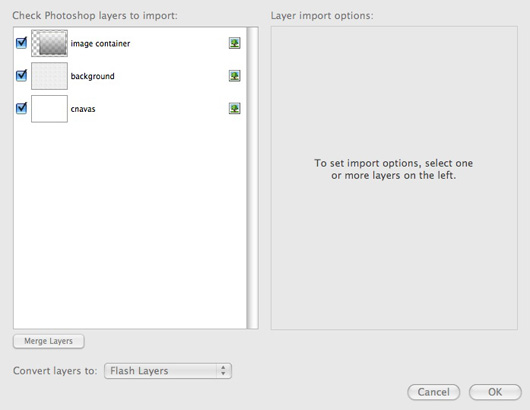
You will see a file called background.PSD as well as a folder called “background.PSD Assets. Make a new folder called PSD and place these two items in the PSD folder.
Now we will do the same with the images. I am using the same import method, File–>Import to Library I find the folder images on my desktop, and highlight all the images I want to import, then click OK. All the images are in the flash library now. To keep organized create a new folder called images, and place all the images that I imported into this folder. We are done importing!
Create one more folder and call it assets, and pace the PSD folder and the images folder here. When you are working on large projects, you want to keep your library clean!
Create a layer called background, and then take the PSD file and drag it onto the stage, and position the graphic to cover the entire stage. Lock this layer!
Now lets make all are other layers.
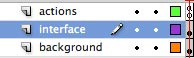
Pictures, text, buttons, actions, credits
You layers should look like this.
The credits layer might be something new to you in the properties inspector under label type something in the Name, and it will appear as shown. I typed “simple slide show by John Barrett for Graphic Mania” This is called a label.
Now the timeline is finished, and now let’s cover what I did in advanced.
Above the background layer is the pictures layer, which is where the pictures will be dragged onto the stage in the container area. Right click on each frame and make a new keyframe, do the same for the text layer. For the buttons and actions layers drag the keyframes to match the others. Now we are done with the layers.
Drag an instance of the button class into library. Lets make one more folder called navigation.
The library should look like this
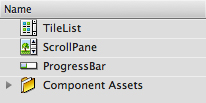
The point to this that that everything is organized!
Make sure you are on the buttons layer and drag an instance of the button onto the stage and place it on the left side. These buttons will act as our navigation for the slide show. We will use 6 buttons for our movie. Will be using the component inspector to change the label of our buttons (same as the last tutorial). I will do the first one, but the rest of the buttons will be the same. I am calling my buttons escape, urban, $10, $25, $50, and play again.
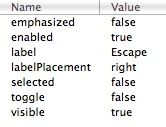
Open the component inspector and change the label from Label to “Escape”
Change the labels on the other buttons as well.
In the properties give this button an instance name of escape_btn. Remember when we call our buttons {buttonname}_btn we get code hints in actionscript, but this is not required and you can all your buttons anything you like. Do the same thing for all the buttons.
You should now have all the buttons with their instances names like this:
| Button Name | Instance Name |
| Escape | escape_btn |
| Urban | urban_btn |
| $10 | $10_btn |
| $25 | $25_btn |
| $50 | $50_btn |
| PlayAgain | PlayAgain_btn |
Now we will make one more button to show how to link to a separate webpage in actionscript.
Drag another button onto the stage, at the button of the stage and call this button graphic mania, and give it and instance name of graphicManina_btn.
Now in the text layer in the first key frame type to the left of the graphic mania button “See more flash tutorials at graphic mania”. I am using the Handwriting – Dakota font (it is included in the source files).
Now for the pictures. In the pictures layer drag an image into the container area (the dark rounded rectangle), and center a image to fill the container area. I am using these dimensions for all the images
I found that this fills each area nicely. It is important to drag the correct image to each keyframe, I named the
images the same as the buttons to keep things simple. If you make a mistake your button will link to the wrong image!
Below is a table that will tell you which image to use for which frame.
| Frame | Image Name |
| Frame 1 | flood.jpg |
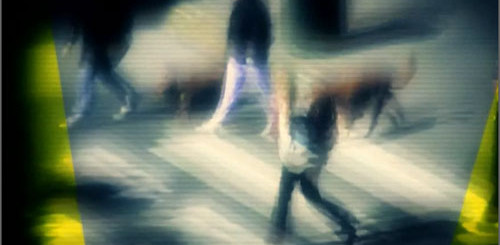
| Frame 2 | escape.jpg |
| Frame 3 | urban.jpg |
| Frame 4 | currency_10.jpg |
| Frame 5 | currency_25.jpg |
| Frame 6 | currency_50.jpg |
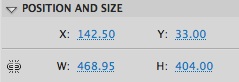
Now in the text layer create a title for each of the images by using the text tool. Do this for each frame. For the fist frame I wrote “Photoshop masking” I made the X position 250, so that when you go from frame to frame the title does not move.
We are now finished with out design, and go move on to actionscript . The final design should look like this (I am on the first frame).
The actionscript:
Go to the actions layer, and in the first frame, right click and open the actions panel.
First type
stop; This will stop Flash from playing all the frames
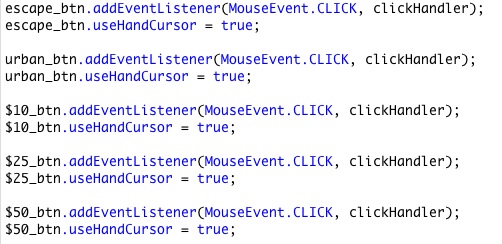
next will create the main buttons for the navigation, and set the handCursor to true to allow the hand to show on mouse over. Will also be using a clickHandler function to tell the buttons which frame to go to when clicked.
So as we did last time we will set the buttonname_btn.addEventListerner and we will listen to the mouse click event, and then we will call a function clickHandler.
So as an example for the escape button we will have the following actioscript:
escape_btn.addEventListener(MouseEvent.CLICK,
clickHandler);
escape_btn.useHandCursor = true;
Below is all the buttons in the navigation complete.
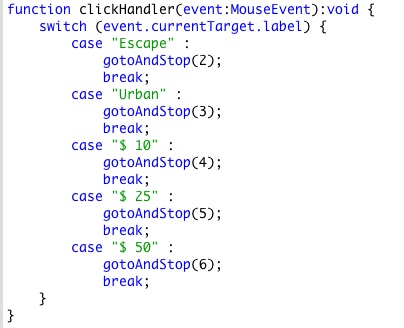
Now in order to use clean code will use a switch statement which is useful when you have many if statements that perform the same task. That is; instead of writing a separate function for each button, we just need to create on switch statement. In order to understand which button was clicked, we listen for the label of the button (event.currentTarget.label), then we go to that frame and stop. You must also
include a break. So you can see that the logic is case, perform an operation, then break. You can see that this is like an if statement.
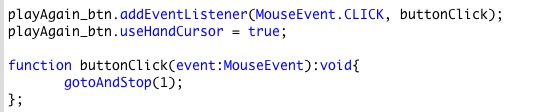
Now we can create the play again button, which will take us back to the first frame. I could have called this flood, but since we started here, I just went with play again.
Finally the button at the bottom which takes us to a separate web page.
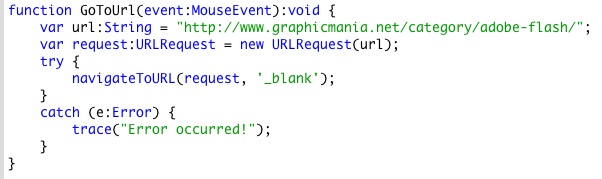
Now in or button we call a function called goToURL, again it is of type MouseEvent, and does not return anything, so we set it to void. Then we set avaribale called url and type it to a string. This is where you give it a web page to go to.
Then we create a URL request. Finally we try to navigation to this url, and have it open in a new page. If this does not work, we trace an error saying “Error occurred!”
We are done-
I hope that you enjoyed this tutorial. For a future tutorial I will make a more advanced slide show with xml, and show ho to pick a random image.
If you have any question/comments, please email me.
Also leave a comment if you would like to see a certain actionscript tutorial, and I will do my best to create one.

Happy flashing-
Johnny
terrific tutorial. i’ll feature it at flashscope.com
This article has been shared on favSHARE.net. Go and vote it!
Thank you very much for your comments, and I am happy to know that you found the tutorial enjoyable
-Johnny
@favSHARE thank you for including the article on favSHARE
-[…] Excerpt from: How to Create Simple Flash AS3 Slide Show | Flash, Design, Vector, Photoshop, Adobe Tutorials | Grap… […]
Great job, thank you for sharing.
Really decent post… I love it. Keep ’em coming… 🙂
Very nice information.
this like script. I add my library anymore.