How to retouch and restore an old photo in Photoshop
8Retouching old photos
Every day we are bombarded with photos on social media. We couldn’t even imagine life without instant visuals of snowstorms, birthday cakes and just about everything else going on in our lives that need to be posted immediately.
Because these photos are so common, it can be especially emotional when we have the opportunity to physically hold old printed photos in our hands. One of my favorite things to do when I’m at my grandmother’s house is to look through her shoebox of old photos.
Things looked so simple back then and the smiles in the pictures were so normal; nobody did duckfaces in the 1950s! When I’m holding an old photo, my soul lights up and I very much enjoy the expression on an elder family member’s face when I ask them about it.
Printed photos will lose quality over time
While the story behind each photo is timeless, the quality of the photo fades over time, the picture gets folded and creased, possibly wet from unfortunate storage in an attic or basement and the image loses the luster it once had.
My grandmother loved to write on the back of each photo documenting the occasion and everyone in the picture. I’m sure it was a good idea at the time, but many of the photos now have damage from the ink bleeding through. I feel extraordinarily lucky to have the ability to preserve these photos using Photoshop. I enjoy the art of adding new life and preserving the history in each photo for future generations – especially those that seemed beyond repair.
The photo paper available today is much better than in the past. Digitally repairing damaged photographs with Photoshop and reprinting them on archival quality paper will easily make them last another 100 years, while digital storage can last forever if you back up your files properly.
Photo restoration is an impressive image editing technique that brings back life to old, faded, and damaged photographs. This step-by-step tutorial shows you how to remove scratches, fill missing portions, and add color (if required) to old images.
You will need a badly damaged photograph to complete this tutorial. Use your old family portrait or download an online sample for practice.
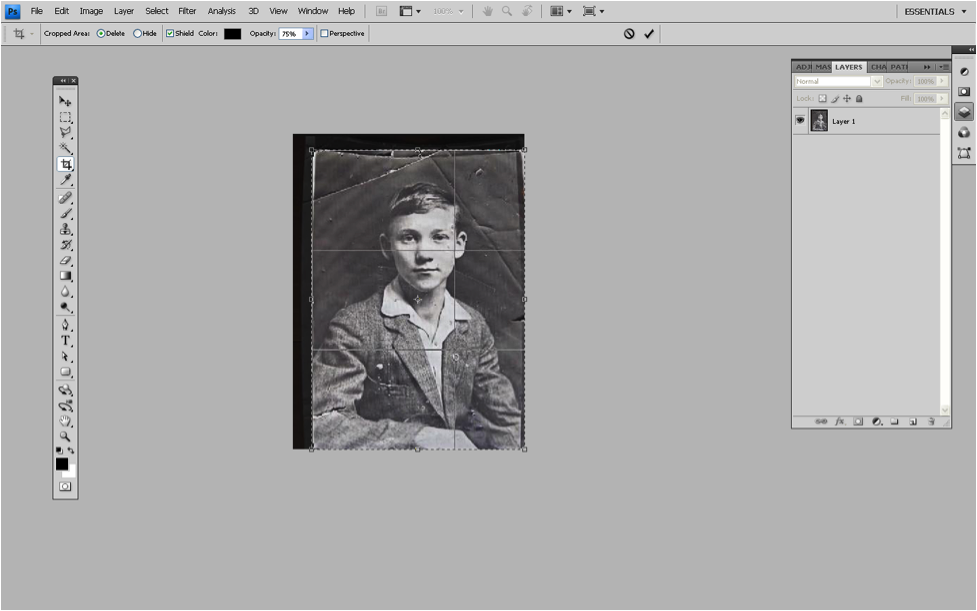
1. Assessment
Open the chosen image in Photoshop and assess damage. A good look at the image before you begin will give you an idea about your goals. Select the Crop tool to get rid of unwanted edges of the image. This step can be skipped if your image does not have any unwanted parts.
2. Application: Work from Background to Foreground
Let’s begin cleaning up larger areas or background of the image. Grab the Clone Stamp tool. Alt + Click on a clean area of the image and brush it over the patched area. Make sure the clean area you choose has a similar tonal range as that of the damaged area.
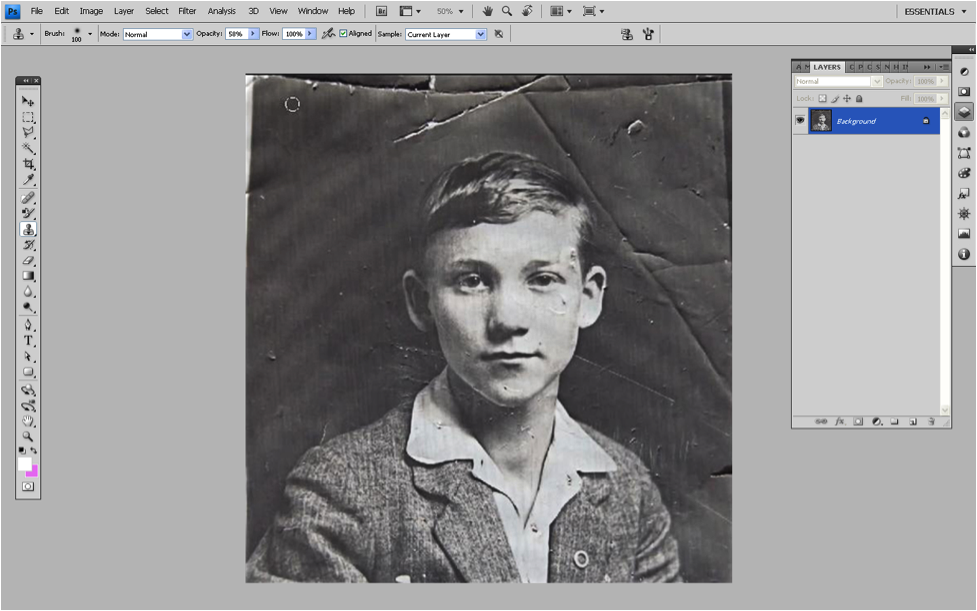
Use Healing Brush tool to paint the color of your sampling area over the damaged parts. Be careful if you wish to avoid messy and smudged edges.
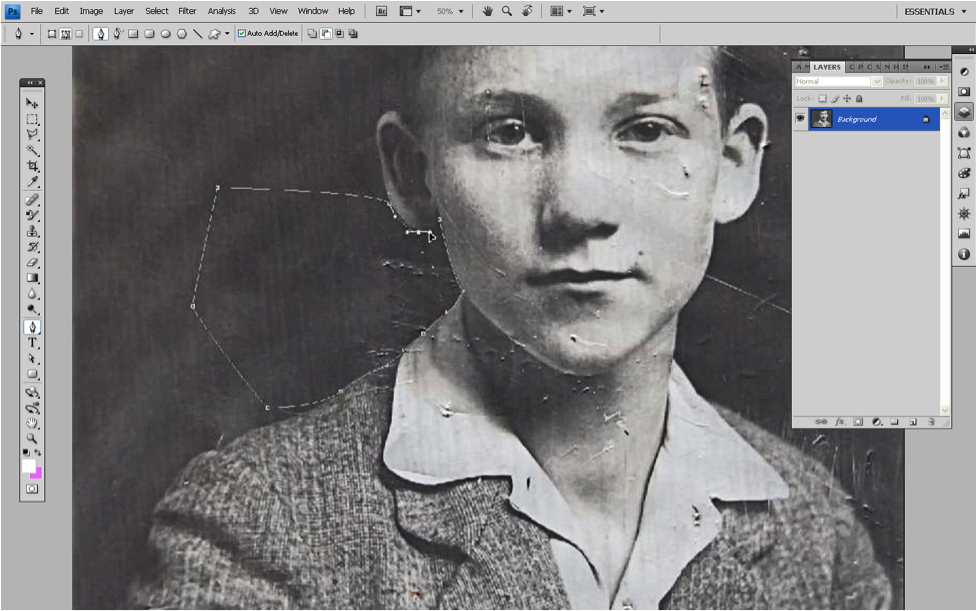
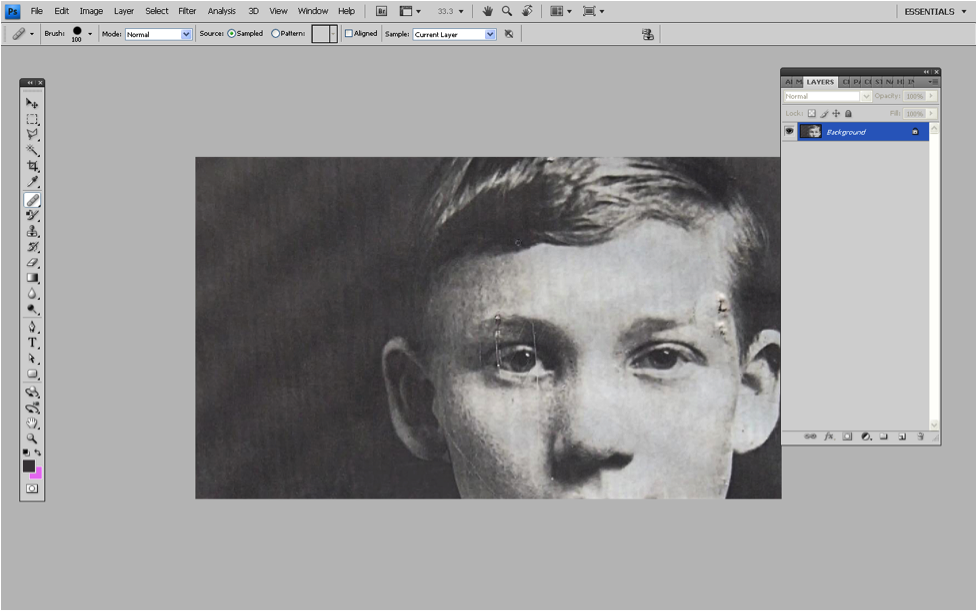
3. Retouch the Details
The following trick will help you restore the areas close to the subject quickly and efficiently.
Choose Pen tool from the Tool Bar or press P on your keyboard. Make a path around the area that you wish to clean up. Name this path.
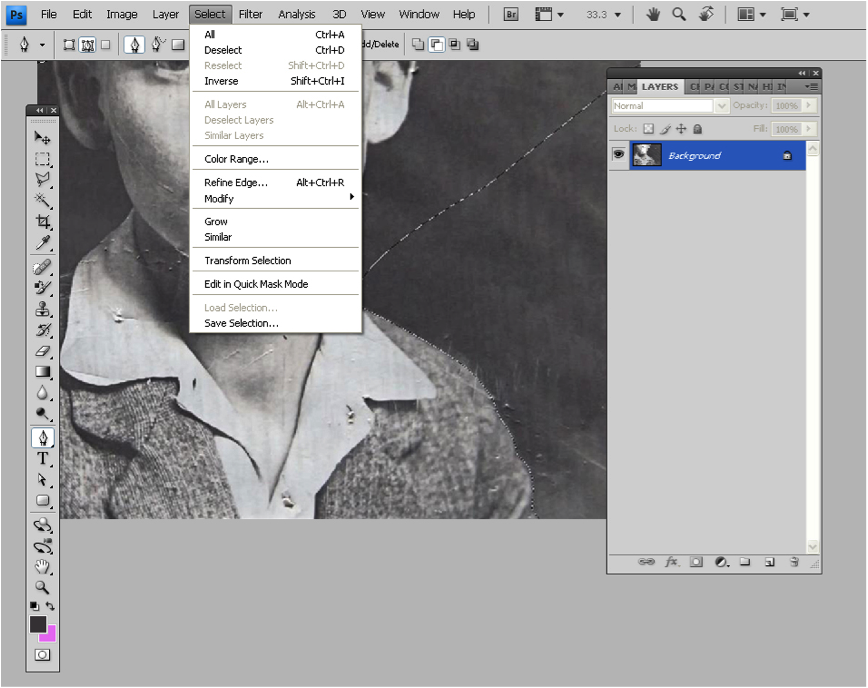
Choose “Make Selection” from the Paths Palette and add feather radius of “0.5”. The selection now acts as a boundary within which you can continue cloning. Press Ctrl + D to deselect the area once you are done.

Repeat steps 4 and 5 if there are multiple background areas in direct contact with the subject. Complete the background.
Zoom in the image and work on finer areas. Use a combination of Clone Stamp, Healing Brush, and Spot Healing Brush tools to remove scratches and marks.
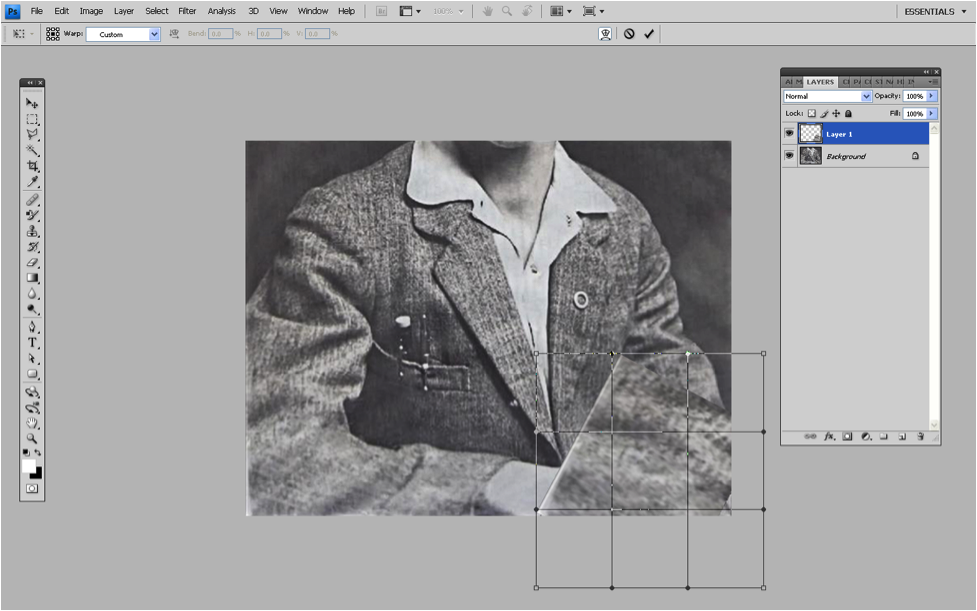
4. No More Missing Portions
Extract cutouts from undamaged areas to reconstruct a completely damaged part of the image. Use the Polygonal Lasso tool to select a smooth area of the image. Make a copy of this selection. Place this cutout on the damaged area and scale it as required.
Play around with the Opacity of the new layer and Overlays from the Layer Palette to get the desired effect. Use the Eraser tool to remove unwanted areas of the cutout.
5. Final Round-Up
Continue replacing the damaged areas with better ones till you get the desired results. If using a faded image, you must use a Layer Mask to adjust the Vibrance of the image.
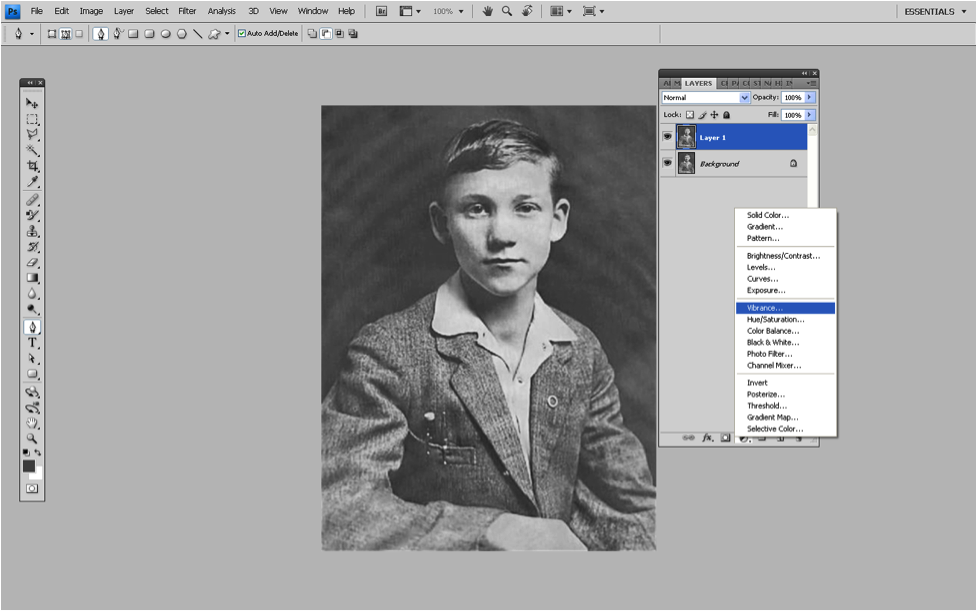
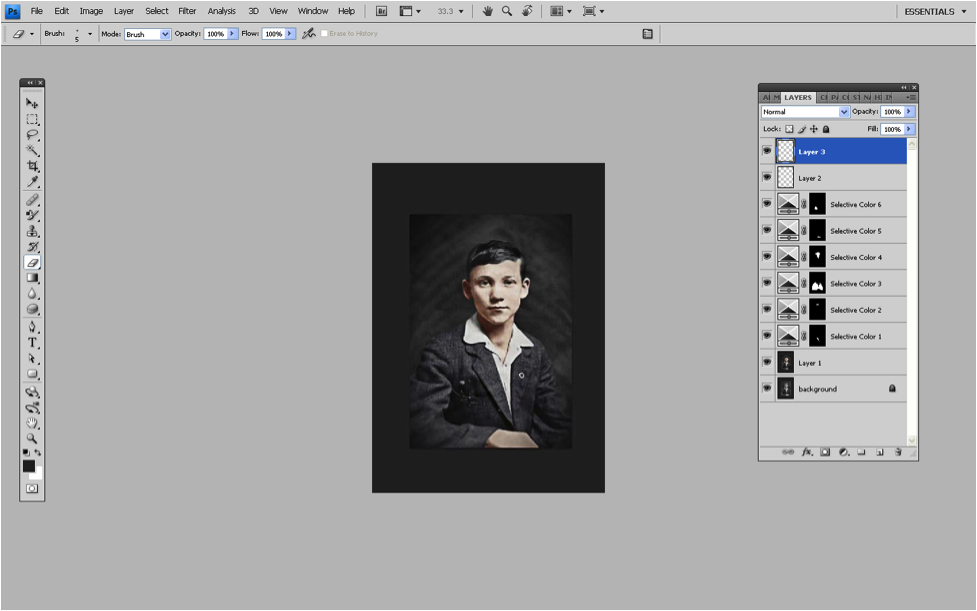
6. Make it Colorful
Those who admire the beauty of monochrome images may not prefer adding color to the image. However, if you would like to transform a black and white image to color, read on.
You must always begin with the larger areas of the image like clothing. Create a path using Pen tool and make a selection around the area you wish to colorize. Create a Color Balance Layer Mask (Click on the half-black/half-white circle icon at the bottom of the Layers Palette and choose Levels/Curves/Color Balance). Move the sliders till you get the desired effect. Repeat this procedure with other areas of the image.
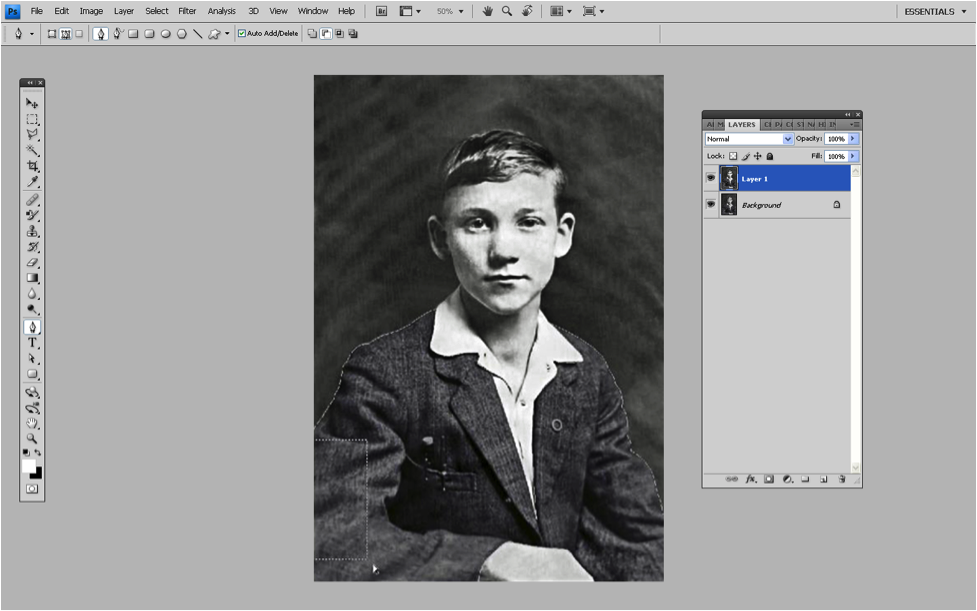
7. Voila! You’re done
Selective Color Mask is an alternative that you can use to colorize the image. Proceed to the finer elements of the image and repeat the procedure.
Now you have a fully restored impressive photograph. Check out this video if you would like to see the techniques for photo restoration and colorization mentioned in this article in action! Master this technique if you wish to rescue your old family portraits and vintage photographs. Good luck!
What do you think of this tutorial?


Very impressive work!, the final result was awesome. the tutorial is very explained thanks for the tips
Thanks, good to hear 🙂
Good Tutorials for Photoshop . Thanks
Hey
Very interested for step by step tutorial. Some of us are totally unaware of Photoshop software tool. Most of us have our own old childhood image that we want to retouch in Photoshop.
It will definitely help those guys who are still searching on Google “How to retouch the old photo”.
Thanks
What an enthusiastic work!Nice to look, impressive and eye-catching.Vintage image really appears a new looking image.After all ,the output is very realistic.
Great job! Interesting process, love to make it.!
Thanks served me very helpful especially is particularly easy to understand. the end it works
Great tutorial. This topics is something unique i must say.