City of Ice Photoshop Tutorial
13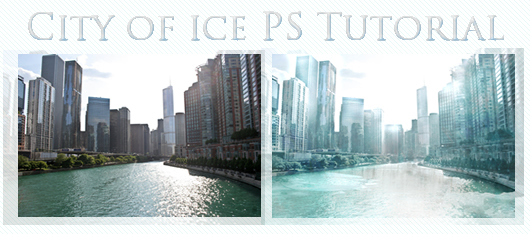
In this tutorial we will transform a city to look like a city made of ice. First we will need the image of a city, for this example I used a shot of Chicago city. Then we will need a lot of ice textures and images to make it as realistic as possible. The more the textures we use, the better the result.
Related posts:
- Quick Tip: How to Create a Seamless Pattern in Photoshop
- How to Create Islamic Style Poster in Photoshop
- How to Customize Skyscraper Background in Photoshop
- How to Create a Photo Manipulation Poster in Photoshop
- Amazing Photo Manipulation Tutorials
- How to Create a Comic-Book Style Image of Yourself
- How to Create HDR Photos in Photoshop CS5
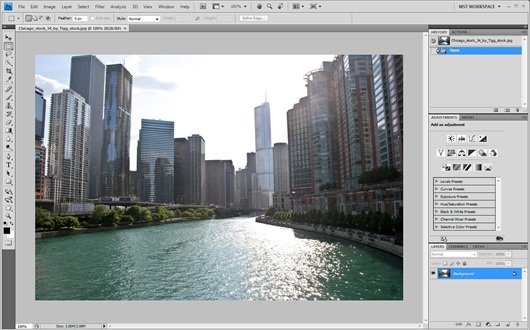
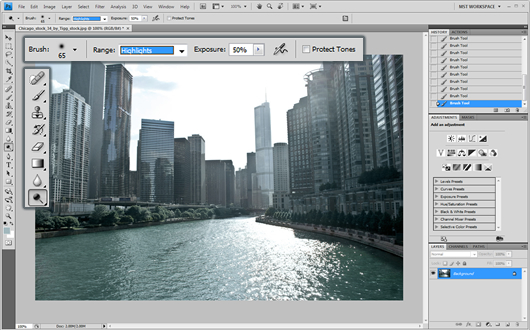
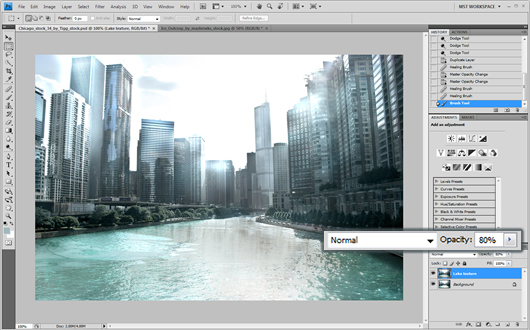
After we open the document we will need to do some modifications so as to make it ready for the texture, otherwise it might look like applying rust or decaying matter, everything in Photoshop is just about coloring and illumination.
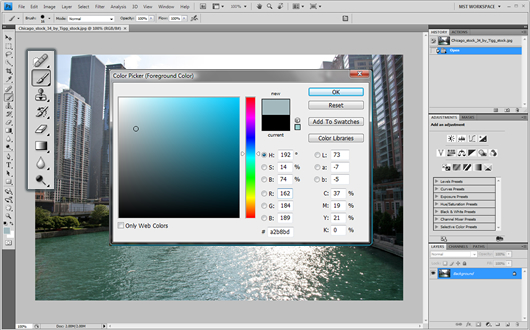
We will use the Brush tool in color mode and Opacity set to 20%, selecting a light grey blue color, I used #a2b8bd but you can use any neighboring hue you’d like. We will apply the coloring 3 times to the lake, and 4 times to the buildings and plants, the buildings that have a really intense color should be colored 6-7 times. The image should look somehow like this :
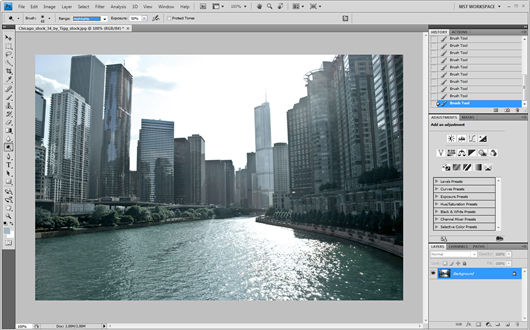
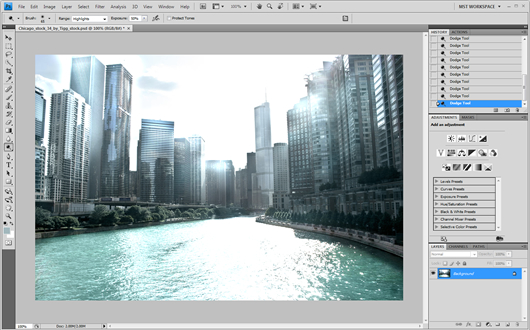
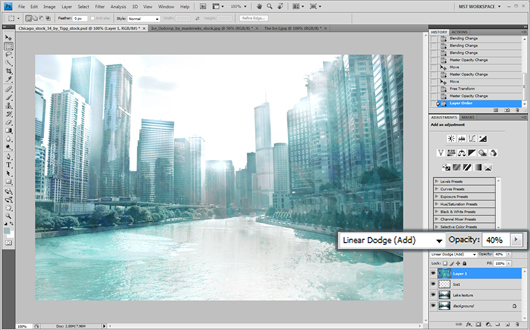
Select the Dodge tool and set it to highlights with exposure to 50%. For CS4 users make sure Protect tones option is unchecked!
As ice really reflects sunlight, we will apply the dodge to the top half of all the buildings and in the whole lake/sea. Now we have successfully created a frost environment with coloring and illumination and can carry on to texturing. The result should be similar to this :
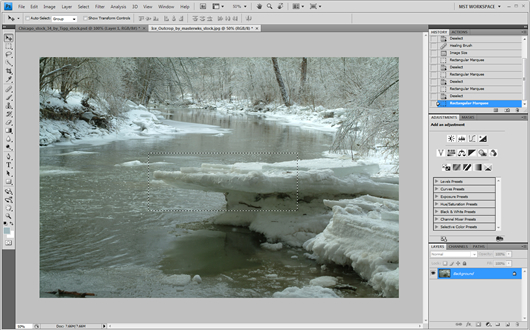
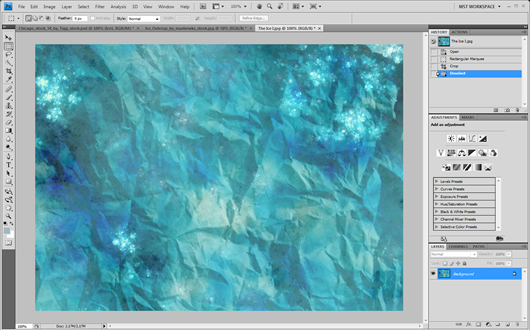
For the lake/sea what’s better using for texture than a frozen lake pattern?
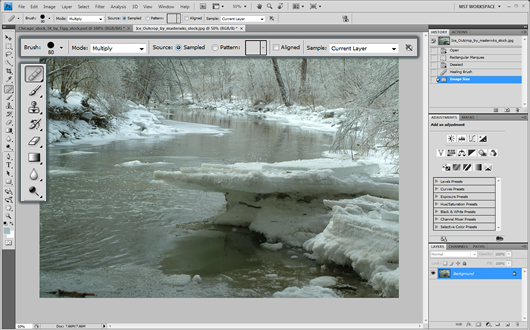
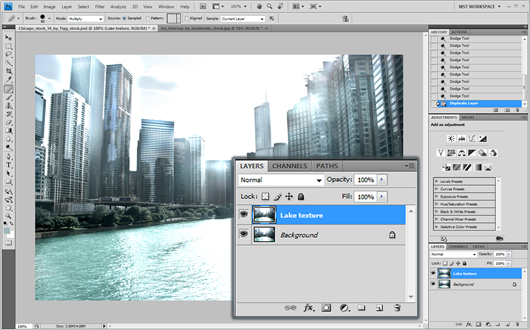
We will use healing brush for texturing, you can use copy paste, but with healing brush we can achieve more complexity. Make sure though you duplicate the layer on the main image. On the Layers panel select right click – duplicate layer and name it something like lake texture.
Using the Healing Brush tool set to multiply, we will apply the lake texture on the duplicated layer, (alt + click to define the pattern you want to copy). Then we will set the layer to 80% Opacity. The result should look like this :
To make the lake more realistic you can copy and paste ice parts to the document
Using the eraser tool you can take out any unwanted parts.
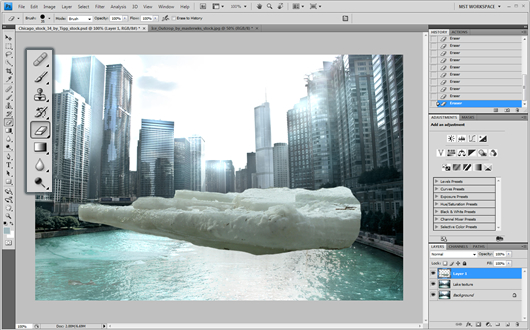
Finally you can set effects like Lighten and add some 75% opacity to make it more realistic.
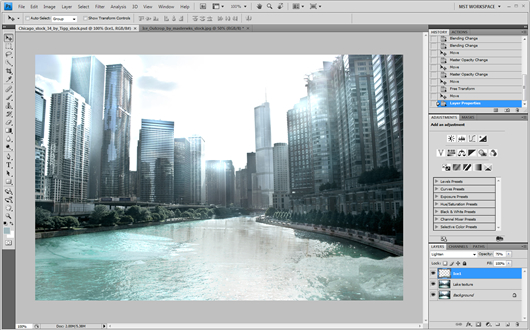
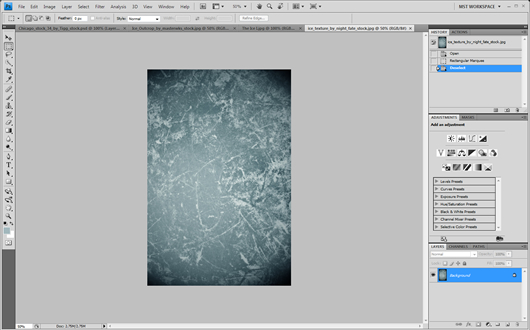
For the building texturing we can use any ice texture image we can find, we can use more to make it more realistic. I used a kaleidoscopic looking one.
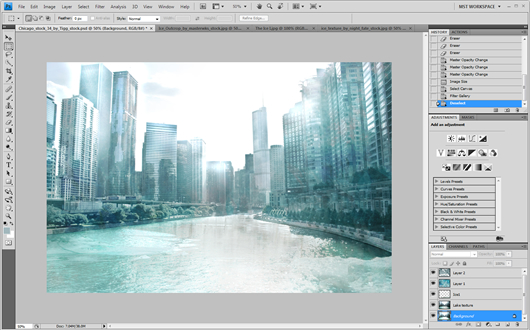
We can directly copy and paste it to the document setting it to 40% opacity and to Linear Dodge. Then using the eraser tool set to 20% opacity we can smoothly erase some parts where the effect is a bit annoying like the middle buildings and the lake.
We can use yet another texture in the same way as the other for more detail.
The result should look like this:
Finally we will add some fog to the whole scene. Click Layer ? New ? Layer and name it fog with opacity set to 25%
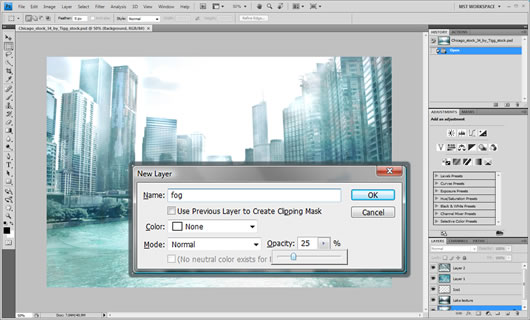
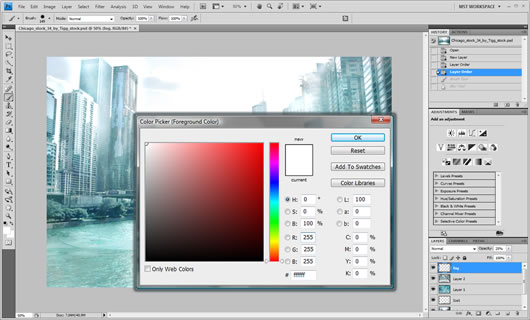
Using the color picker tool we will select the very white color
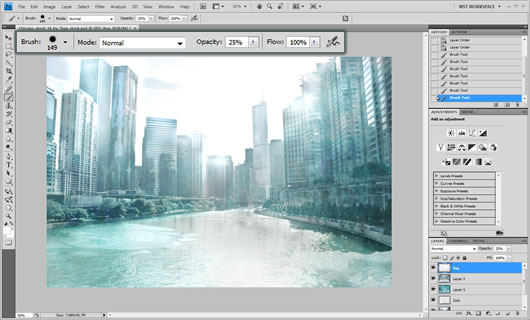
Then with the Brush set to normal and 25% opacity we will apply the coloring 1 time in all the buildings and after that two times in the middle buildings and another two times in the last building on the horizon. If there was no lake you could have used a gradient for this effect, but now it would be complicated. The result should look like this :
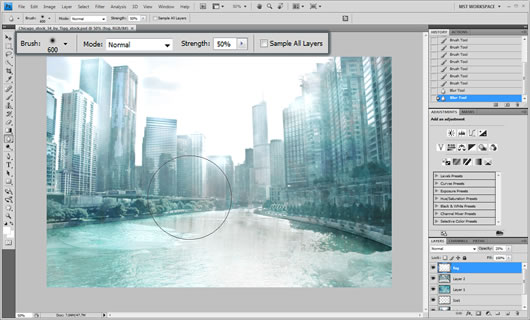
Finishing up we will add some blur to the whole effect.
![]()
DOWNLOAD: PSD
RESOURCES: City IceTexture I Ice Texture II

This tutorial couldn’t have come to my attention at a better time!
I have a local ice distributor who wants to do redo his website.
And Although I think the actual image could be tweaked a bit, the steps you outline is a great starting point…
—
Thanks & Regards
Noel from nopun.com
a professional graphic design studio
really awesome work.
AMAZING!!!!
Very Nice….
.-= Rameexgfx´s last blog ..My DeviantART =-.
[…] a comet. Lets look at an example: Anthony GoicoleaSome random “destruction” tutorials ice city, city, tsunami, horror landscape, haunted house, aging someone, 1, 2, 3, 4, 5, 6, 7I was trying to […]
Thanks a lot man! it’s a kind of you.
making ice effect is one of my unachievable dream.
gotta try it now!
cheers.
Hi there, I am not very good with graphics, though I am trying to learn. I would love to try to follow this tutorial, but I don’t understand several of the steps you outline; it’s clearly meant for someone with more experience with Photoshop than I have (which is minimal). Is there somewhere you can recommend that I can learn how to follow this with more details on how to do each step?
Thank you!
Hi Jenni,
This tutorial may requires basic knowledge of Photoshop,you cna try to start with lynda.com, it is a great video site for learning.