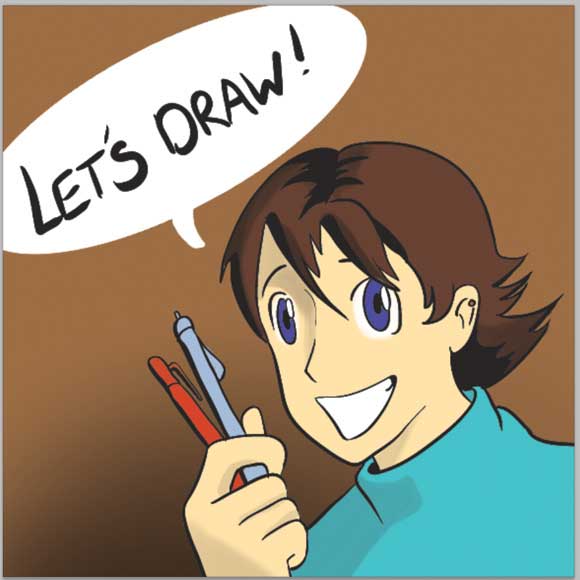
Illustrator Tutorial to Convert Drawing Sketch to Vector Cartoon
0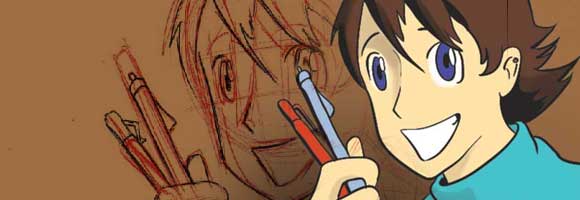
In this tutorial, we will see how to convert a drawing sketch or draft for cartoon character to vector cartoon in Adobe Illustrator. You can use any version of Illustrator as this tutorial is using the general drawing techniques in the program. The level for this tutorial is intermediate and requires to have a scanner to be able to scan the drawing and graphic tablet to be able to trace the lines easily.
Before you continue to read this tutorials, yo may like to check these tutorials as well:
- Adobe Illustrator Tutorials to Fuel Your Creative Vector Skills
- 20 Useful 3D Illustrator Tutorials for Best Practice
- How to Create Abstract Lines in Illustrator (Part 1)
- How to Create Abstract Lines in Illustrator (Part 2)
Step 1
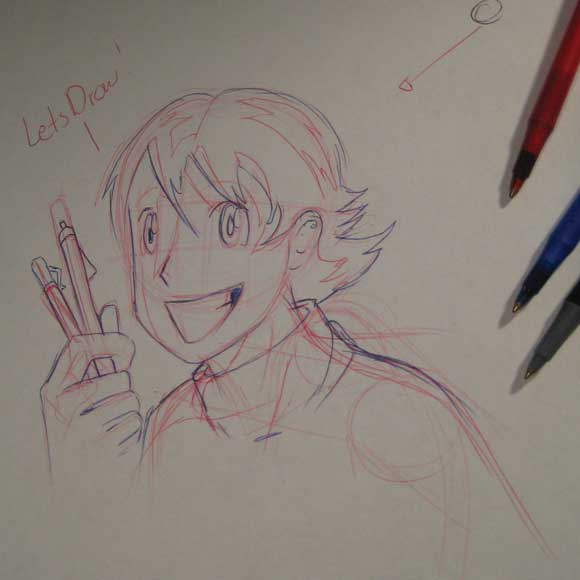
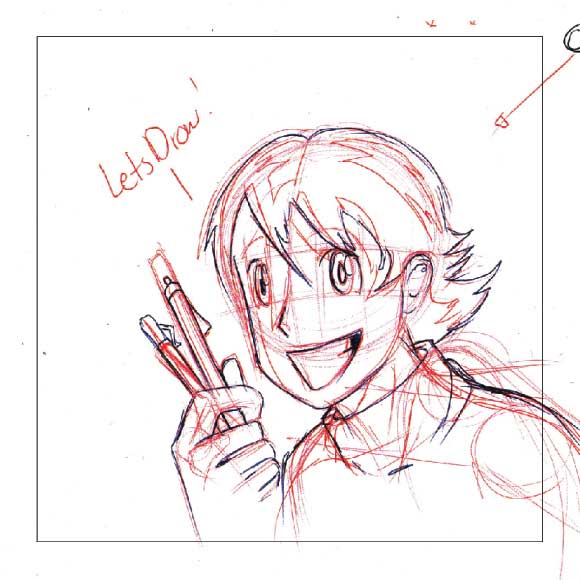
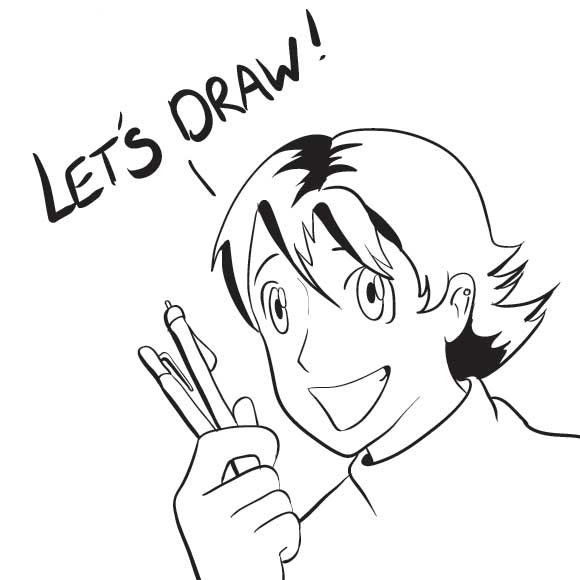
First, we need to use a well line drawing that will look good inked
Step 2
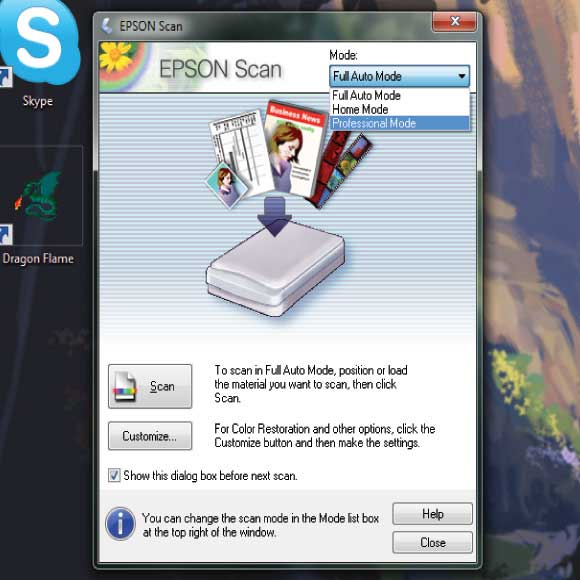
Now we need to scan it, it is best to do it in the scanner on mode where you can do the most adjusments to your scan to get what you want. For my Epson scanner it is the professional mode
Step3
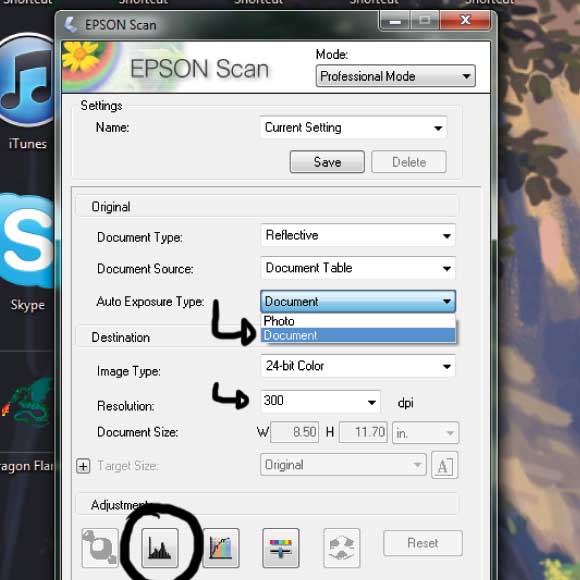
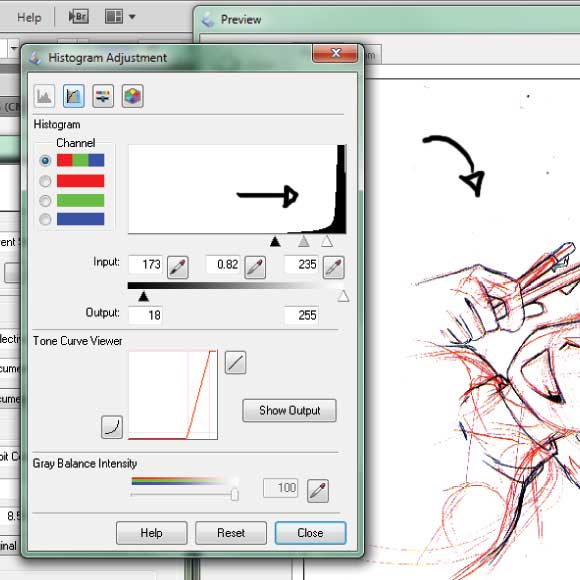
We need the setting to be in the document setting, not in the photo setting. This will make a better scan. Then also we need to make sure that the resolution is set to 300dpi. This will make a good scan for most drawings that are ready for print. Now hit “preivew” so we can get a quick scan and make adjustmenst to it before we make the final scan. Then we will want to adjust the “levels/histogram” as circled
Step4
Usually a scan will be much lighter than you want so you need to make it darker. So slide the little black arrow over to the right, but not too far, just enough to make the lines pop out a little more. Then, when you are ready, go ahead and make the scan.
Step 5
Open up a new document in Adobe Illustrator and then open up the scan and paste the image in the new document. Now we are ready to start working at it.
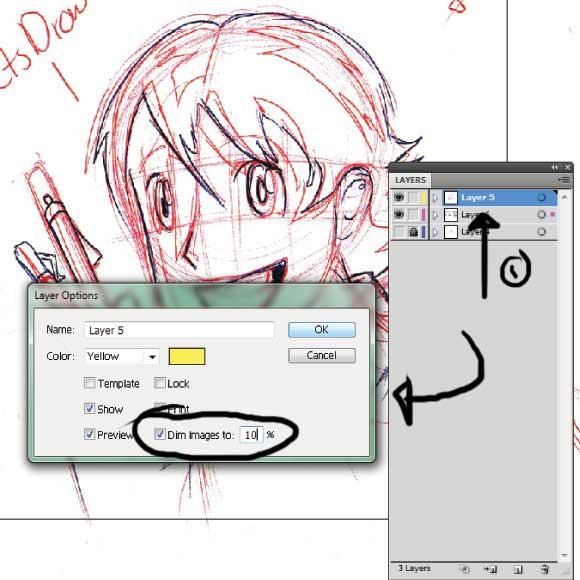
Step6
First we need to dim the image so it isn’t so distracting when we are trying to ink it. So double click on the layer that it is on and a little box will pop up. I would dim it to 10%, but you can dim it to whatever you want. Then hit okay.
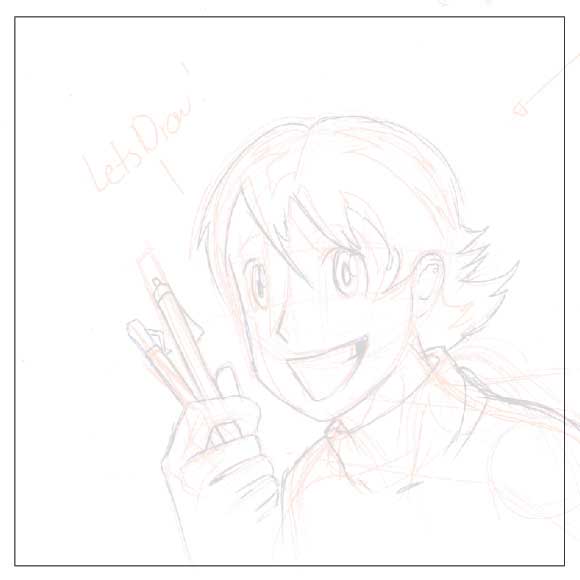
Step7
Alright, now it is ready for us to ink. It is light so we can make clean and persiese marks over it on a separate layer.
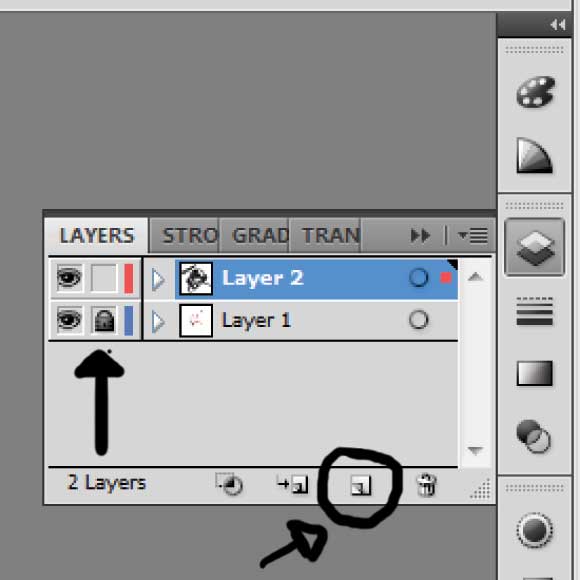
Step 8
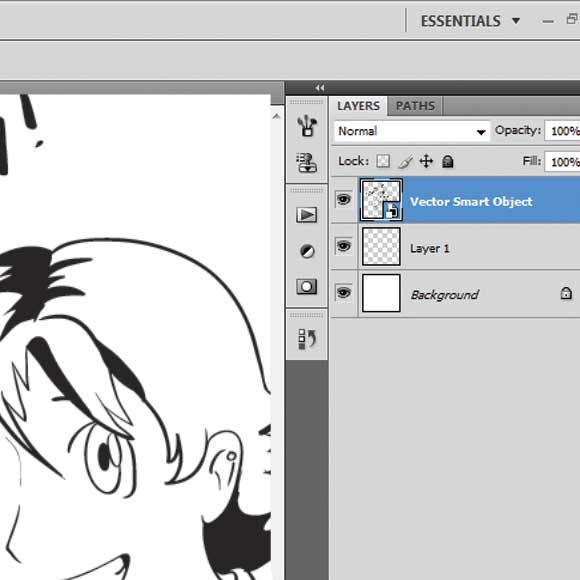
We need to put everything we are going to do in a new layer. So hit the little circled icon to make a new layer. We need to have the original image in its own layer and we need to lock it. Just hit the little empty box next to the eye and it will lock it. Locking it means we cannot edit anything in that layer at all. This is good so we can keep track of all our marks and to keep that layer unedited.
Step 9
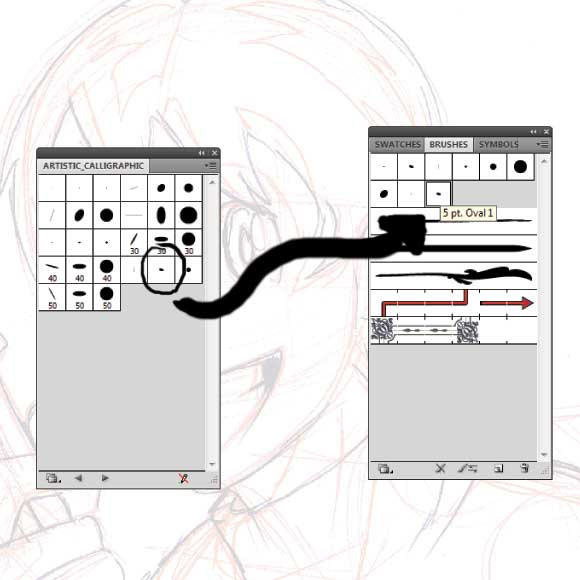
Alright, now we need to find the brush we are going to use. Open the brush tool box and hit the little icon in the top right corner to get a scrol down meanu. “Open Brush Library” > “Artistic” > then click on“Artistic_Caligraphic.” A new box should pop up then.

Step 10
We are going to use the “5pt Oval” brush, as circled. Double click on the brush and will move over from the caligraphic brush menu to the main brush box. Then doubble click on it again.
Step 11
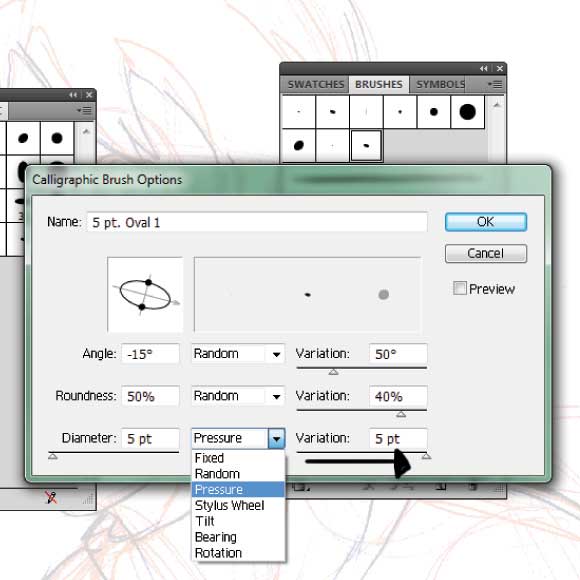
Pull out your graphics tablet for we are going to need it now. Graphics tablets are great because they transfer the pressure you put on your pen to the computer to make more natural looking marks. Plus it is better than drawing with a mouse. Now we need to add the pen pressure to the brush we are going to use. Under “Diameter” pick “pressure” and adjust the pixel width variation to what you desire.
Step 12
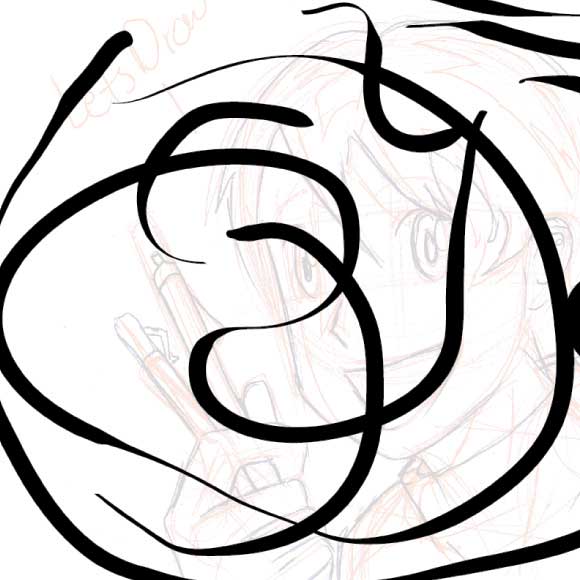
Your brush should be acting like this. Mess around with it for a bit to get a hang of it so you can make great marks.
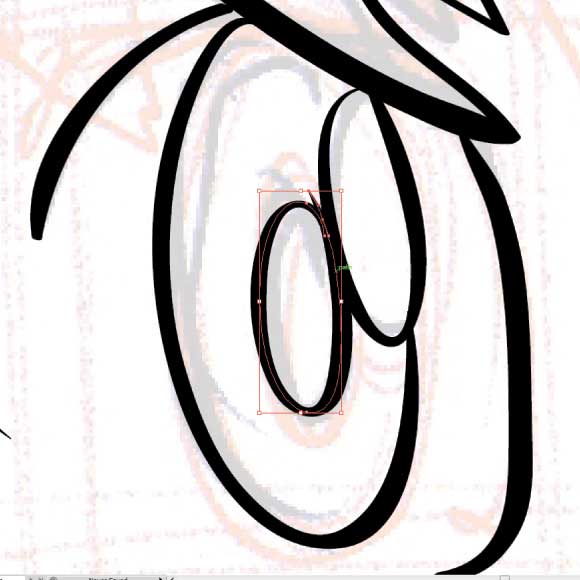
Step 13
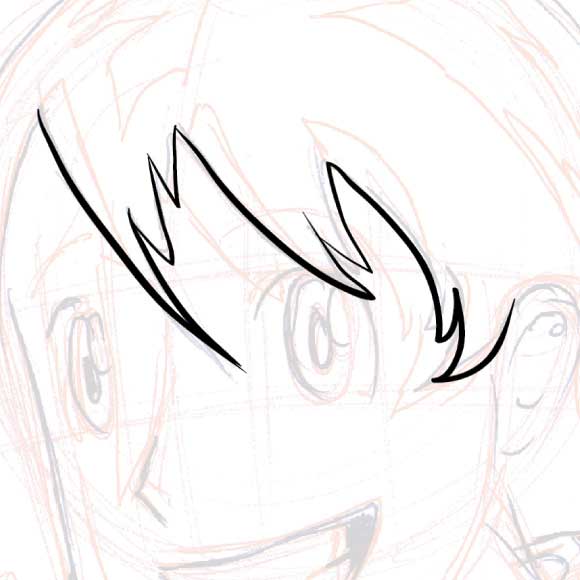
Alright now we can get to the final marks. In this bit that is seen was not done in one swipe. It was done with many different indiviual marks with careful pen pressure. If you make a mark you can always just undo it with Ctr/Cmd+Z.
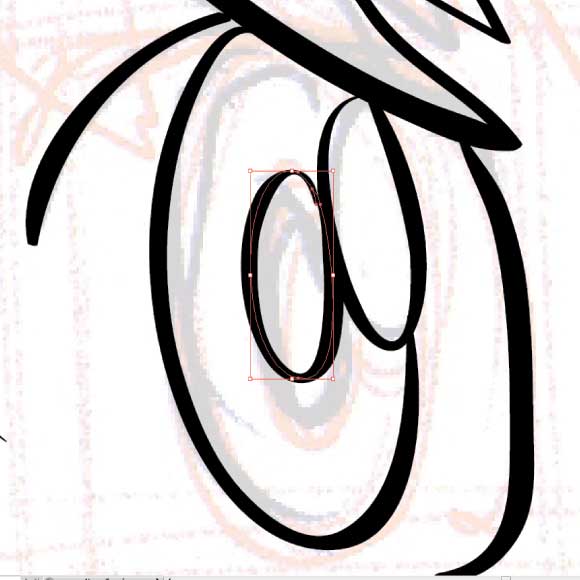
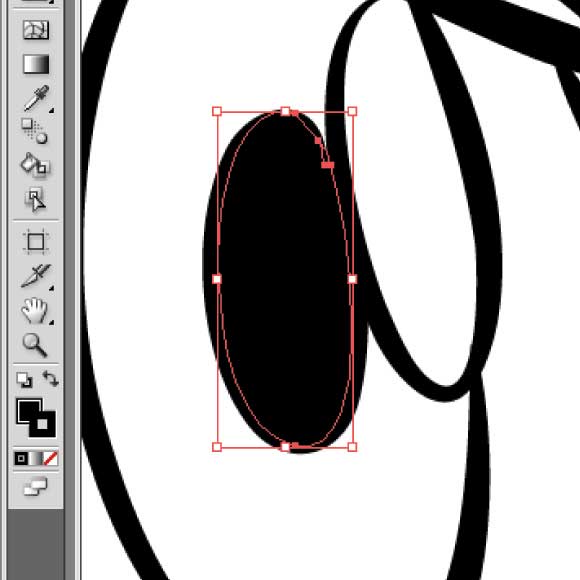
Step 14
Here is something helpful. See I made the eye and in the pupil I made a mistake. To fix that hit the quick selection tool (V) and highlight it. Then hit the direction selection tool (A) to select the little upward mark, then just bring it down to the rest.
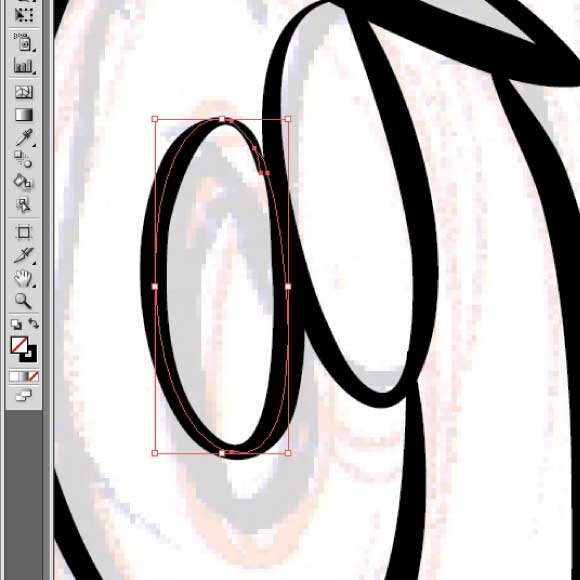
Step 15
I then decided to move the pupil up a bit so I hit the quick selection tool (V) and movied it up. Now we are ready to fill it in.
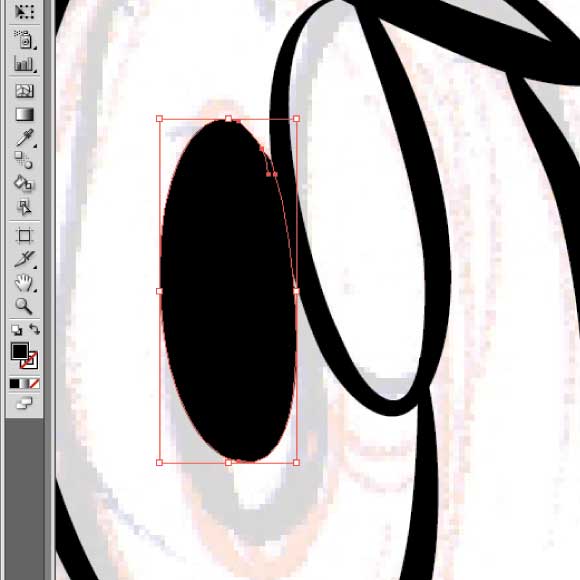
Step 16
Still have it selected with the quick selection tool. Look over on the bottom of the tool bar to the left. See the black box? That indicates that the line is the thing being filled, to change it, just hit the little arrows above the box and it will switch the fill.
Step 17
Now we have it filled, but i think it would look better for it to be filled and outlined. So I select the lined box with the dash. Then click on the little black box, the one of the far left below the dashed box. It will then fill the line with black.
Step 18
There that is better. Both the line and the inside are now filled. Much better.
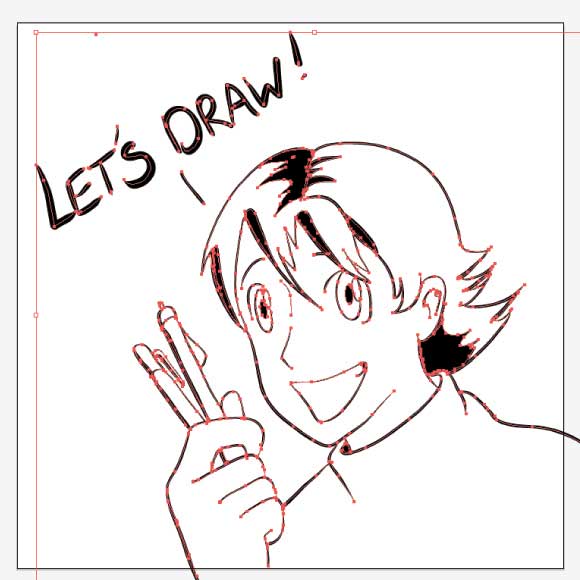
Step 19
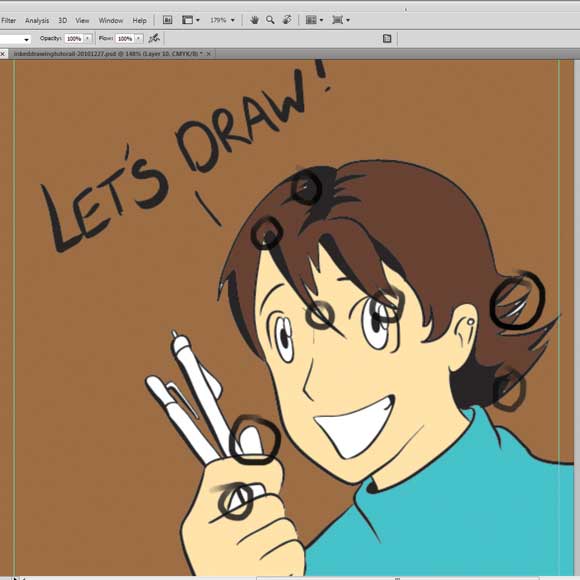
Then continue with inking the rest. Now we need to move it to photoshop to get a good image.

Step 20
Select everything, but not the original image, with quick selection tool. Or you can use Ctrl/Cmd+A to select all if you have the original image not being shown. Then punch in “Ctrl/Cmd+C” to copy it.
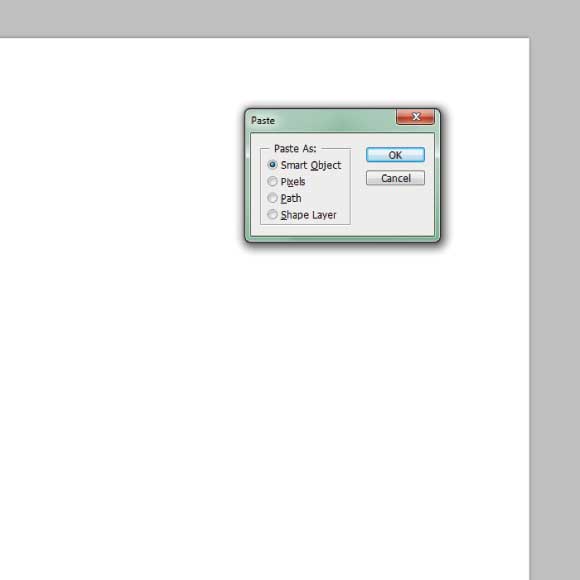
Step 21
Open photoshop and create a new document with the correct size you want. Then hit “Ctrl/Cmd+Z” to paste it. Since it is coming from Illustrator, a little box will pop up. You want to have it in “smart object” so it remains a vector.
Step 22
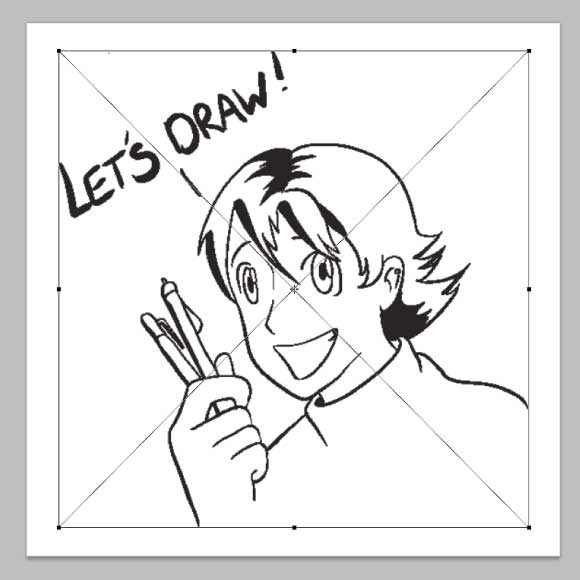
Now you can size it however big you want. Since it is a vector, it won’t loose pixel count or become degraded if you make it smaller or bigger. Then when you have the correct size, double click on it and it will paste it. If you feel you didn’t adjust it right the first time you can always hit “Ctrl/Cmd+T” and it will go back to where you can edit it again.
Step 23
Now you can save it as is in a jpg format after hiting “Ctrl/Cmd+shift+S”. Now we will color it.
Step 24
To color it you need to make sure that all the coloring layers are below the vector image so that the inked drawing will be shown on top.
Step 25
If you connected all the lines a simple paint bucket with “all layers” box checked at the top when you are using the paint bucket. But it is not going to be enough, you will have to go in and fix some of the pixels that were not colored in with the paint bucket.
Step 26
To make the shadow just take each color and make it a bit darker and put them on clipping masks for the various colors. Remember to follow the direction of the shine on the eyes.
Step 27
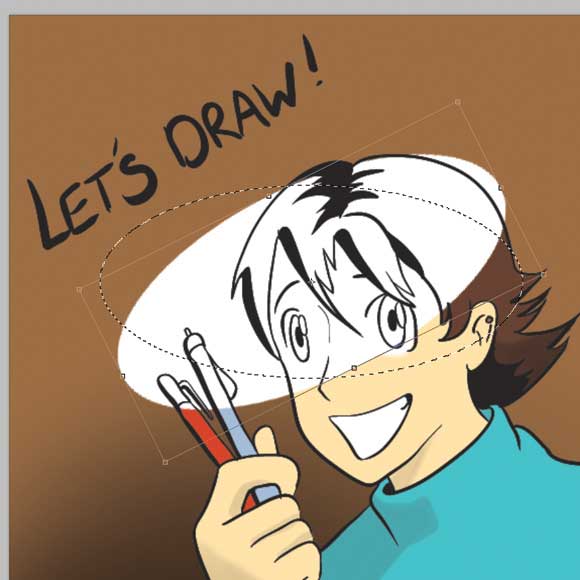
To make the word bubble make a round marquee, fill it in white and rotate it and adjust it to the space desired. Don’t worry about it going outside the image, that is farily typical for comics.
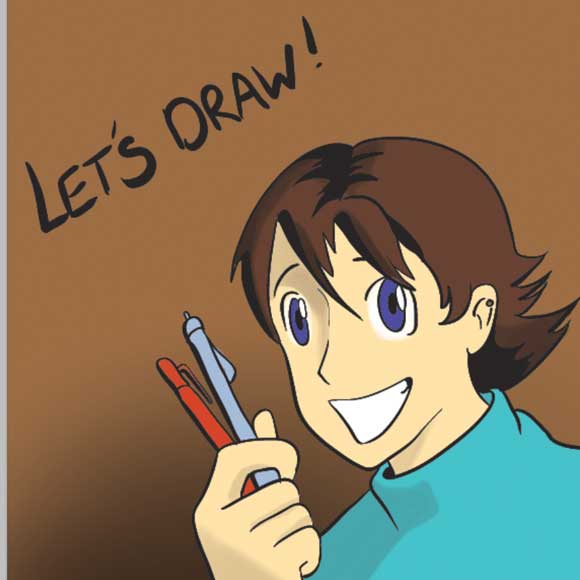
Step 28
Don’t forget the little end of the word bubble, and that’s it. Hope you found this helpful! And never stop trying!