Lava Devastation Photoshop Tutorial
7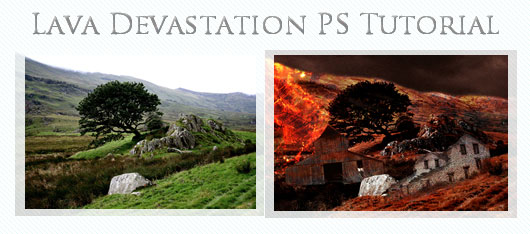
In this tutorial, we will learn how to make a realistic scene of a valley being burned by volcanic magma.
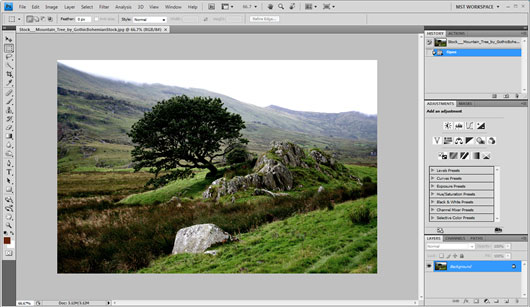
First of we will need the image of a slope. I used a grassy slope but you can use anything.
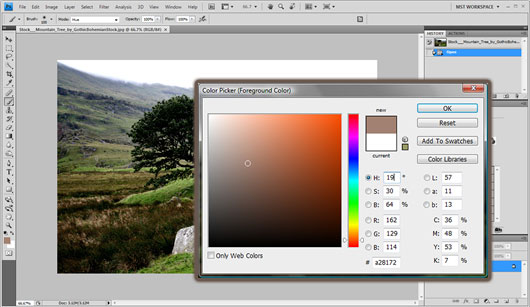
We will apply a grey-brown coloring to the whole image so as to make it ready for texturing. Using the Color Picker we will select a pale grey-brown hue, I used #a28172 but you can use any neighboring hue you want.
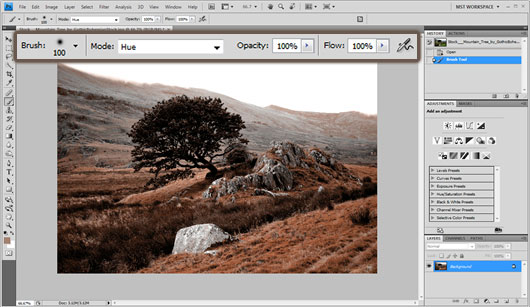
Then using the Brush tool set to hue and full opacity we will apply the coloring to the whole image.
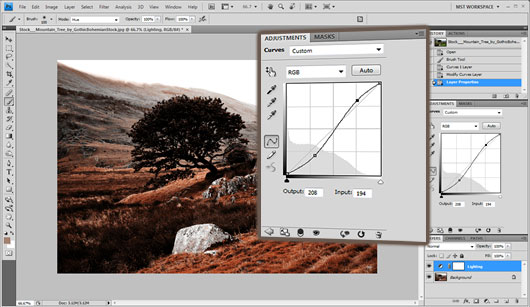
To apply some dark vivid lighting we will use the curves tool. To do this, we can either select Image -> Adjustments -> Curves or simply if on CS4 select the curves tool from the Adjustments panel.
On RGB mode we will make the graph looking like an” S” bend shape, this way the light tones will become lighter and the dark tones will become darker, but the midtones will remain the same unlike using contrast tool. We can name this layer something like lighting.
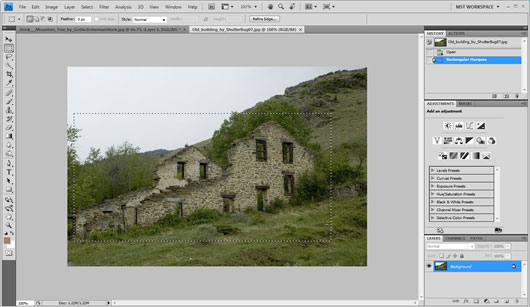
To add some buildings we can simply copy paste them to our document.
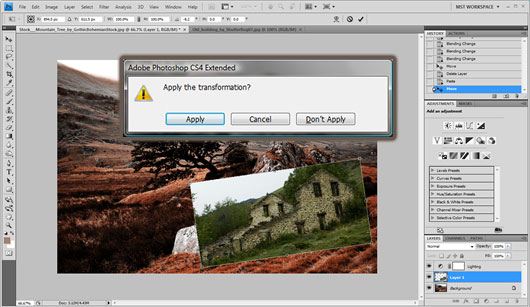
Then while on our actual document we will click Edit -> Transform -> Rotate and rotate the building so that it will be on the same level of one of the clifs.
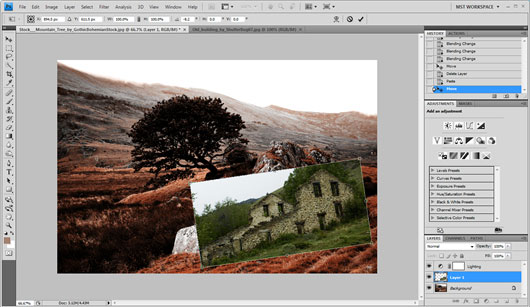
Clicking outside a popup box will prompt us if we want to apply the rotation, we will click apply.
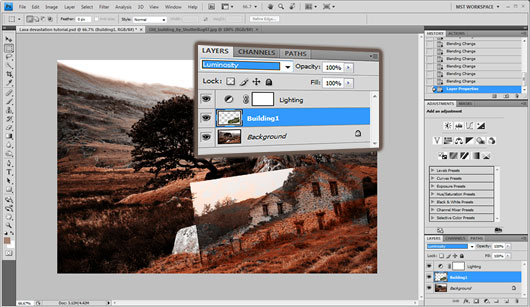
We will change the layer blending into Luminosity mode so that it will fit the background.
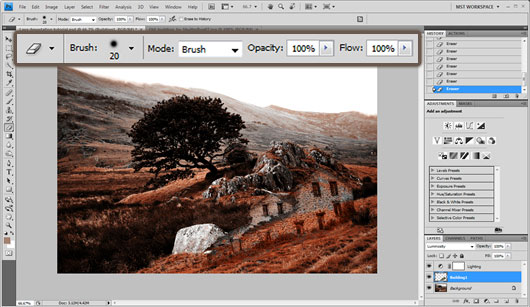
Then using the eraser tool we will erase the unneeded parts like the sky and the surrounding of the building.
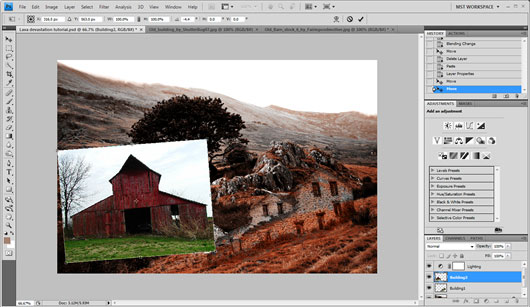
For further detail we will add another building in the same style, the oldest it seems the better.
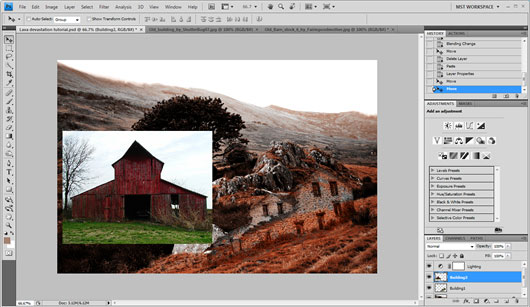
Once again we will click Edit -> Transform -> Rotate in order to rotate the image equivalently to the background.
We will change the blending to Luminosity
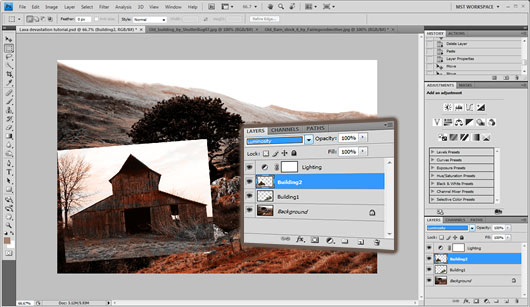
Then using the eraser tool, we will erase the sky and surrounding parts as well as the part that is in front of the stone.

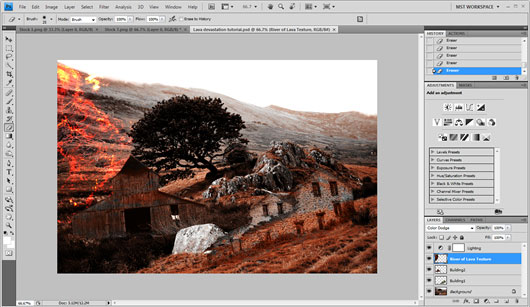
As we have now prepared our background we can go on to texturing. The first texture that we are goiun to use is a river of lava.
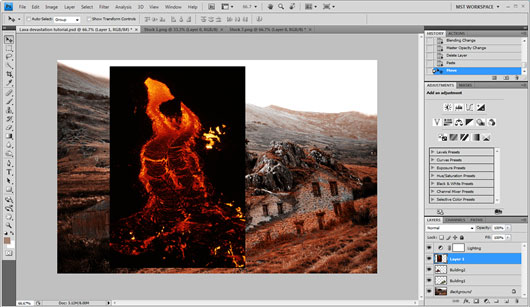
Using the rotate tool we will rotate it and place it on the top left part of our document as shown :
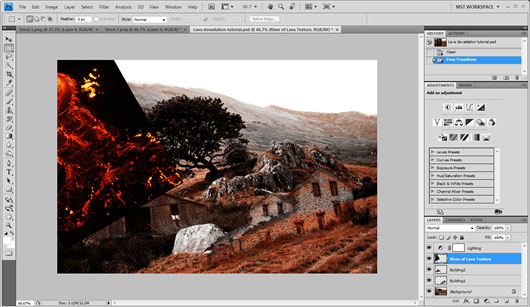
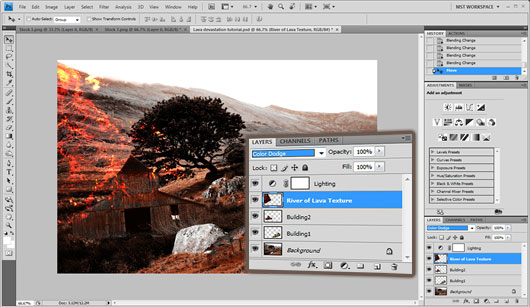
Then we will change the texture blending into color dodge mode
Using the Eraser tool we will remove the parts where the texture stands in front of the building and the tree.
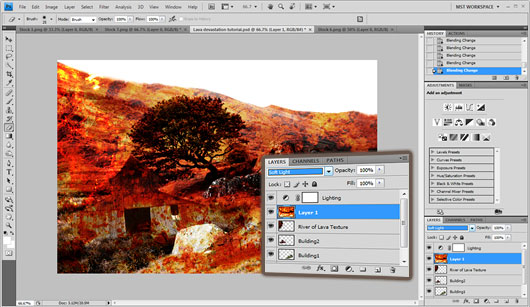
We will add yet another texture for more detail
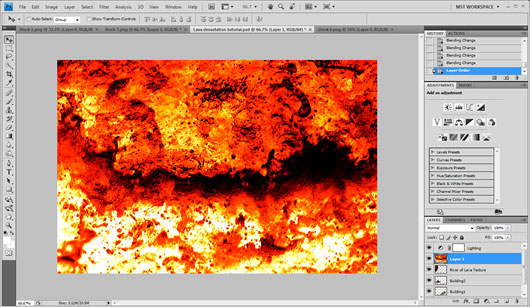
We will then set the texture blending to Soft Light
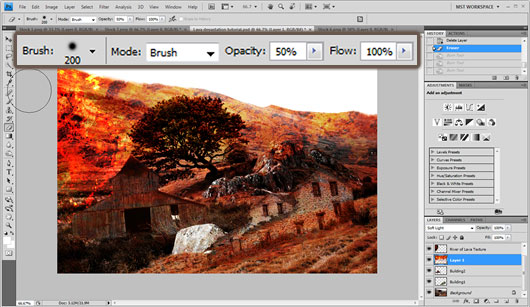
Using the Eraser tool set to semi-transparency (opacity 50%) we will erase the bottom part of the texture.
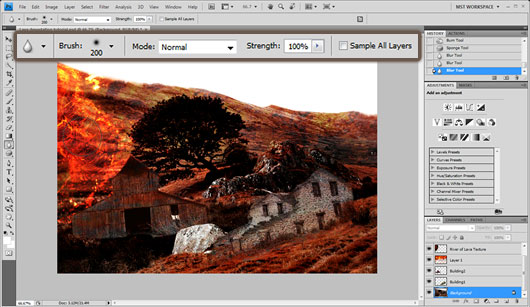
Using the Burn tool set to Shadows and Exposure set to 11% (for CS4 Users, make sure protect tones options is unchecked) we will darken the background image.
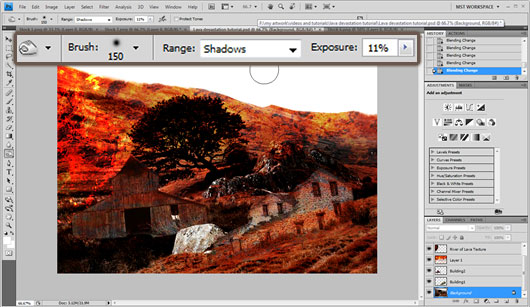
We will set the layer opacity to 60% so as to make the effect more dicreet.
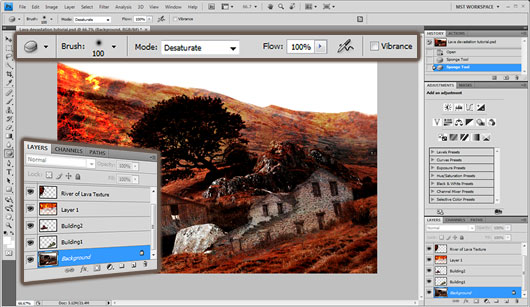
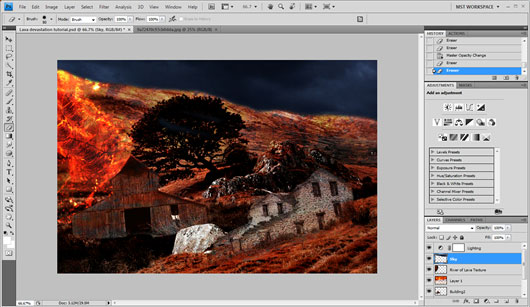
Our image is almost complete, we will go ahead and make some corrections. First off using the Sponge tool in Desaturate mode, with flow set to 100% and for CS4 users: Vibrance unchecked. We will apply the desaturation twice on the background right behind the right building so as to correct the blending.
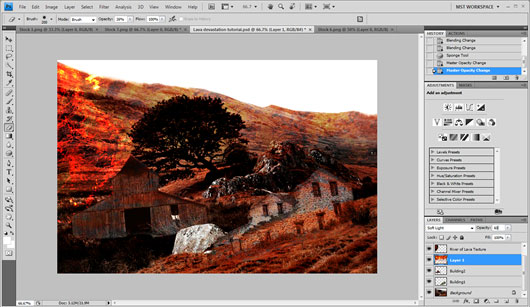
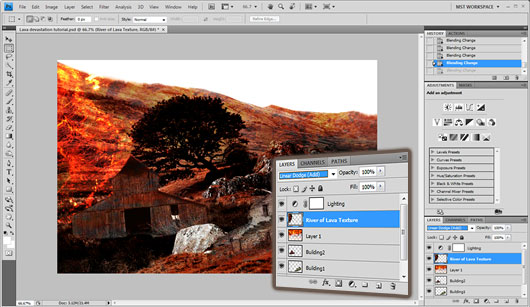
We will also go ahead and change the blending of the river of lava texture to Linear Dodge (Add)
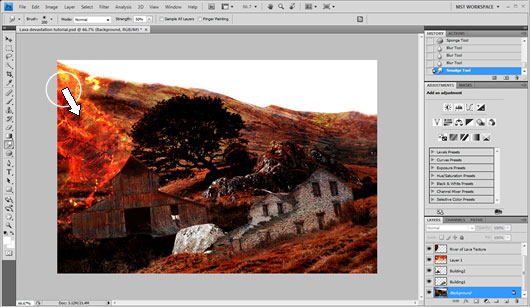
To add some flow we will use the blur tool set to 100% around 3 times on the background right behind the river lava texture.
To add some extra flow we will use the smudge tool (in default options) on the same area of the background dragging it downwards as shown :
We will add some clouds to make the scene more realistic, we will simply copy paste an image we like on our document.
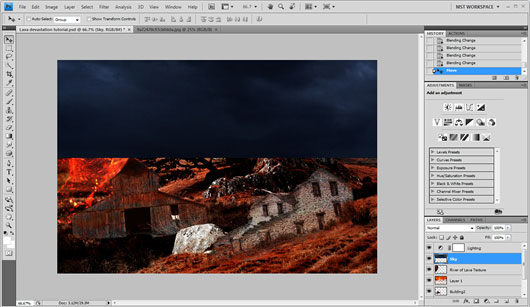
Using the Eraser tool we will erase the sky parts that are over our document.
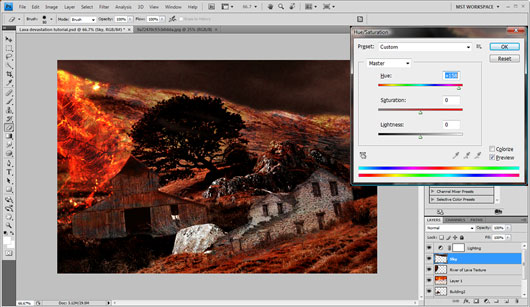
Finally selecting Image -> Adjustments -> Hue Saturation, we will add some red hue to the sky layer.
DOWNLOAD: PSD
RESOURCES: Valley Lava Textures Old Building 1 Old Building 2 Sky


Thanks very much for sharing! Awesome post!
[…] al tutorial: http://www.graphicmania.net/lava-devastation-photoshop-tutorial/ […]
[…] Link al tutorial: http://www.graphicmania.net/lava-devastation-photoshop-tutorial/ […]
Woow! Thanks for the great tut! Got it on the first try.
sorry but the result isnt that convincing thanx anyway