How to Create Vector Calendar in Adobe Illustrator
1We have shared many vector packs recently in Graphic Mania. It is the time now for a new Adobe Illustrator tutorial that I hope you find helpful and useful. In this tutorial, you will use Adobe Illustrator basic tools to draw the calendar and add the effects on it using different colors and gradient effects. Thus, it will help you to understand how these tools work and how to use it in real-world design projects.
In this tutorial I will show you how to create a stylish vector calendar for 2013 that you can use as a vector art or icon for your design project. Make sure to share with us your comments and experience about the tutorial.

Related tutorials:
- How to Create Folded Text Effect in Illustrator CS6
- How to Create an Alarm Clock in Adobe Illustrator
- Creating an Email Icon in Adobe Illustrator
- How to Create a Vintage Floral Frame in Adobe Illustrator
- Japanese Style Floral Illustrator Tutorial
- How to Create a Trophy Cup in Adobe Illustrator
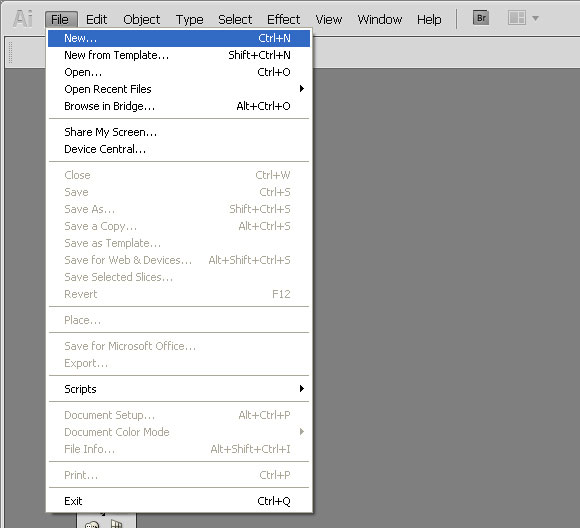
Step 1
Open AI and Choose new (Ctrl+N) from the File menu.
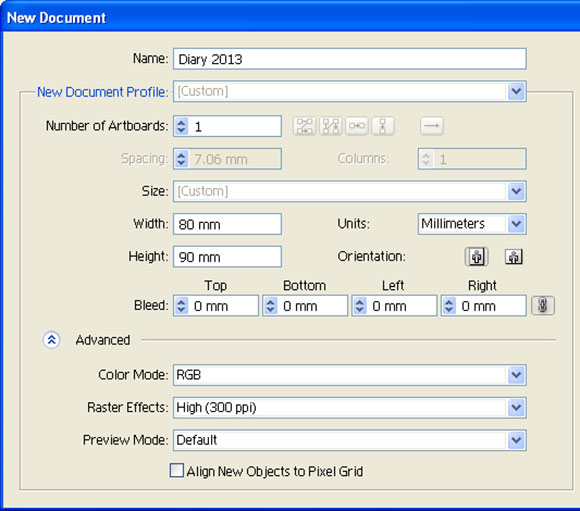
Step 2
Name it Diary 2013, set the number of artboards to 1,select milimeters as units, set the width to 80mm and height to 90mm, the orientation to portrait and click OK.
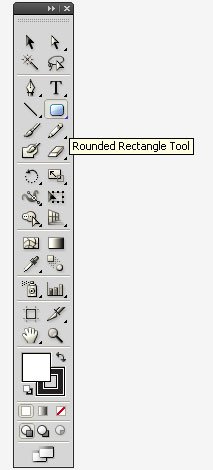
Step 3
Hold down the rectangle tool button for a few seconds to see its options and then click on the Rounded Rectangle Tool.
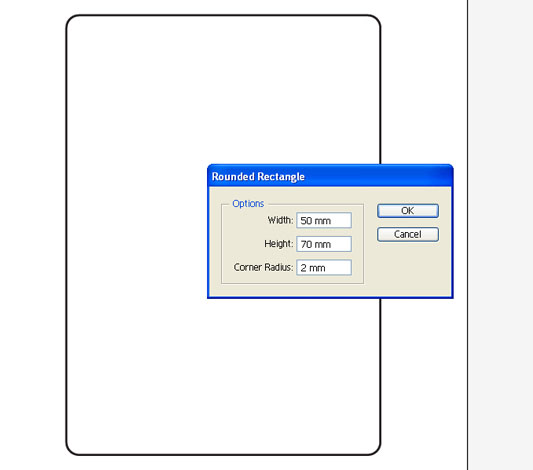
Step 4
Click on the artboard to set the values for a Rounded Rectangle with 50mm width and 70mm height and a corner radius of 2mm.
Step 5
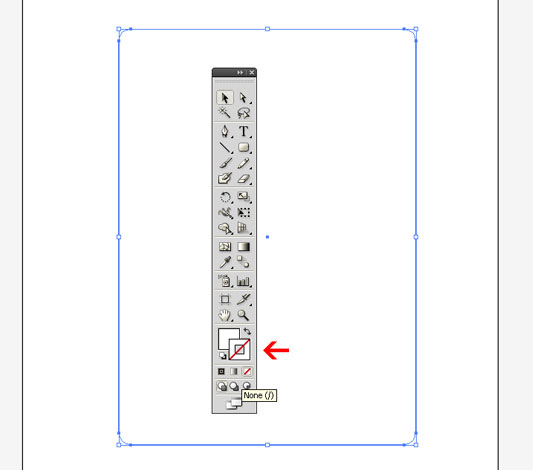
Select the rectangle with the Selection Tool (v). At the bottom of the tool you can see the swap fill and stroke button (shift x), cross the stroke.
Step 6
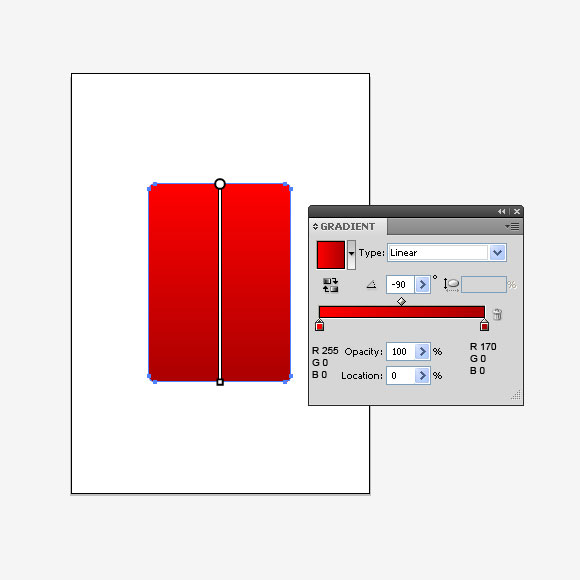
Press X on the keyboard to swap fill and double click the Gradient tool (G) with the linear option, then double click the left gradient slider with the values R255 G0 B0 and the right gradient slider with the values R170 G0B0 and angle -90.
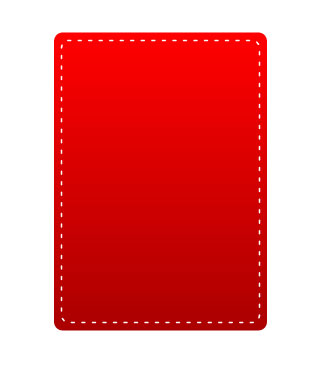
Step 7
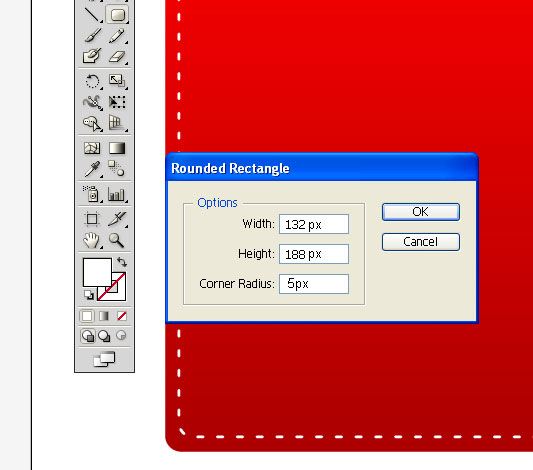
Click on Rounded Rectangle (R) with a width of 132px, height of 188px and 5px Corner Radius. Double click stroke and set its color value to “FFFFFF” and its fill color to “none”.
Step 8
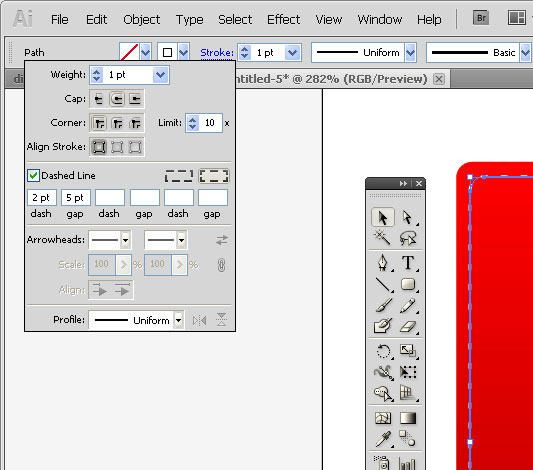
Click stroke at the top menu and set its weight to 1pt. Click the round cap in the middle, check the dashed line box, set its value to a 2pt dash and a 5pt gap.
It should now look like the image below.
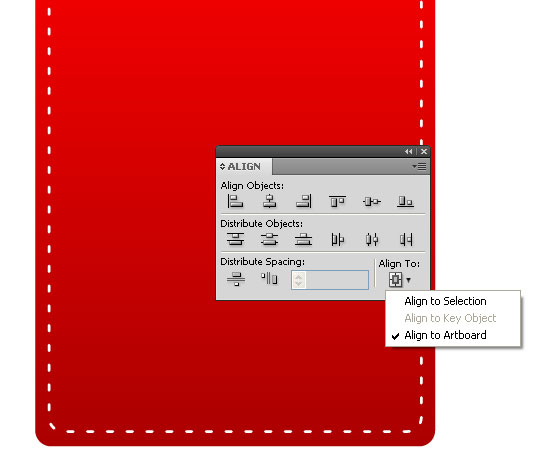
Step 9
Click the Selection Tool (V), select both shapes and go to window >Align or press shift+F7 and make sure the first Align To option is Align to artboard, then click the horizontal alignment to center and vertical alignment to center as well.
Step 10
Click the Ellipse Tool (L) with a width of 10px and height of 10px. The circle may be in dashed lines as we have created a dashed line in step 7, so uncheck the dashed line in the stroke menu. Set the fill color value to “000000” and the stroke value to “none”.
Click the selection tool, select the circle and drag it by holding down the alt +shift key. Then press ctrl+D to repeat the action 6 times.

Step 11
Click the Rounded Rectangle (R) with a width of 28px, height of 6px and a 5px Corner Radius. Place above the first black circle at the top. Click Gradient and set the color value of the gradient slider according to the suitable value.
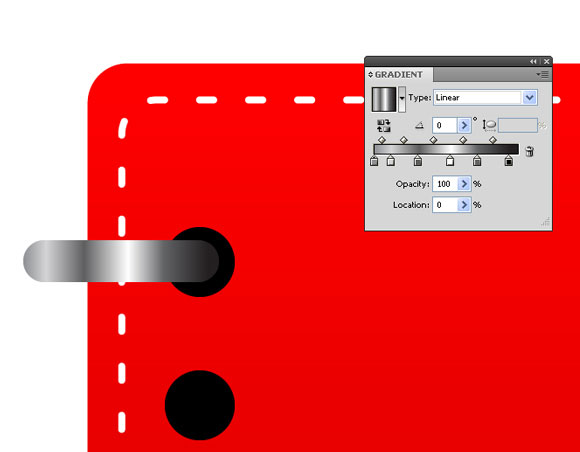
Step 12
Select the Selection tool (V), select and drag it while holding down the alt+shift key and press Ctrl+D as in step 10 for 6 times to repeat the action. Or you can copy them one by one by pressing Alt+Shift and dragging the rectangle each time.

Step 13
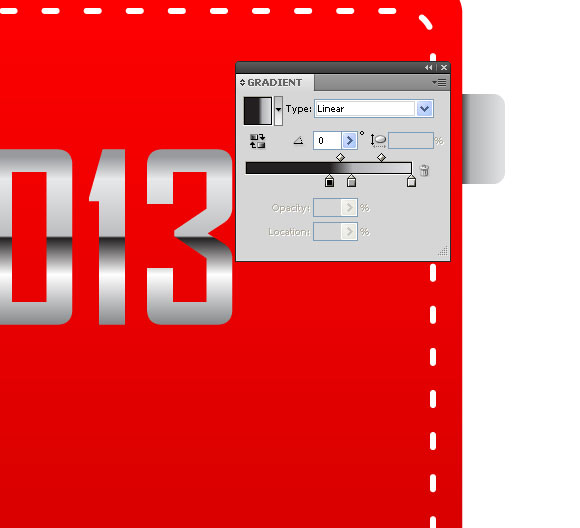
Click the Type tool (T) and write 2013 with a suitable font and size. Select it with the selection tool and right click, then click Create Outlines. Double click on the Gradient tool and set the color value with the gradient slider according to a suitable value.

Step 14
Again, click the Type tool (T) and write Company Name with a suitable font and size. Select it with the selection tool and right click, then click Create Outlines. Double click Fill(X) and set a suitable color value.
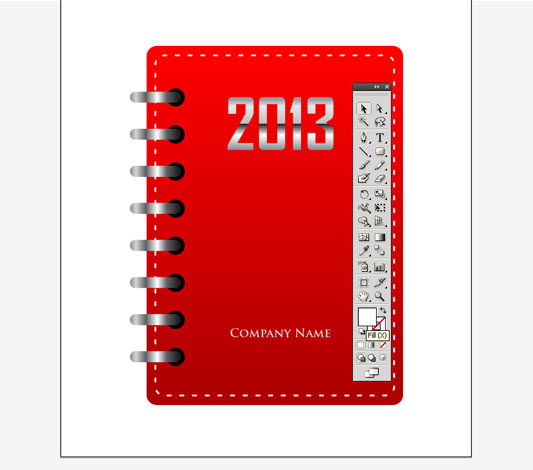
Step 15
Click Rounded Rectangle (R) with a width of 9px, height of 15px and a 2px Corner Radius. Select and click the right button of your mouse, then go to the option Arrange>Send to back > OR Ctrl+Shift+[. Double click Gradient and set its color value with the gradient slider according to a suitable value. And then drag it holding down the alt+shift keys to copy like in steps 10 and 12.
Step 16
Select each rectangle with the selection tool and double click Gradient tool to set the color value with the gradient slider according to a suitable value. Now select the Vertical Type tool and write the months on it like in the picture.
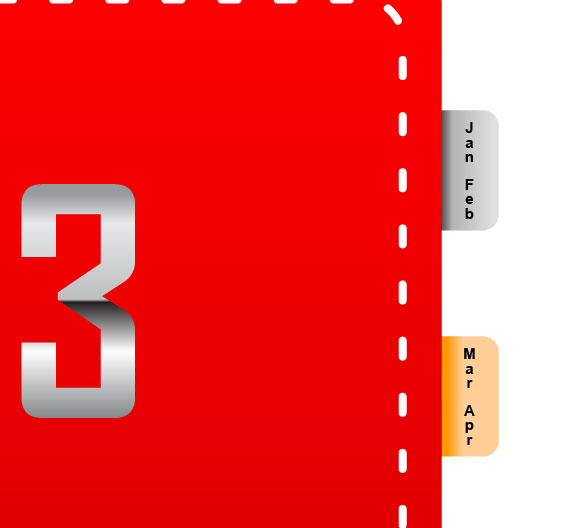
Here is our Final Design.


[…] How to Create Vector Calendar in Adobe Illustrator […]