How to Create Flash Dynamic Image Viewer
17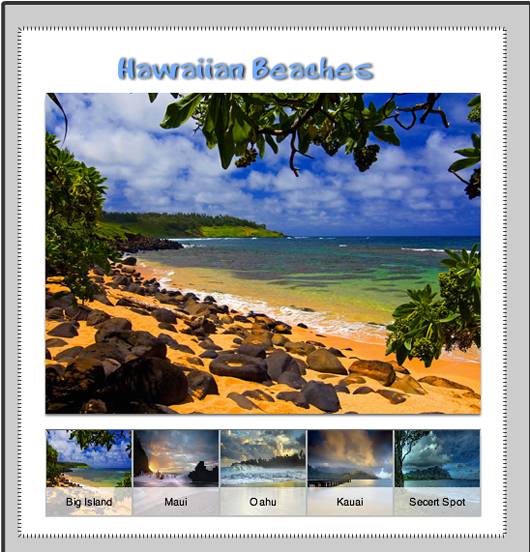
This is what we will be creating a dynamic image viewer with Flash CS 4, and the ScrollPane, titleList, and using the ProgressBar to give a loader.
The first thing that we will need for our application are some images. I am using some pictures of beaches here in hawaii, but you can grab your own photos of whatever you like.
Create a folder call it “images” inside this folder place your images.
I am using phtotoname.png, and photoName-thumb.png
Related posts:
- Create Your First Android AIR App in Flash
- How to Create a Snake Game in Flash Using AS3
- Creating Reflection in Flash Using AS3
- Bitmap Data Manipulation in Flash ActionScript 3
- Creating and Controlling Flash Animation with XML
- How to Build a XML Driven Quiz Application in Flash
- Approach to Understand XML and Flash Workflow
so as an example my first image is called BI.png, and the thumb image is called BI-thumb.png
Note the type of images does not matter.
We will be using actionscript to call the images later in the tutorial.
Create a new Actionscript 3.0 project in Flash CS 4
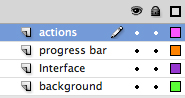
make the document size 550 px by 580 px and create 4 layers
(1) background
(2) interface
(3) progress bar
(4) actions
your layers should look like this
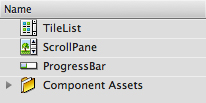
Now adding the necessary components
Go to Window-> Components
drag an instance of the TileList to the library
drag an instance of the ScrollPane to the library
drag an instance of the ProgressBar to the library
In the library you should now have these components
This application will have series of small (thumbs) images in a row at the bottom, and when the user clicks on a thumb, that image will appear in the image canvas above. You can if you so desire to have many thumbnails and if it goes past the boundaries that I set, a horizontal scroll bar will appear. The same effect could be used on the ScrollPane as if you images are bigger than the defined area, horizontal and vertical scrolls will appear. This can be defined in the component inspector.
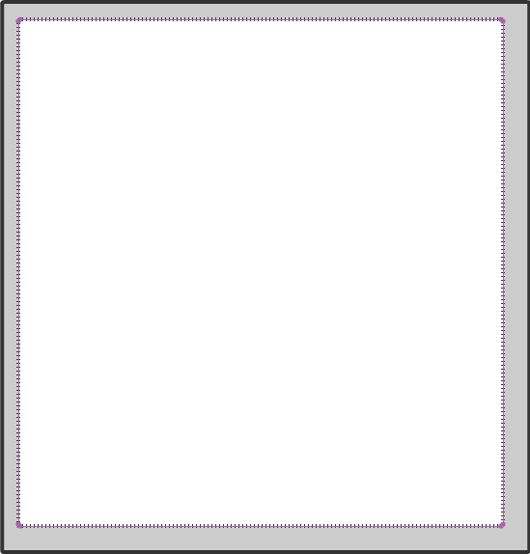
Creating the outer background. Make sure you are on the background layer, take the rounded rectangle tool and create an area covering the entire stage. I picked a grey color with a black fill.
Next, take the rounded rectangle tool and create covering the original background, but leaving a space for a border. I picked white with a black fill,and a hatched stoke on the fill.
Highlight everything on the stage,and convert this to a movieclip call it background, lock the layer. This way when we build the rest of our application the background does not move.
You should have this on the stage
Now on the interface layer drag the ScrollPane to the top of the background,and give it an instance name of “loadPhotos”
Below the ScrollPane drag the TitleList and give it an instance name of “thumbs”, leave a little space between these two components.
On the ProgressBar layer drag the ProgressBar in the middle of the ScrollPane,a nd give it an instance name of “loader”
Now open the components inspector (window->components inspector)
set these values for the ScrollPane
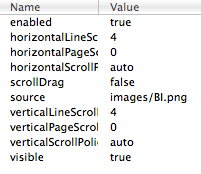
in the source section I am loading the first image by default. If you don’t want an image to load on default, leave this option blank.
set these values for the TitleList
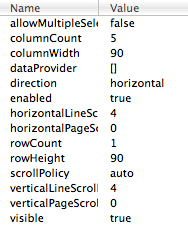
these are the values for the titleList, for holding the thumbs.
Your values might differ depending on how you design your image viewer.
We are now done witht he interface, and your stage should not look like this
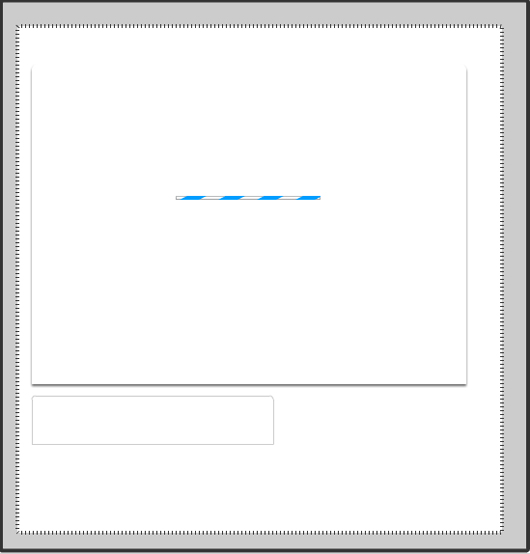
The interface is done,and you can lock the 3 layers that we have been working on.
Now we can start adding interactivity to the applications.
Open the actions panel (Window->Actions)
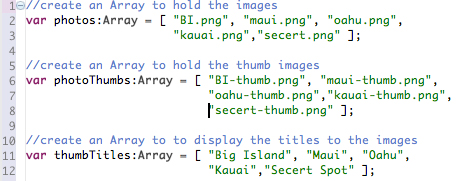
we will now create 3 arrays to hold the data.
First we wil create a Photos array to store all the photos
Next we will create an array for the thumbs
Finally we will create an array for the titles of the images, that will be displayed on the thumbs
(Please note due to spacing here I add to add extra lines, when you create this yourself use one line {see source})
Now we will add all the thumbs to the title list. You will notice that the for loop goes to 5, that is because, we only have 5 images that we are working with. If you decide to add more photos, you will need to change this number.
I also like to keep the thumbs in a separate folder.

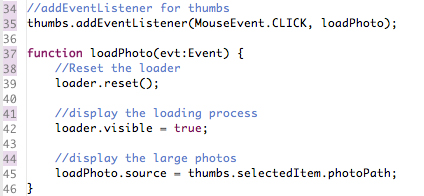
Next we will add the functionality of the loader.
First we set it to true,a s we are loading an image by default, but make this false if you are not loading an image when the application first starts.
then we tell the loader to load the source, which is loadPhoto,and will get loaded in the ScrollPane. Finally after the image has loaded, we remove the loader.

Finally we will add the large phtots when the thumbs are clicked. When one of thumbs are clicked we reset the loader,a nd set it to true, so the loader will load the image. then we display the image in the ScrollPane.
That is all, now you can make a cool little image video to your website.

Any Questions write a comment or email me.
Happy Flashing-
Johnny


[…] This post was mentioned on Twitter by Hawaii Flash , Web Design News. Web Design News said: How to Create Flash Dynamic Image Viewer http://bit.ly/YtfmK […]
[…] Read more here: How to Create Flash Dynamic Image Viewer | Flash, Design, Vector … […]
[…] more here: How to Create Flash Dynamic Image Viewer | Flash, Design, Vector … Posted in Photoshop | Tags: adobe, behind-the, behind-the-designing, default, foreground-and, […]
[…] original here: How to Create Flash Dynamic Image Viewer | Flash, Design, Vector … […]
[…] post: How to Create Flash Dynamic Image Viewer | Flash, Design, Vector … SHARETHIS.addEntry({ title: "How to Create Flash Dynamic Image Viewer | Flash, Design, Vector […]
[…] original here: How to Create Flash Dynamic Image Viewer | Flash, Design, Vector … […]
[…] How to Create Flash Dynamic Image Viewer | Flash, Design, Vector … […]
[…] How to Create Flash Dynamic Image Viewer | Flash, Design, Vector &… […]
[…] Para seguir o passo a passo do tutorial acesse: http://www.graphicmania.net/how-to-create-flash-dynamic-image-viewer/ […]
Good post, thank you for sharing.
[…] How to Create Flash Dynamic Image Viewer […]
Good Post.
Any idea how can we integrate XML with this if the images are coming from XML.
So confusing. Thanks a bunch for posting this tutorial but for someone who is new to Flash I got lost when trying to set the values for the title list, or tilelist? is that a typo, do both of these exist in this tutorial. I think you need to explain the steps better and how they build off of the step prior to it. I was totally lost after that and gave up sadly.
Óvodai jelek kiváló min?ségben rávasalható és matrica kivitelben! Óvodások figyelem!
Hi,
Managed to get through the tutorial, i do think Watson is right about how this tutorial is written. But nevertheless i got through and built it.
Unfortunately the viewer doesn’t load properly, i seems it’s in a sort of flickering state in my browser?
I then downloaded the source and used your viewer and still this does not load correctly?
Any suggestions?
We will get the tutorial author to help you with your questions.
Hi there just wanted to give you a quick heads up. The text in your article seem to be
running off the screen in Ie. I’m not sure if this is a formatting issue or something to do with
internet browser compatibility but I figured I’d post to let you know.
The design and style look great though! Hope you get the problem solved soon. Kudos