Quick Tip: How to Use the Adaptive Wide Angle Filter in Photoshop CS6
0The Adaptive Wide Angle filter is one of the revolutionary new features of Adobe Photoshop CS6. The new version of Photoshop is part of the Adobe Creative Suite 6 and the Adobe Creative Cloud Membership.

Adobe Photoshop CS6 comes with new features and enhancements for exciting features. In our tutorial today, we will cover the new Adaptive Wide Angle filter, which lets you fix photos taken with fisheye lenses.
In the previous versions it was quite impossible to fix such images without real distortion in the photo content. With the new filter, we will see how easy it is to fix these types of images.
Related posts:
- Creating Animation with Audio in Photoshop CS6 Tutorial
- Quick Tip: How to Create a Seamless Pattern in Photoshop
- How to Create Islamic Style Poster in Photoshop
- How to Create a Photo Manipulation Poster in Photoshop
- Amazing Photo Manipulation Tutorials
- How to Create a Comic-Book Style Image of Yourself
- How to Create HDR Photos in Photoshop CS5
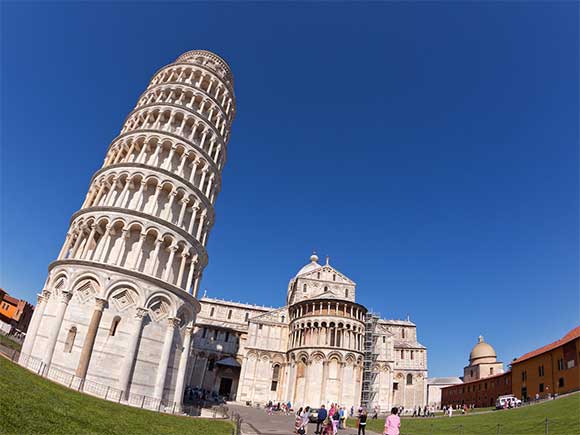
In this tutorial we will apply the effect on the following photograph taken by unukorno. You can download it from Flickr under a “Some rights reserved” copyright.
The original image:

The image after applying the Adaptive Wide Angle filter:
Step1
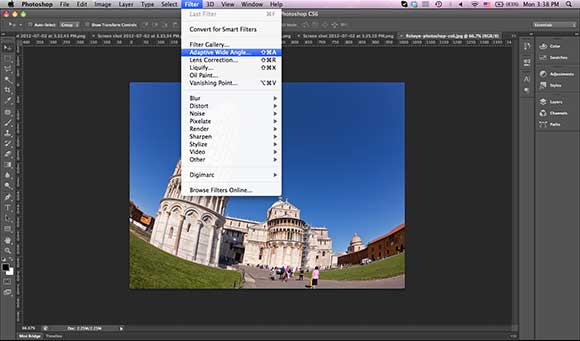
Open the Pisa tower image in Adobe Photoshop CS6. From the Filters menu, choose the Adaptive Wide Angle filter. It will open the filter dialog box.
The dialog box has four parts:
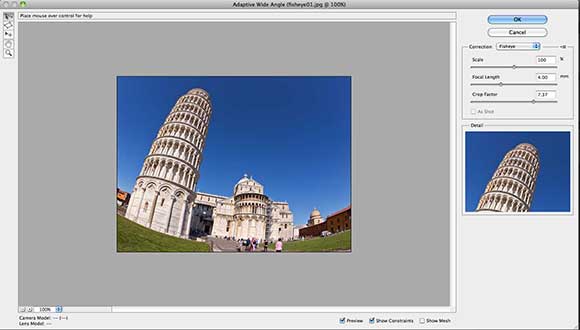
- The left part includes the tools that we can use to handle the image, such as the constraint tools that guide Photoshop while doing the correction.
- The center part includes the preview for the image and in the bottom left you can change the preview zoom.
- The right part lets you choose the correction type that can be Fisheye, Perspective, Auto, or Full Spherical. Also, you can set the Scale, Focal length and Crop Factor.
- The bottom part consists of three checkboxes, the Preview, Show Constraints and Show Mesh. The Show Constraints feature displays a constraint line or polygon that you draw over the object to point Photoshop to the parts that you would like to fix. The Show Mesh displays the photograph mesh, so you can overview the changes of the photo mesh after applying the Adaptive Wide Angle filter settings.
Step2
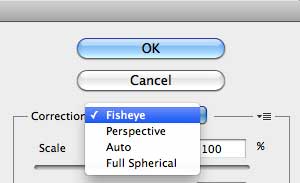
From the Correction drop-down menu, make sure to select the Fisheye option.
Step3
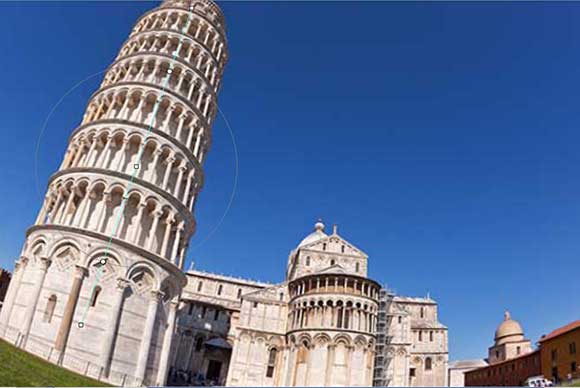
Make sure that the Constraint tool is selected from the left part. Draw a vertical line over the Pisa tower and see how it is fixed automatically.
Step4
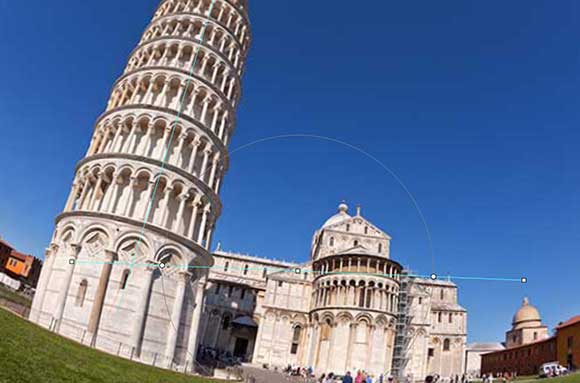
Draw another horizontal line to fix the horizontal building behind the tower. As you can see, the image edges got distorted, which we will fix using the left setting and the Content-Aware fill after applying the filter.
Step5
Keep the scale to 100%, set the Focal Length to 4 mm and the Crop Factor to7.37. Click Ok to apply the filter.

Step6
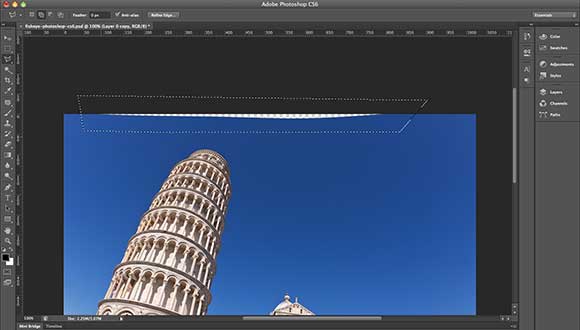
Using the Polygon Lasso tool, select the distorted area at the top of the image.
Step7
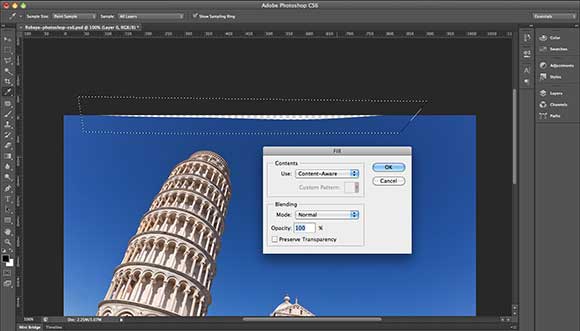
From the Edit menu, choose the Fill command and from the drop-down list choose Content-Aware.
And the final result of the fixed image after applying the Adaptive Wide Angel filter should look like below:
As you can see, fixing the fisheye lens distortion becomes very easy with the new Adaptive Wide Angle filter in Photoshop CS6. You can practice using the filter with different fisheye photographs and see how you can fix different issues.
At the end of this quick tutorial, apply these steps on your own images and share them with us by posting the links in the comments area. Also, feel free to share with us your comments and if you would like us to cover any specific feature of the new Photoshop CS6.